Evaluate an Agent in the UI
This tutorial expands on the Agent we created in the Quickstart Guide.
If you’ve already completed the Quickstart, you can jump directly to the Run second Evaluation section. If you haven’t completed the Quickstart yet, please begin with the first step below.
For this tutorial, we’re going to evaluate Outreach Agent, which is designed to compose personalized outbound messages to potential customers. The Agent uses a Tool to research information about the lead before writing a message.
We’ll show how to assess the quality of the Agent and compare two Agent versions side by side.
Account setup
Create a Humanloop Account
If you haven’t already, create an account or log in to Humanloop
Add an OpenAI API Key
If you’re the first person in your organization, you’ll need to add an API key to a model provider.
- Go to OpenAI and grab an API key.
- In Humanloop Organization Settings set up OpenAI as a model provider.
Using the Prompt Editor will use your OpenAI credits in the same way that the OpenAI playground does. Keep your API keys for Humanloop and the model providers private.
Clone an Agent
Clone Outreach Agent from Library
In this quickstart, we will use a pre-configured Agent from the Humanloop Library.
Navigate to the Library by clicking the Library button in the upper-left corner. Select the Outreach Agent and click the Clone to Workspace button in the upper-right corner.
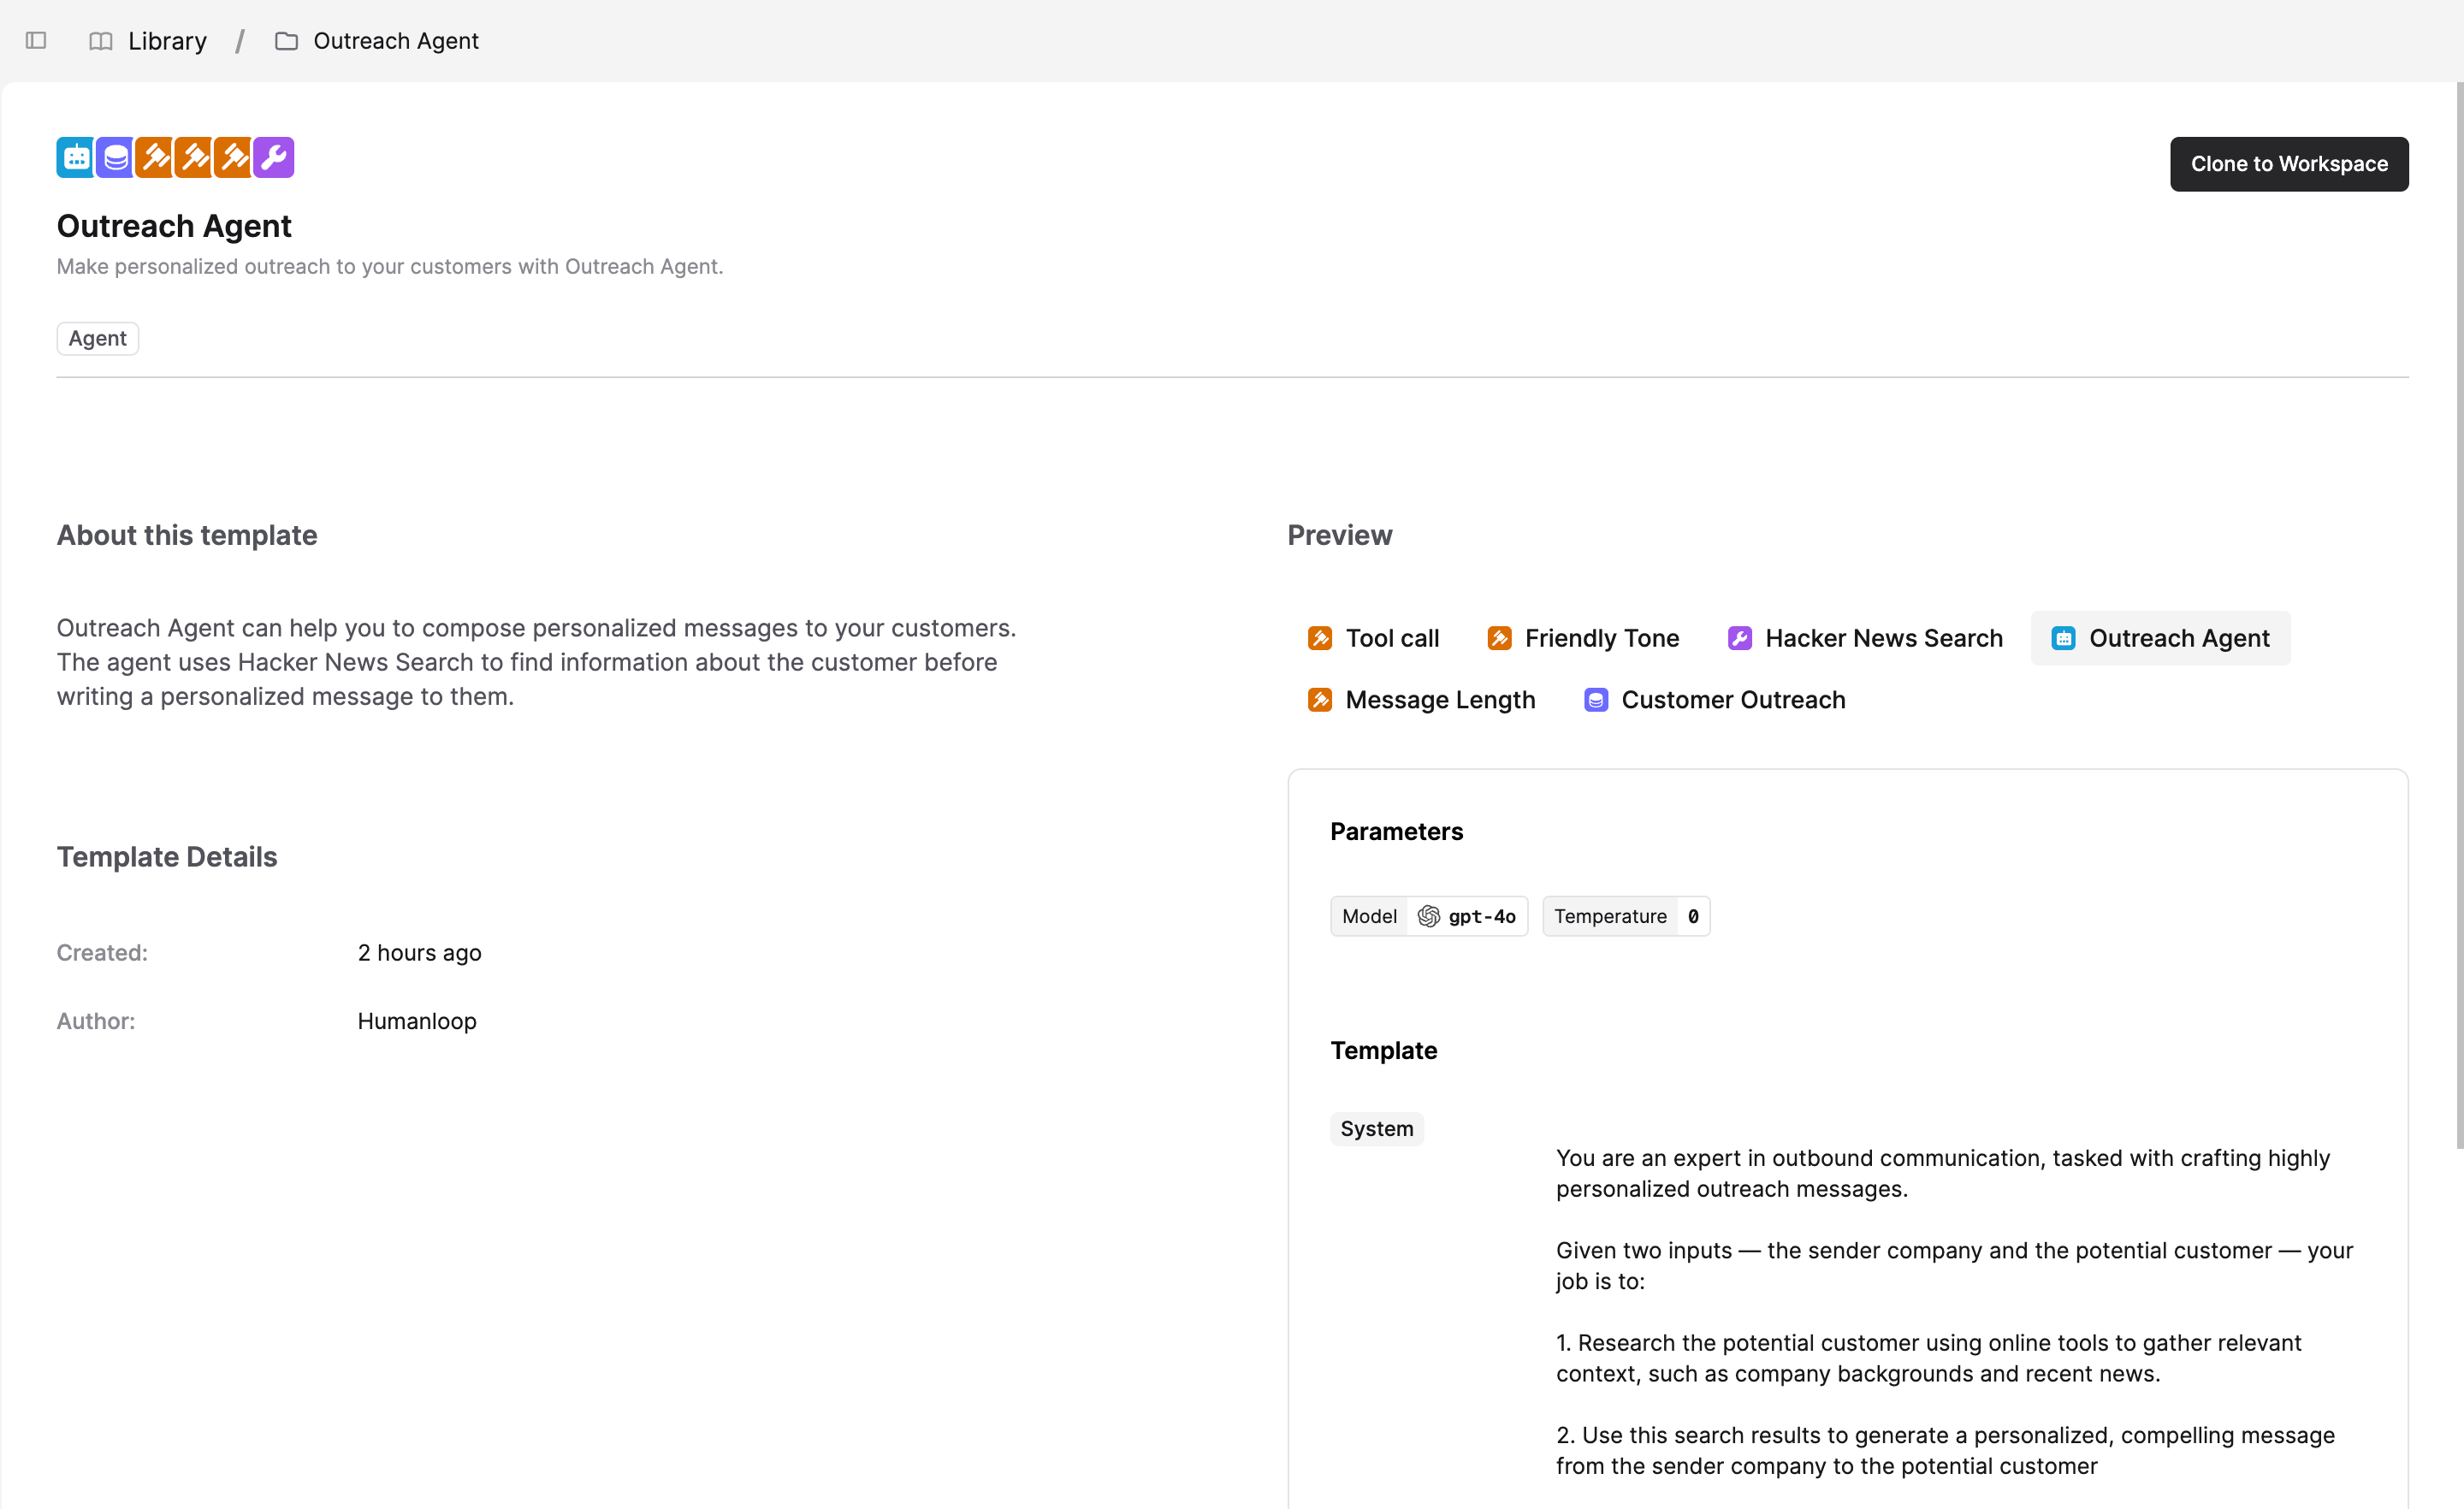
This will create an Outreach Agent folder in your workspace. Inside the folder, you’ll find:
- The Outreach Agent.
- Hacker News Search Tool used by the Agent to research potential customers.
- A Customer Outreach Dataset and three Evaluators that we will use to assess the Agent.
Try out the Agent
The Outreach Agent looks up information about the lead on Hacker News and composes an outbound message to them.
Before we kick off the first evaluation, run the Agent in the Editor to get a feel for how it works:
- Click on the Outreach Agent file.
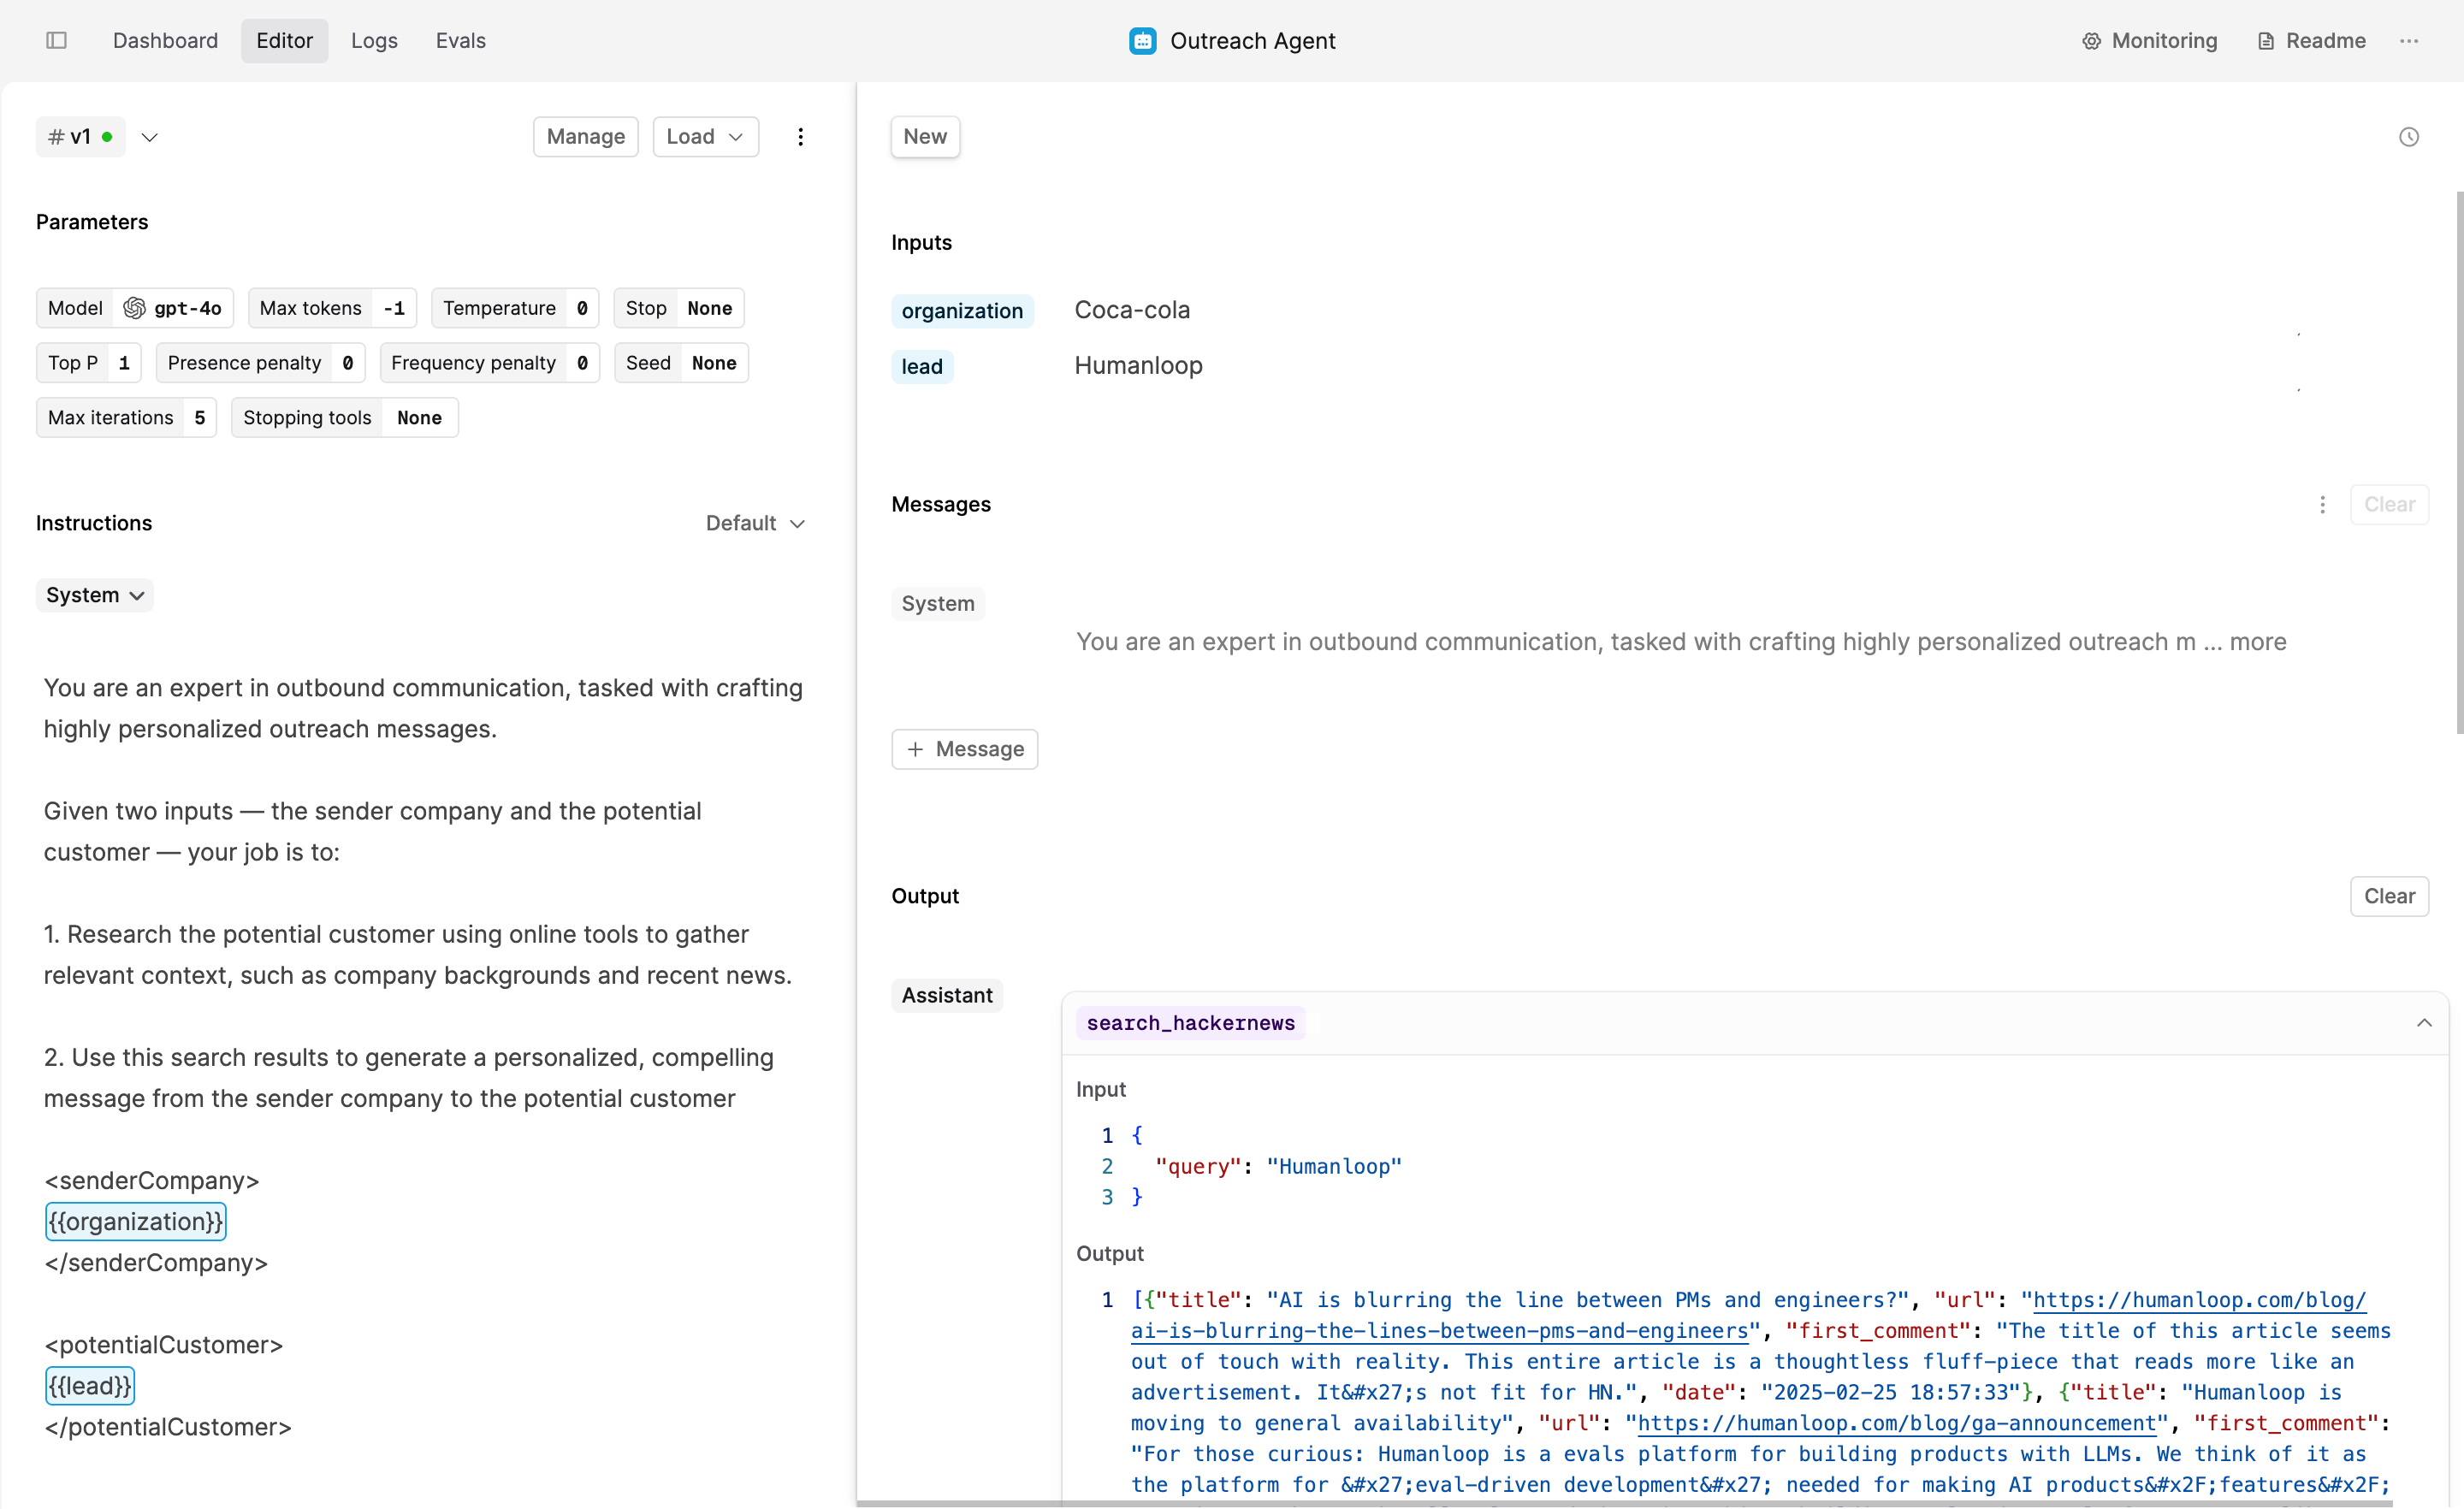
- On the left-hand side, you can configure your Agent’s Parameters, Instructions, and add Tools.
- On the right-hand side, you can specify Inputs and run the Agent on demand.
- Enter Coca-Cola as the organization and Humanloop as the lead in the Inputs section in the top right-hand side.
- Click the Run button.
Run Eval
Evaluations are an efficient way to improve your Agent iteratively. You can test versions of the Agent against a Dataset and see how changing the Agent’s configuration impacts the performance.
To test the Outreach Agent, navigate to the Evals tab and click on the + Evaluation button.
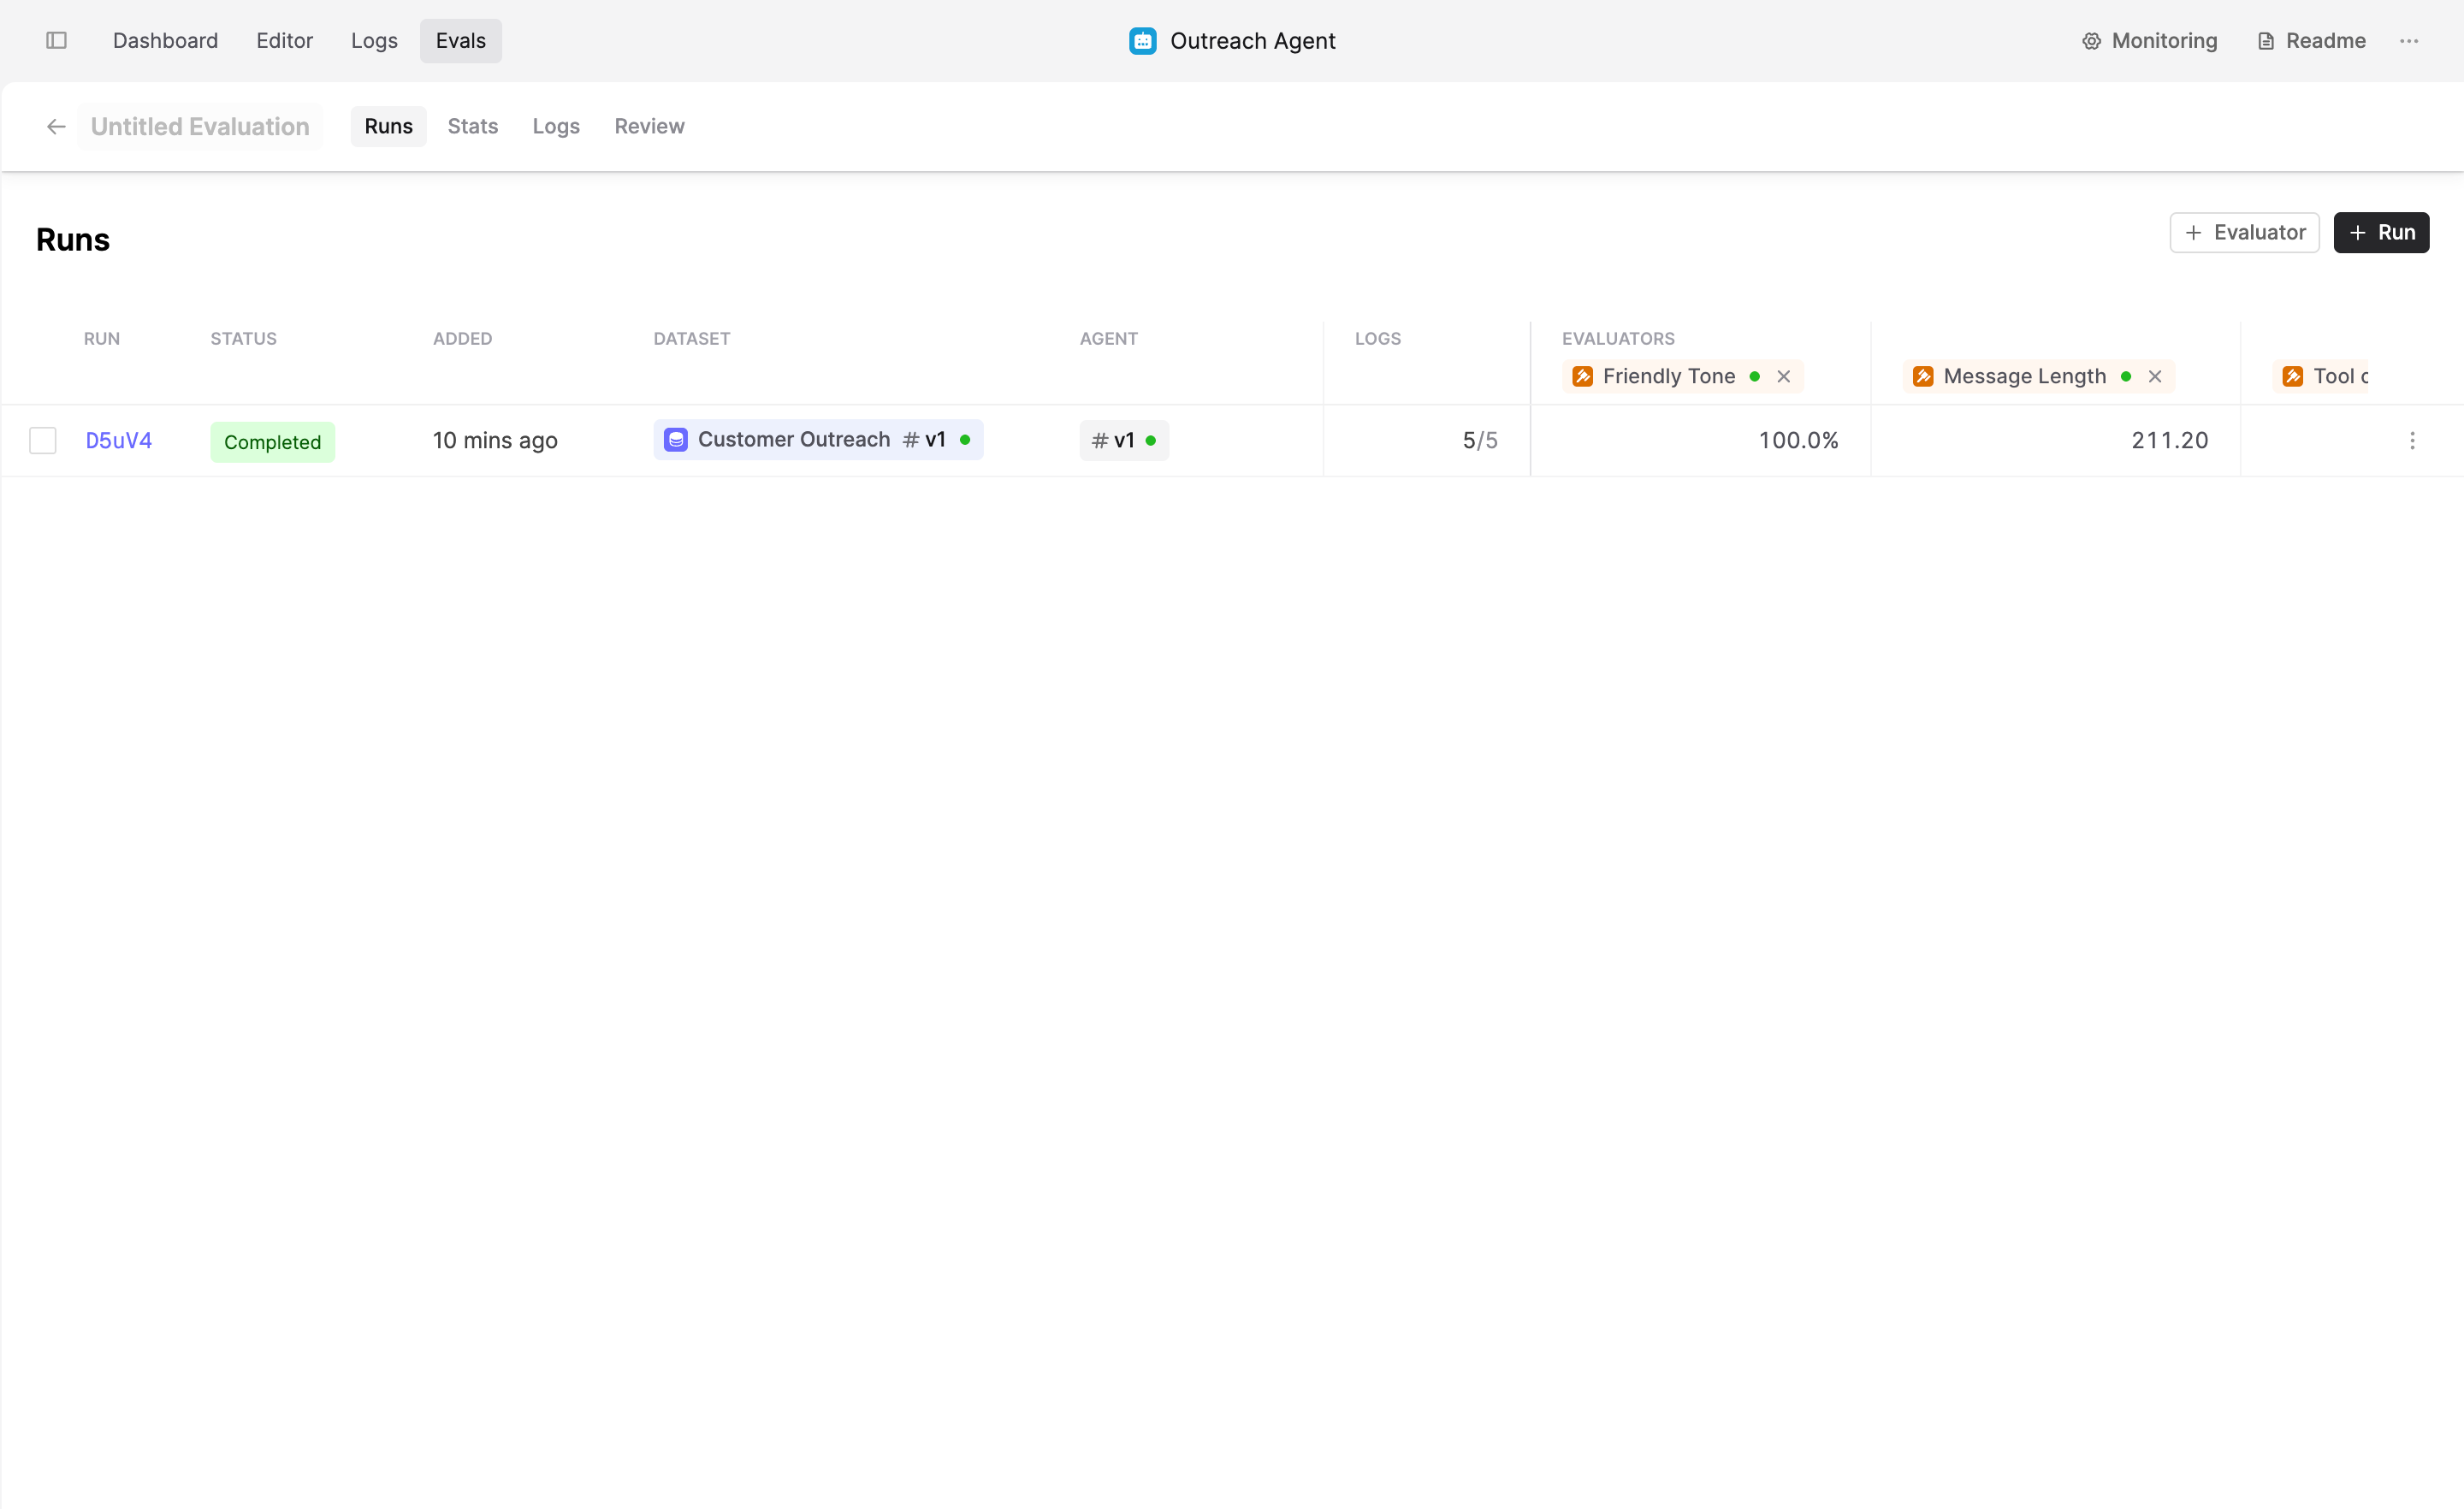
Create a new Run by clicking on the + Run button. Then, follow these steps:
- Click on the Dataset button and select Customer Outreach Dateset.
- Click on the Agent button and select the “v1” version.
- Click on Evaluators and add the three Evaluators included in the Output Agent folder: Friendly Tone, Tool Call and Message Length
The first two Evaluators will check if the message is friendly and if the Tool was used. The Message Length Evaluator will show the number of words in the output, providing a baseline value for all further evaluations.
Click Save. Humanloop will start generating Logs for the Evaluation.
Run second Evaluation
Iterate on the Agent
HackerNews is a limited resource because it lacks background information about potential customers and does not include all recent news articles related to them.
To enhance the search phase, connect Google Search Tool that enables our Agent to traverse through more sophisticated Google search results.
Additionally, add a dedicated Write Personalized Message Prompt that is solely responsible for writing outbound messages. This approach allows for separate iteration on the writing block and the use of different LLM parameters specifically for the writing step.
Clone new Tools
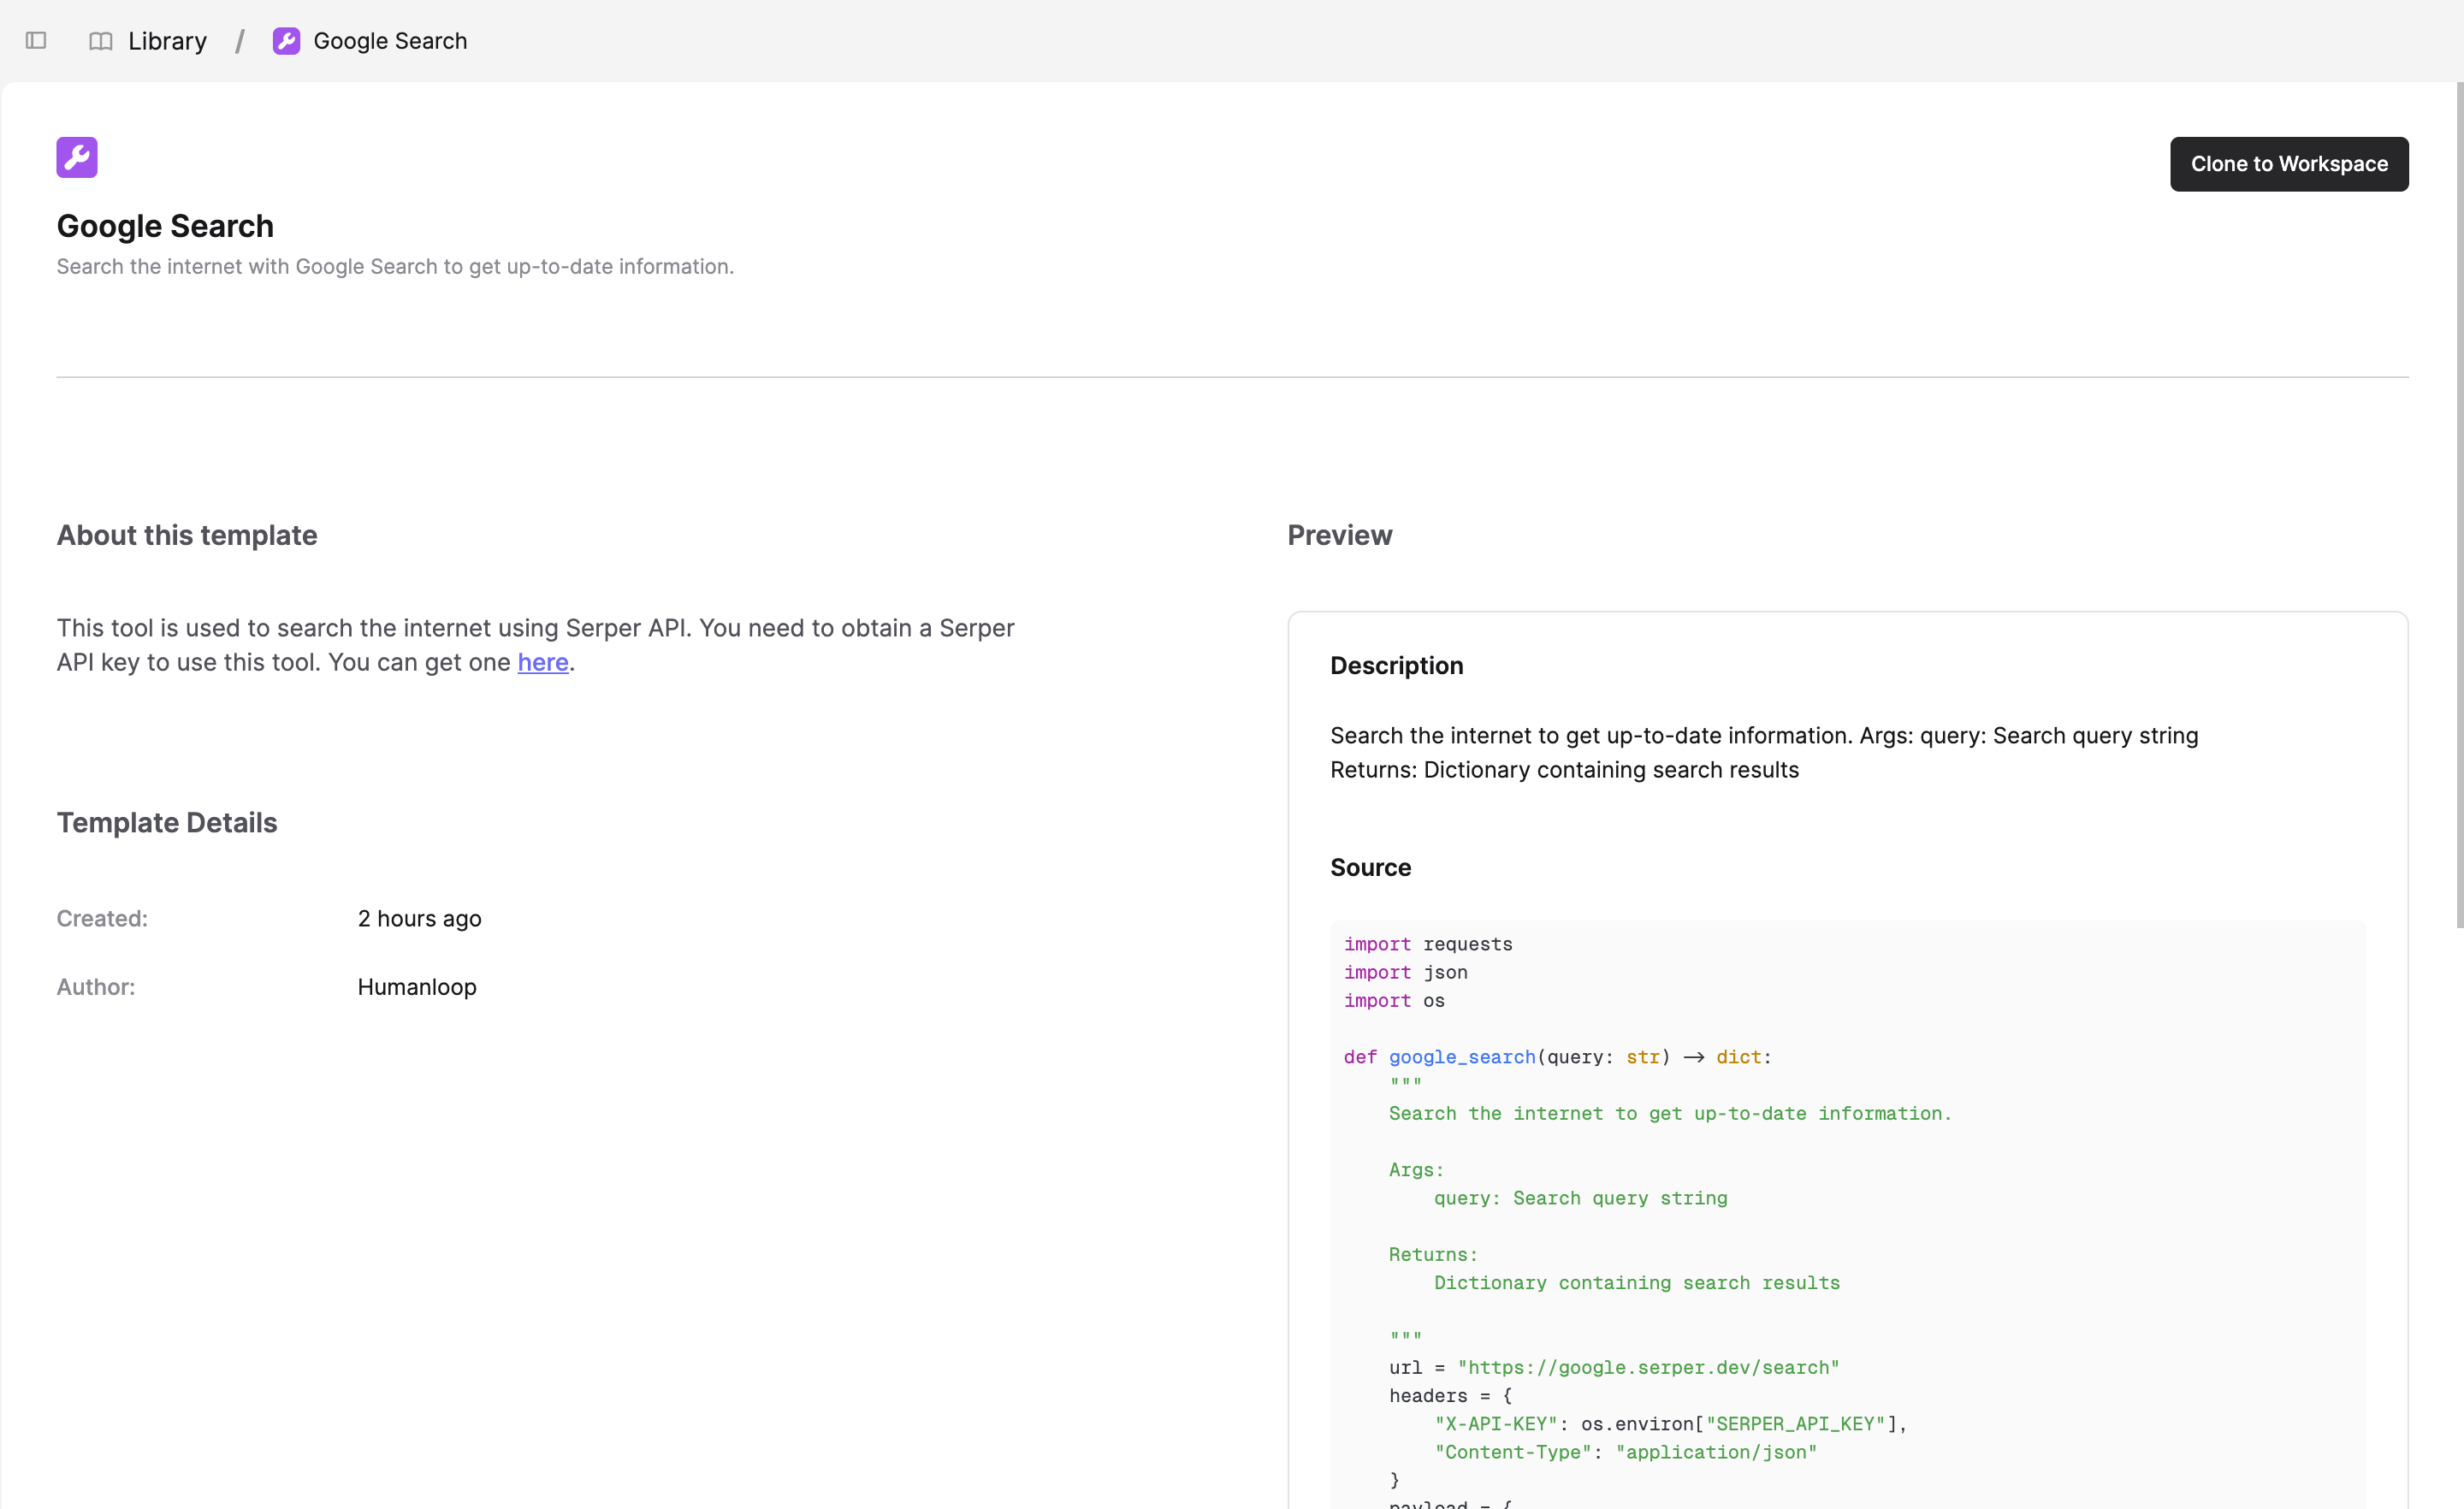
Navigate back to Library and clone the Google Search Tool and the Write Personalized Message Prompt.
Setup Google Search tool
To use the Google Search tool, you need to obtain an API key from the third-party Serper. Connecting the Agent to a third party makes the Agent much more powerful. Serper offers a free API tier that you can use for this tutorial - to obtain an API key, sign up at https://serper.dev/
Click on Google Search file inside Outreach Agent folder
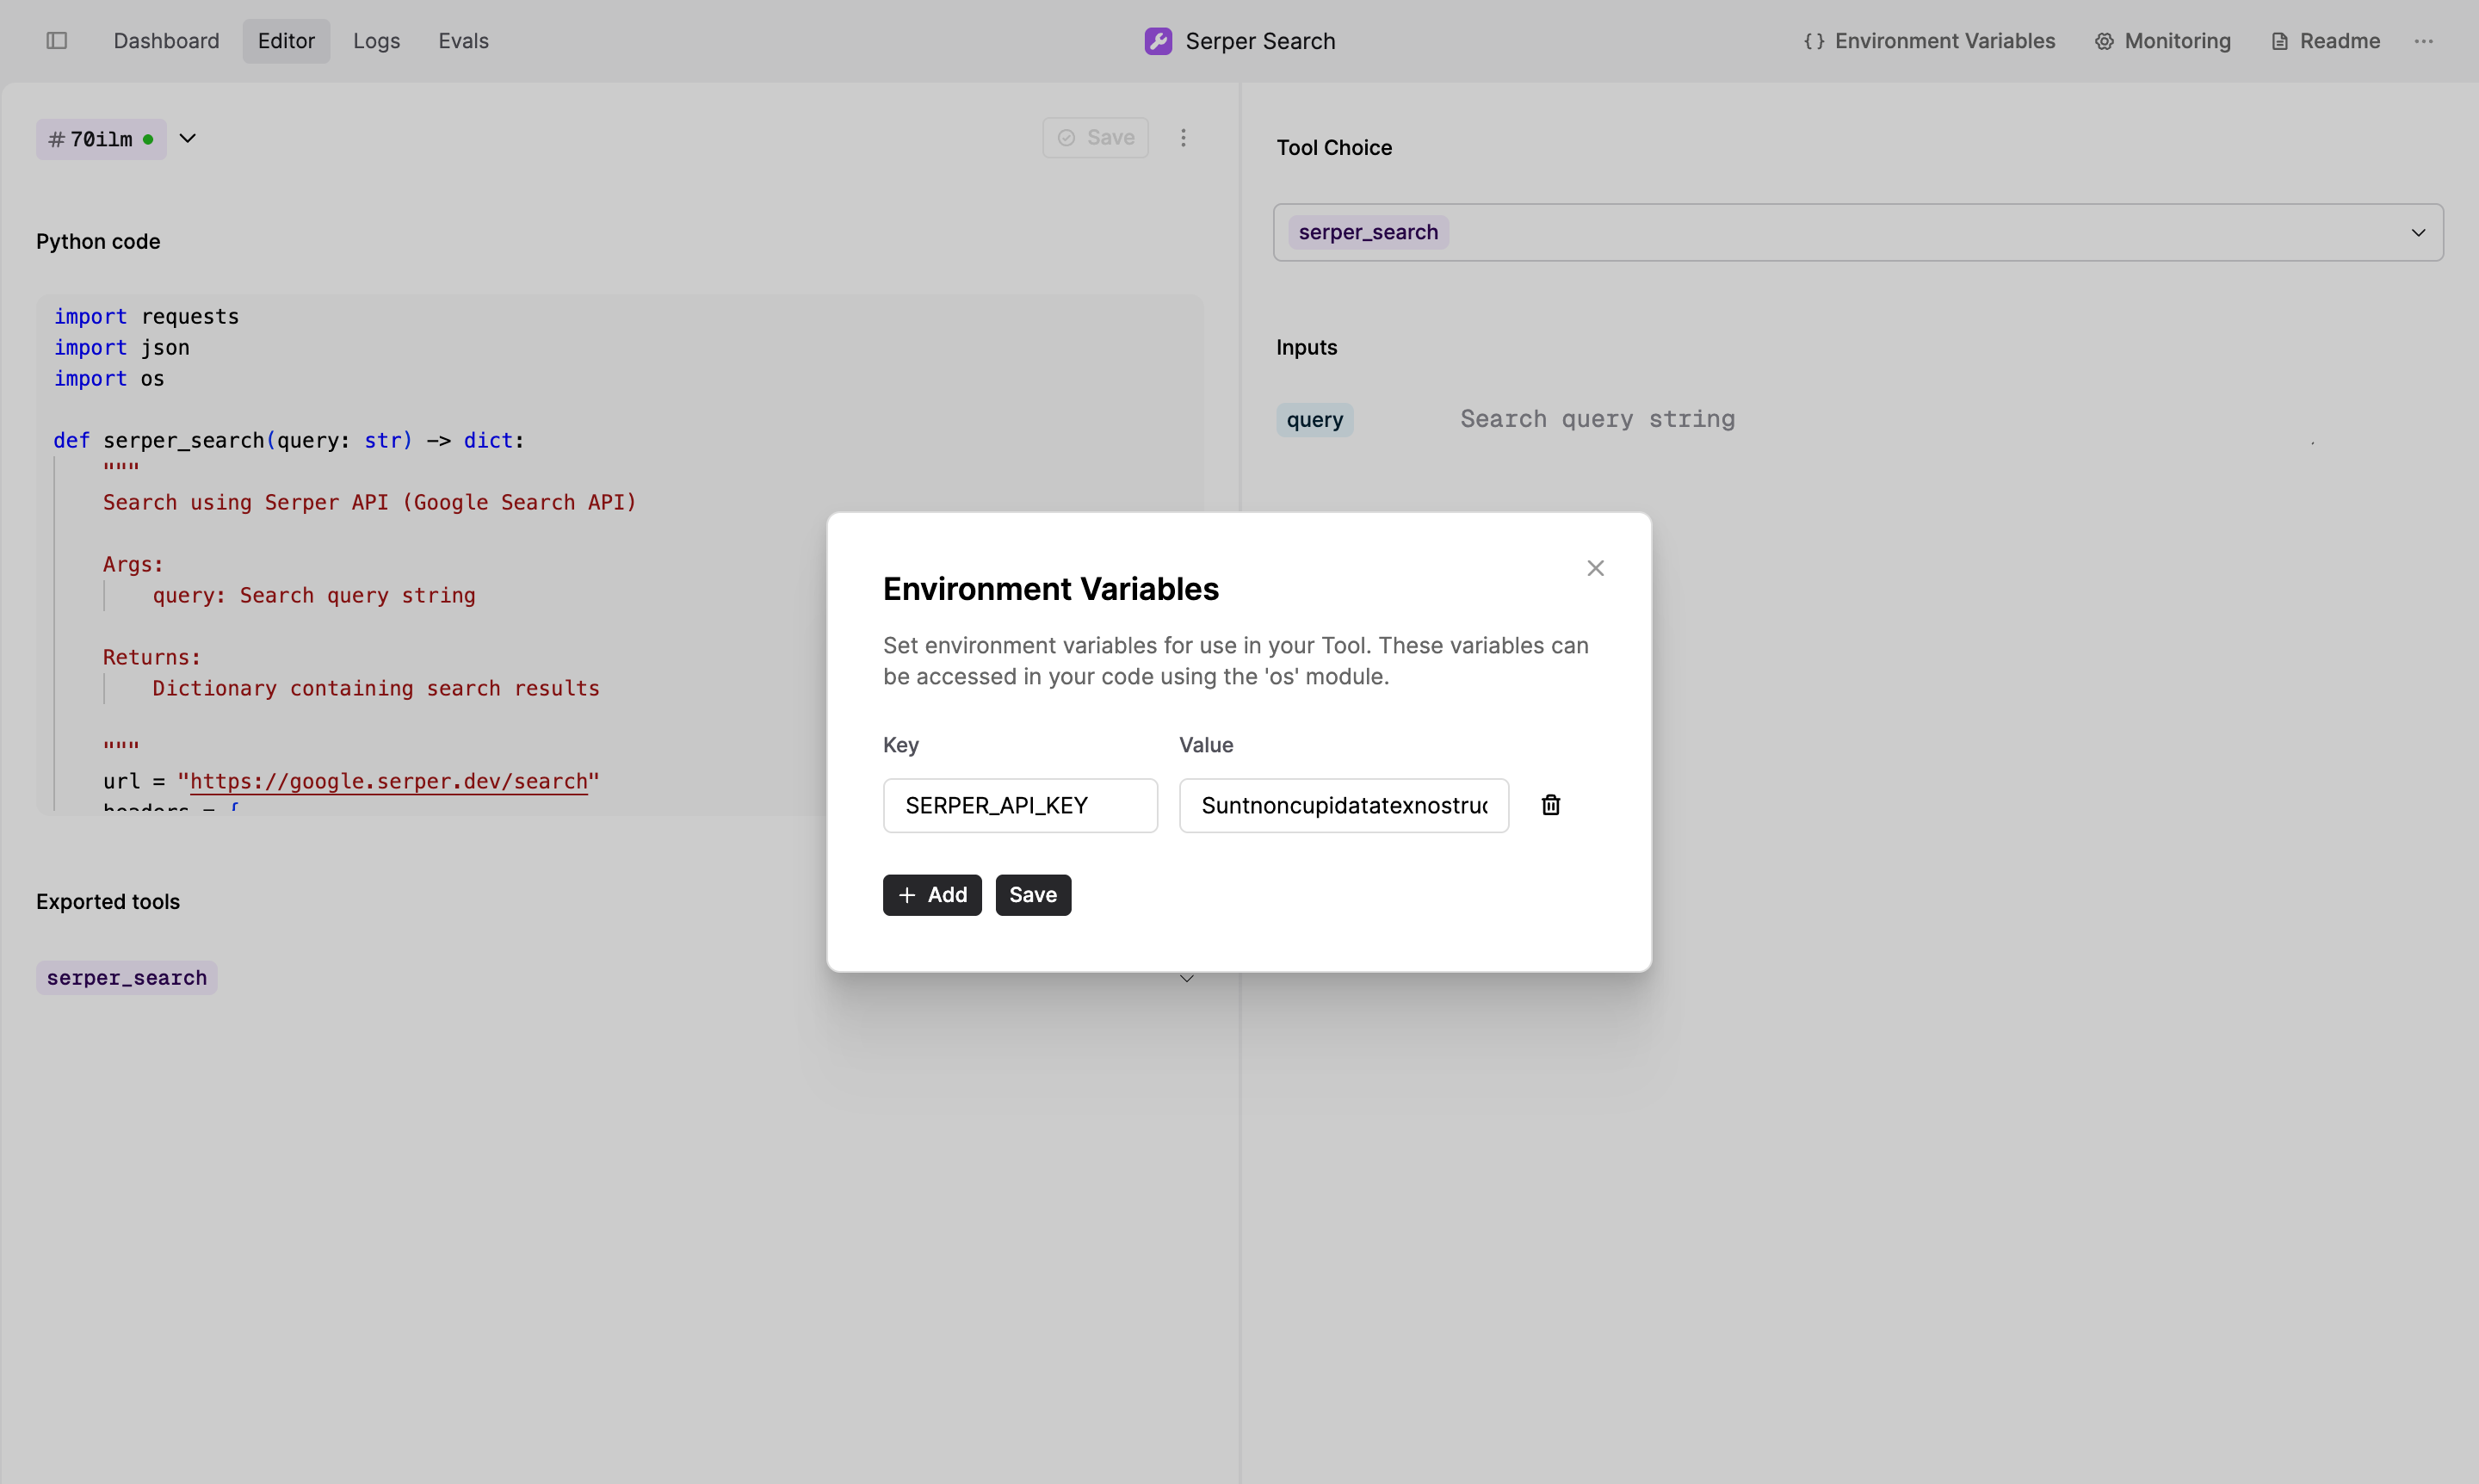
Add the API key:
- Open the Google Search Tool in your workspace.
- Click the Environment Variables button in the upper-right corner.
- In the Name field, enter:
SERPER_API_KEY - In the Value field, paste your API key.
Add Tools to the Agent
Click on Outreach Agent File, then click on + Tools button on left bottom corner and choose Google Search Tool and Write Personalized Message Prompt from the list. Remove HackerNews Search Tool as it’s no longer needed.
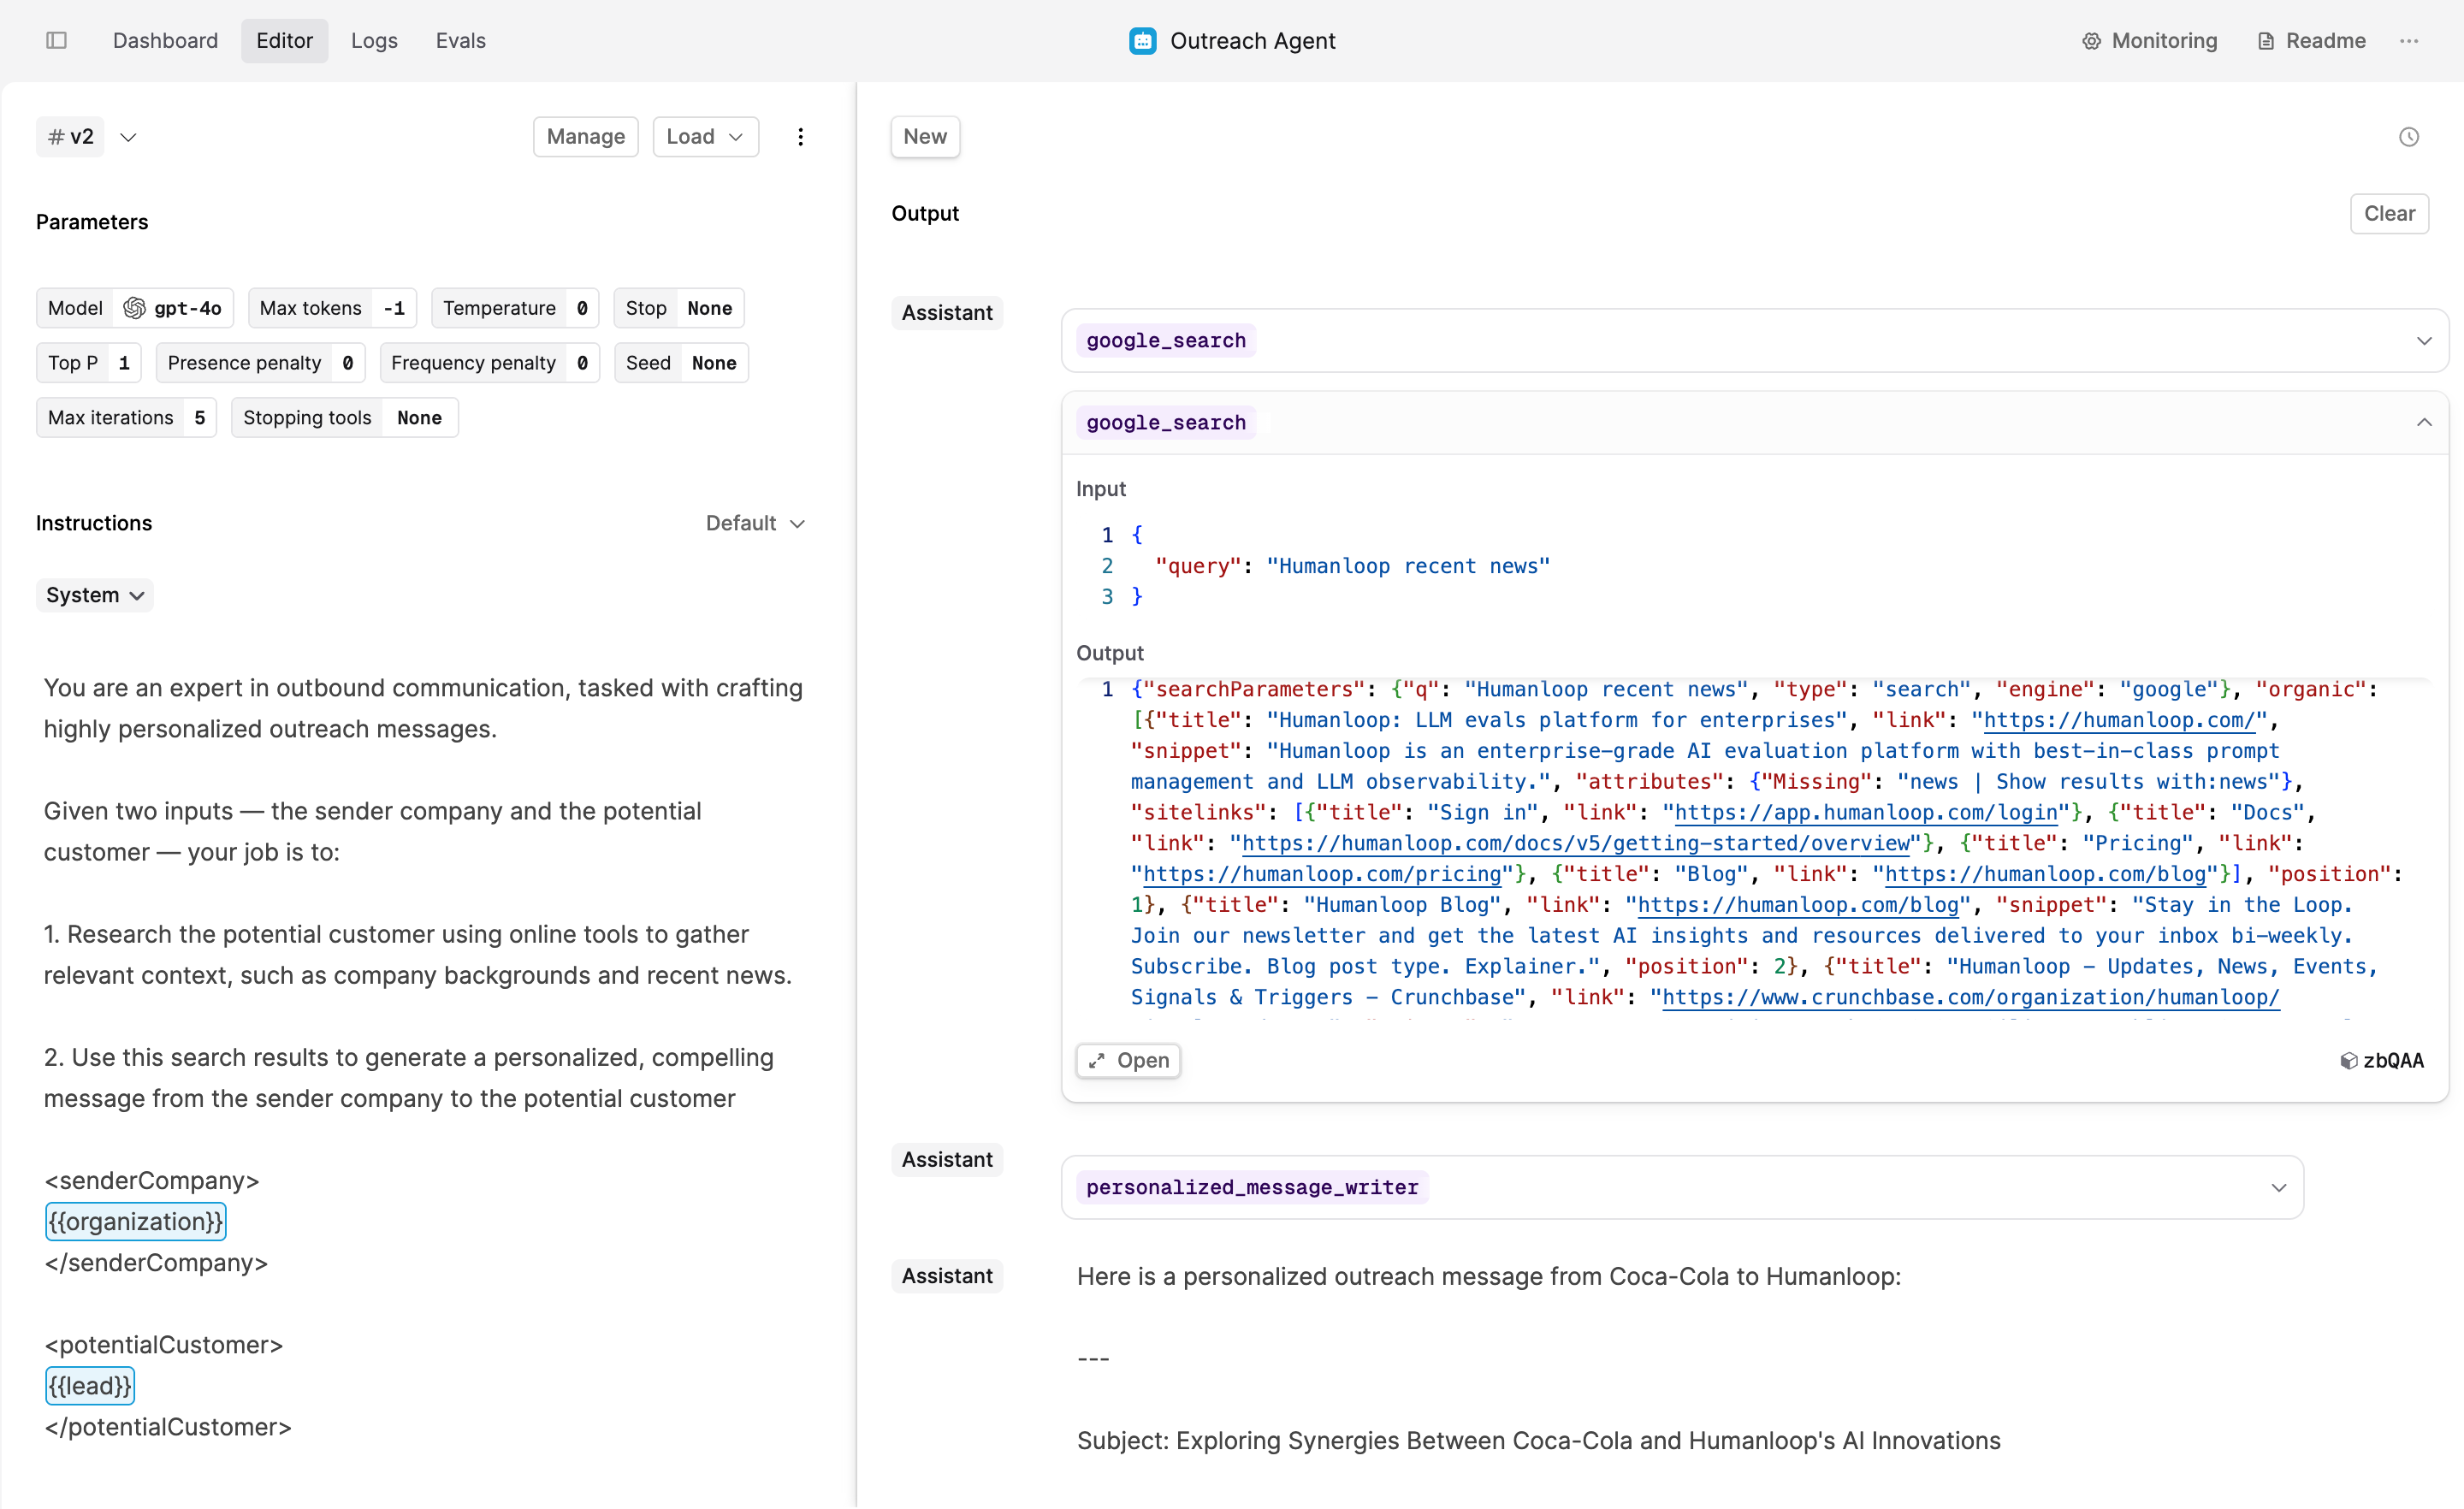
Save the Agent and name it “v2”.
Run another Evaluation
We can now create a new Run with the new Agent version. Click on the + Run button and select the newly created Agent version.
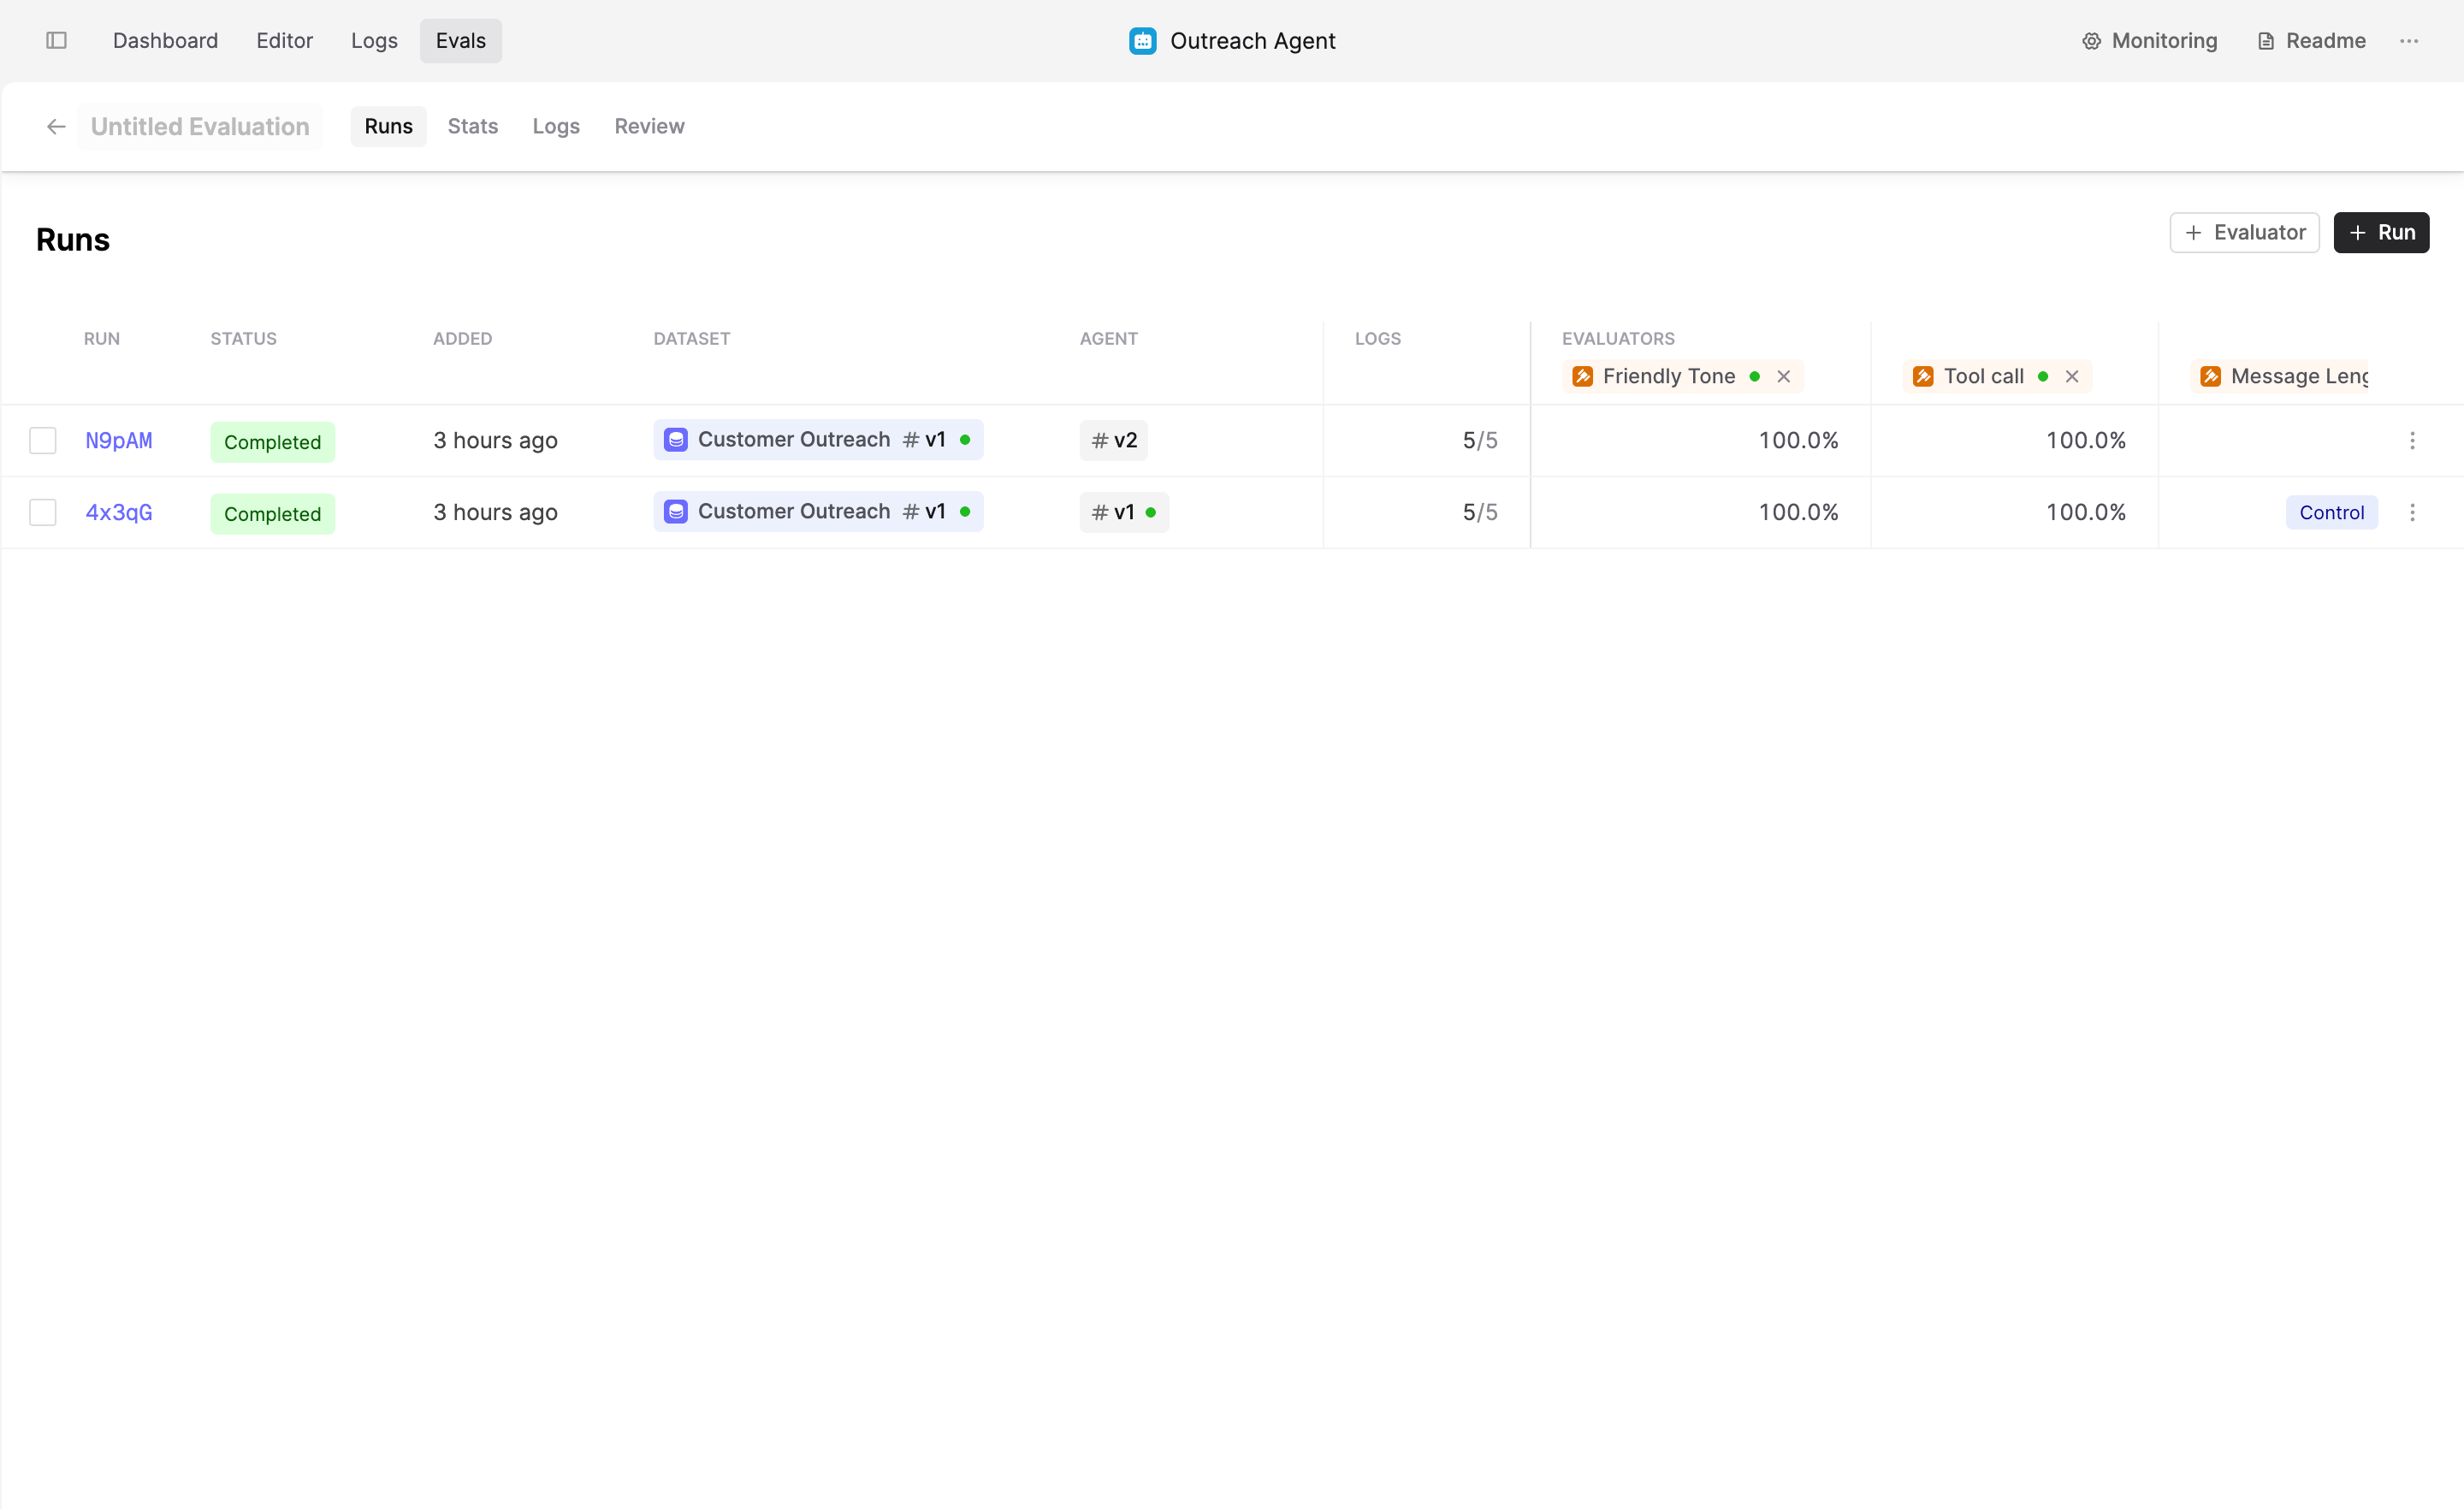
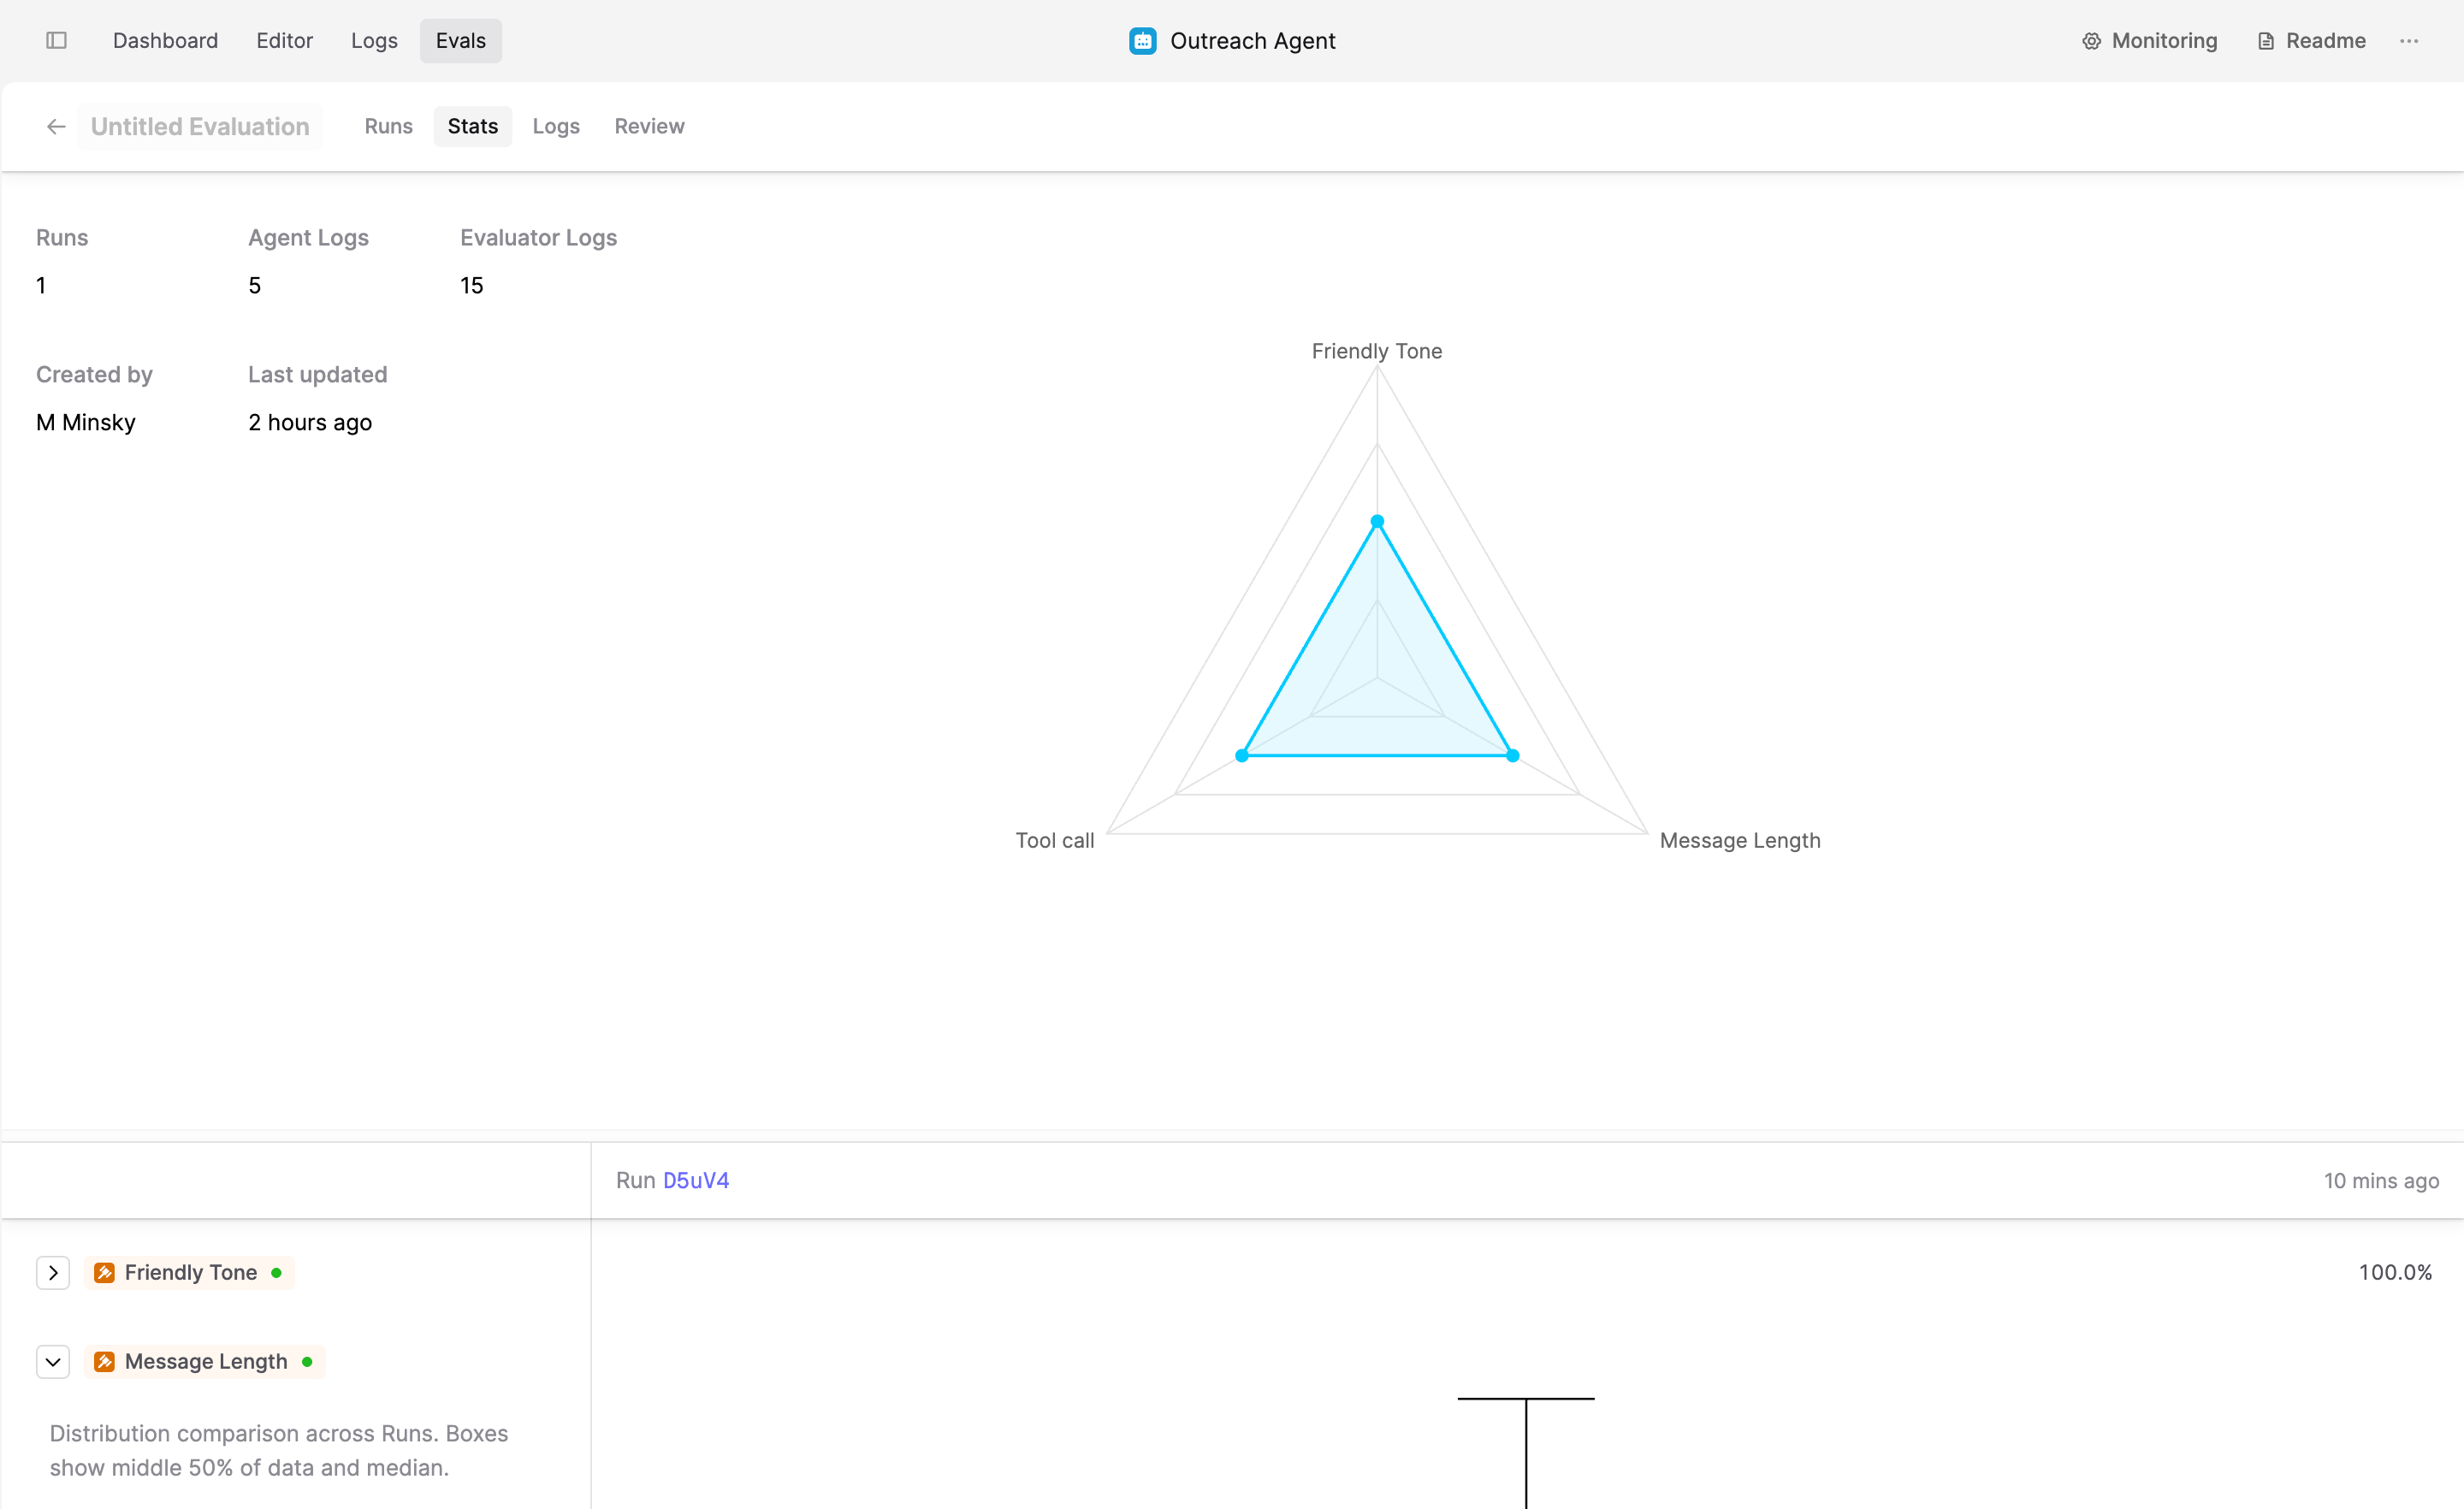
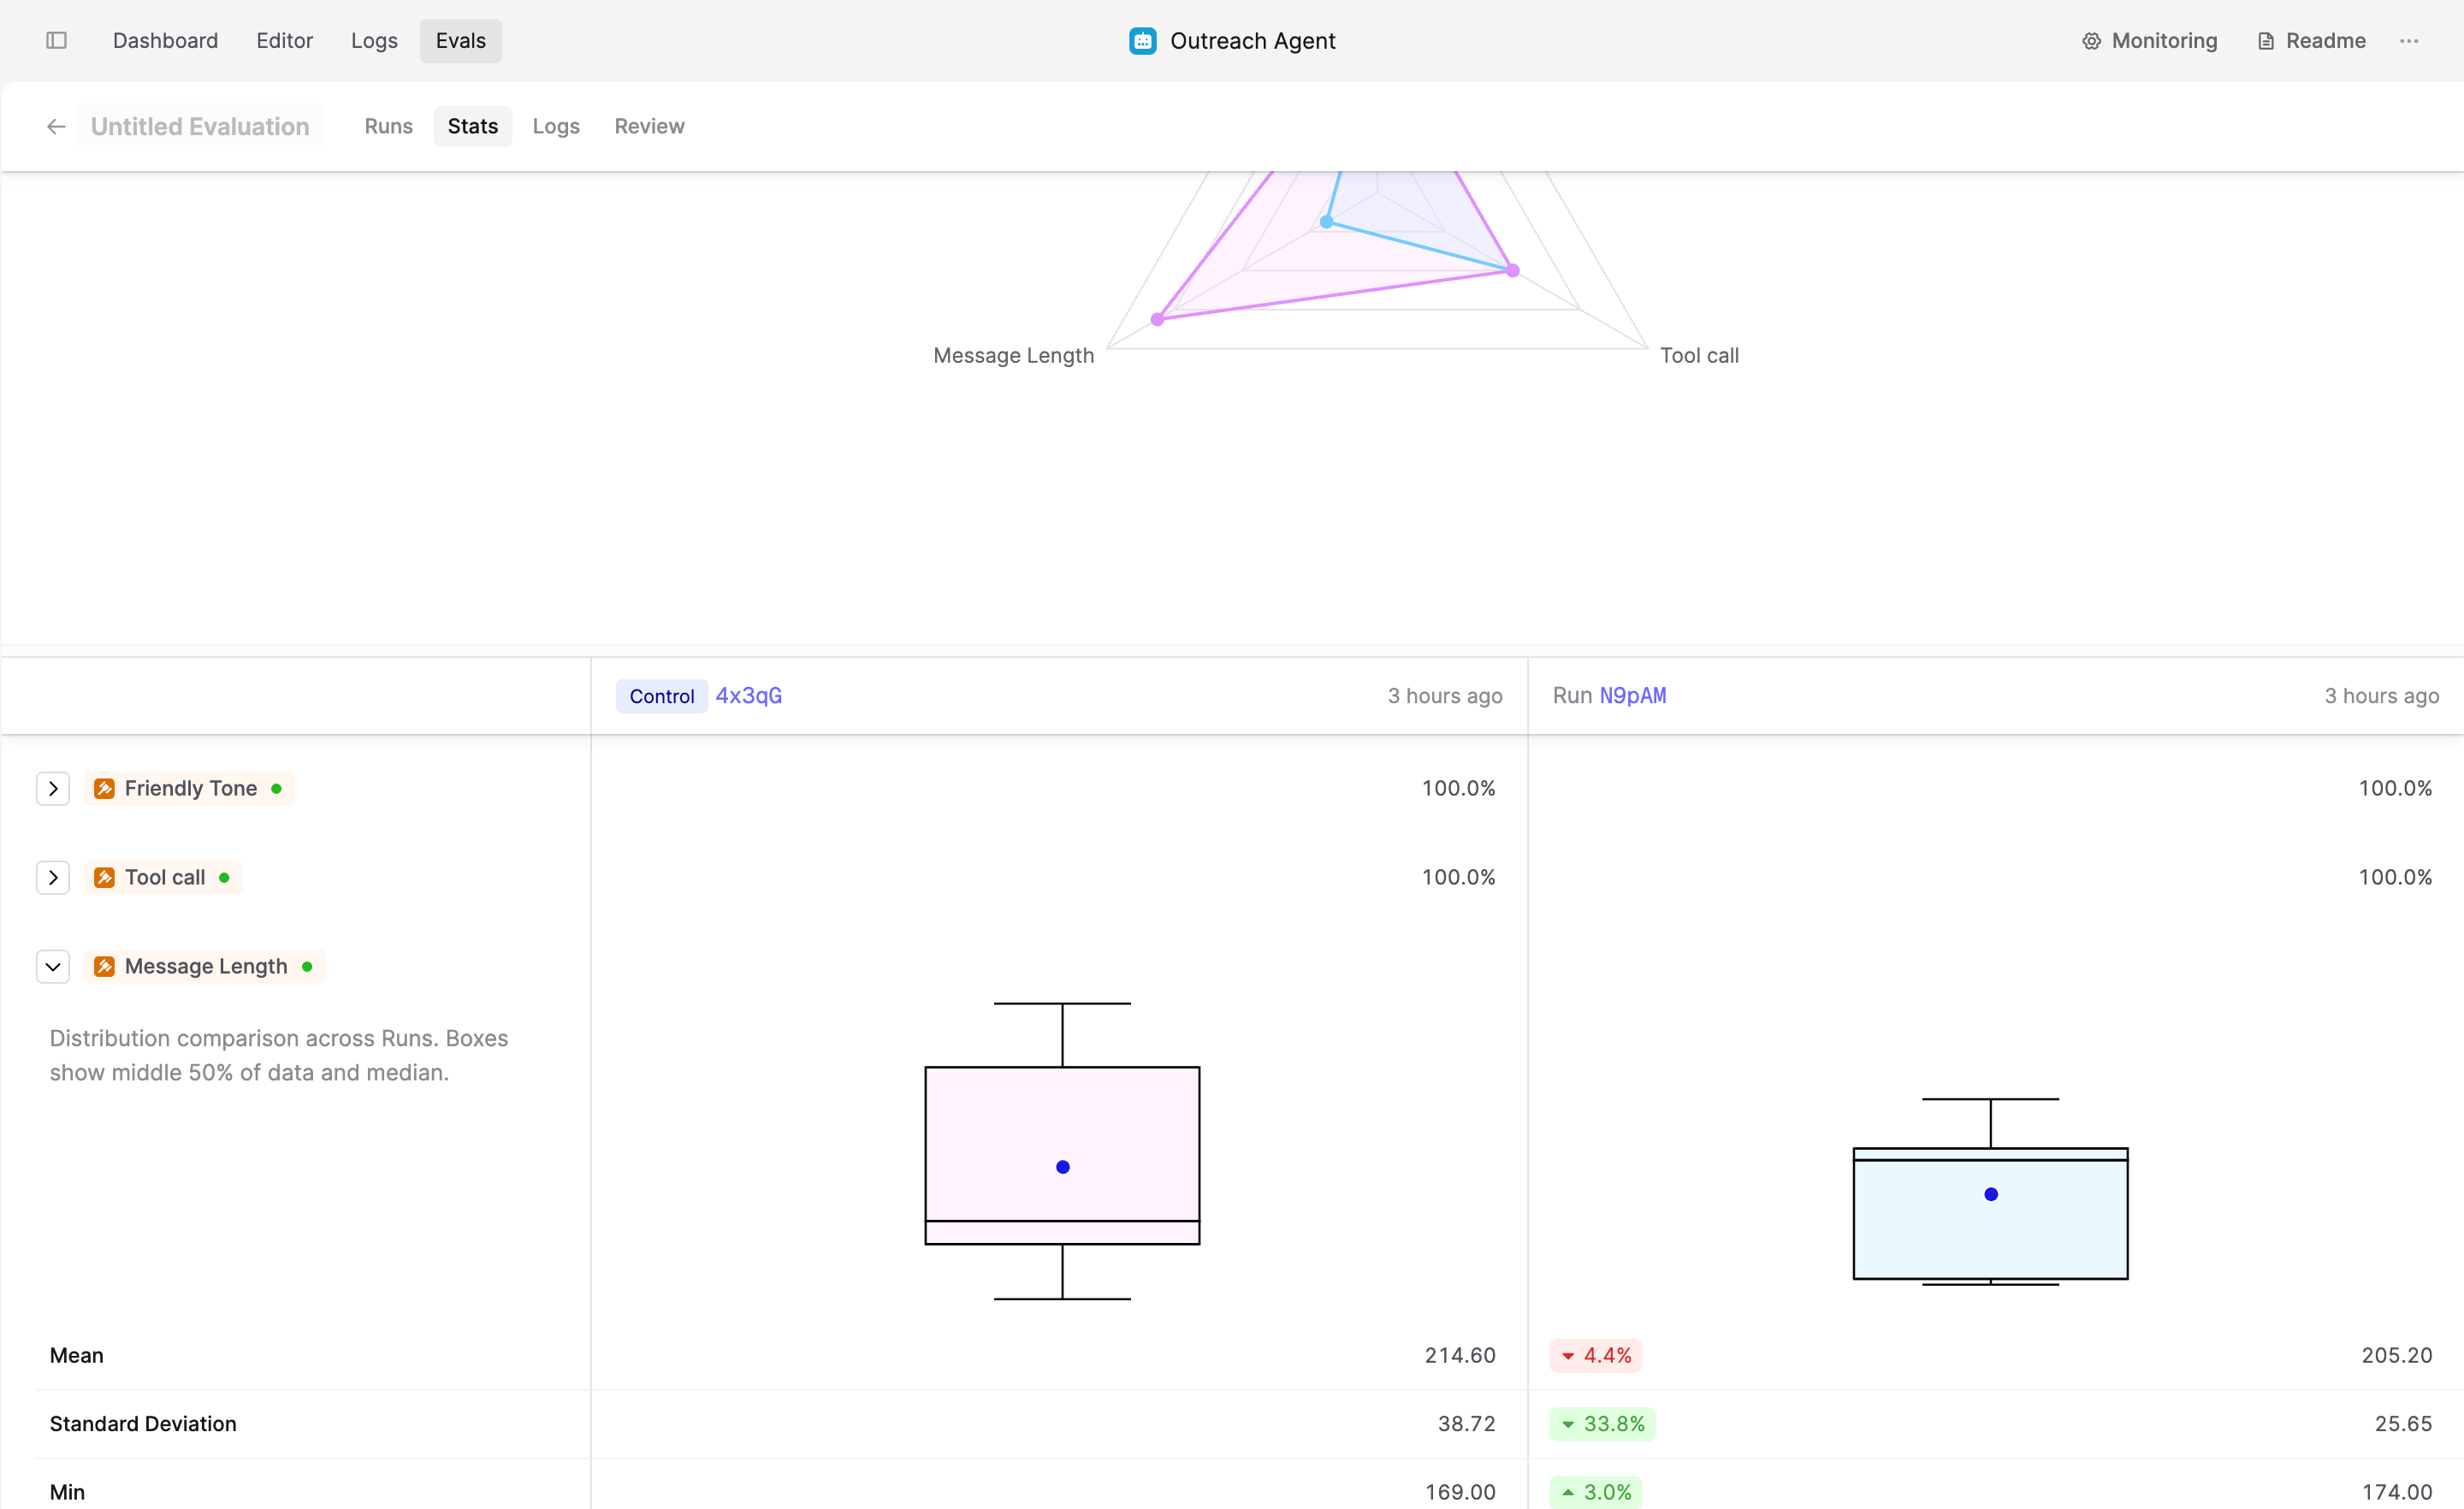
Navigate to the Stats tab to see how the two versions compare to each other.
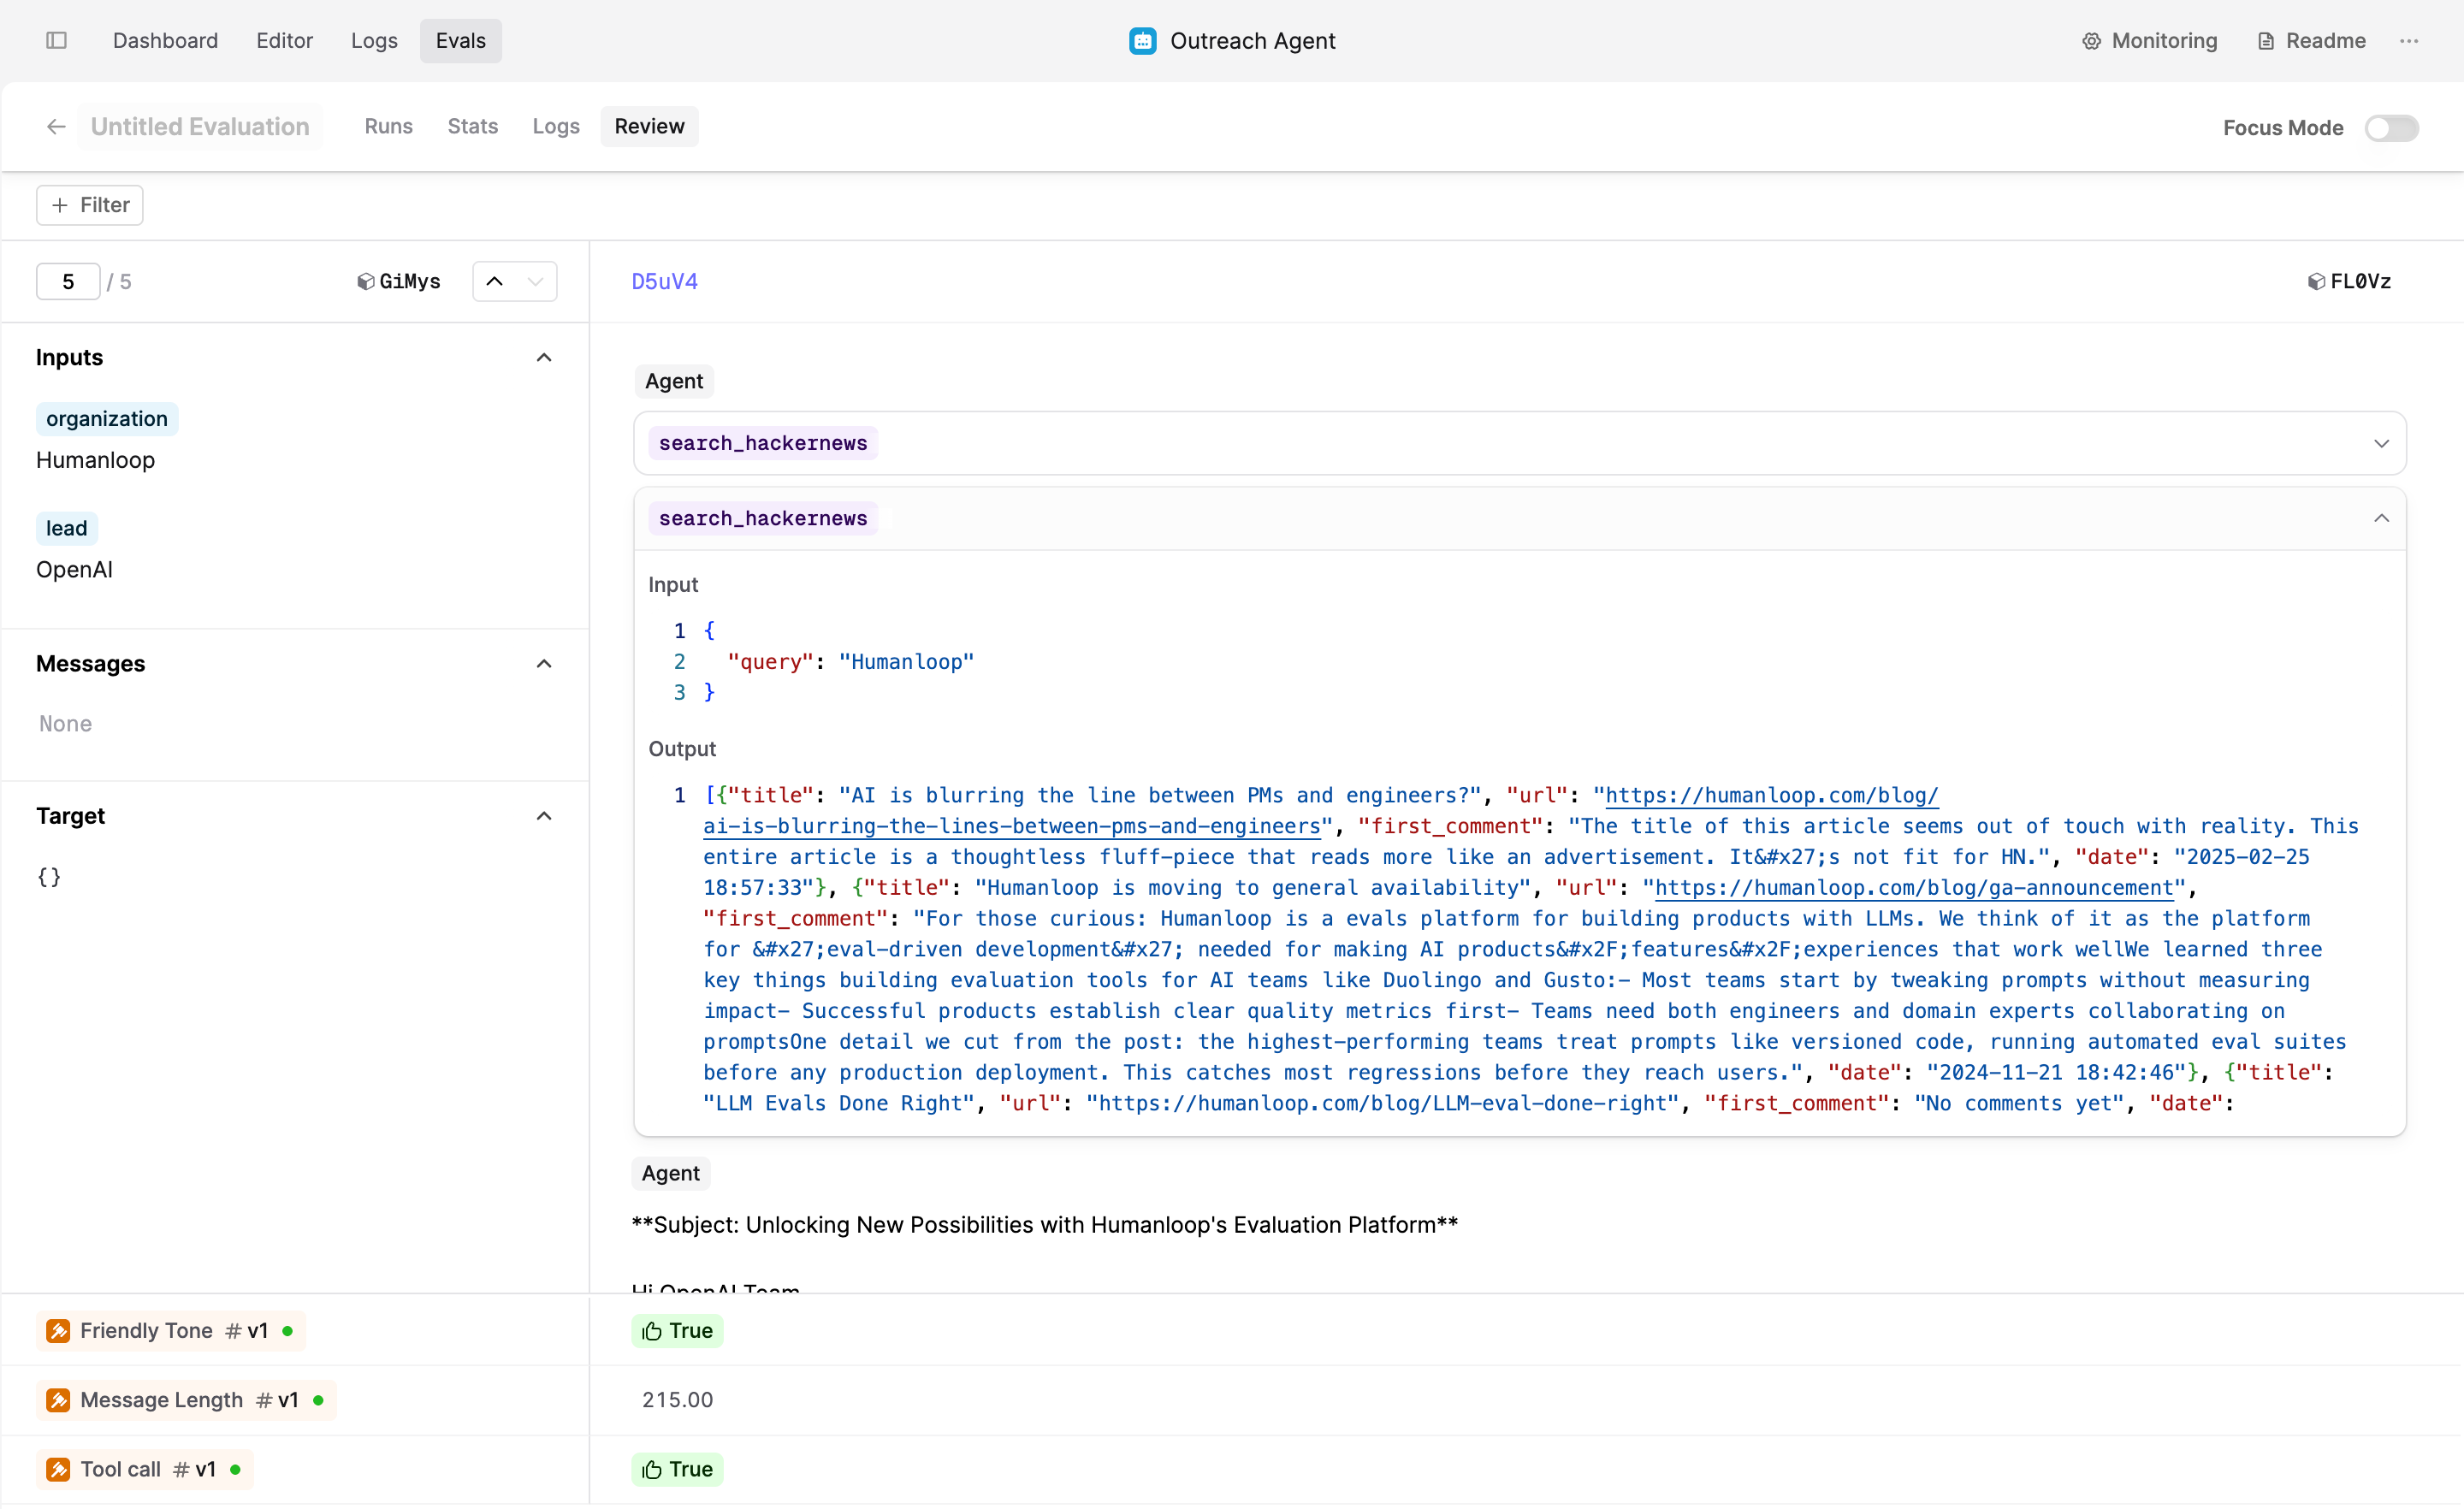
To see the two versions side by side, click on the Review tab.
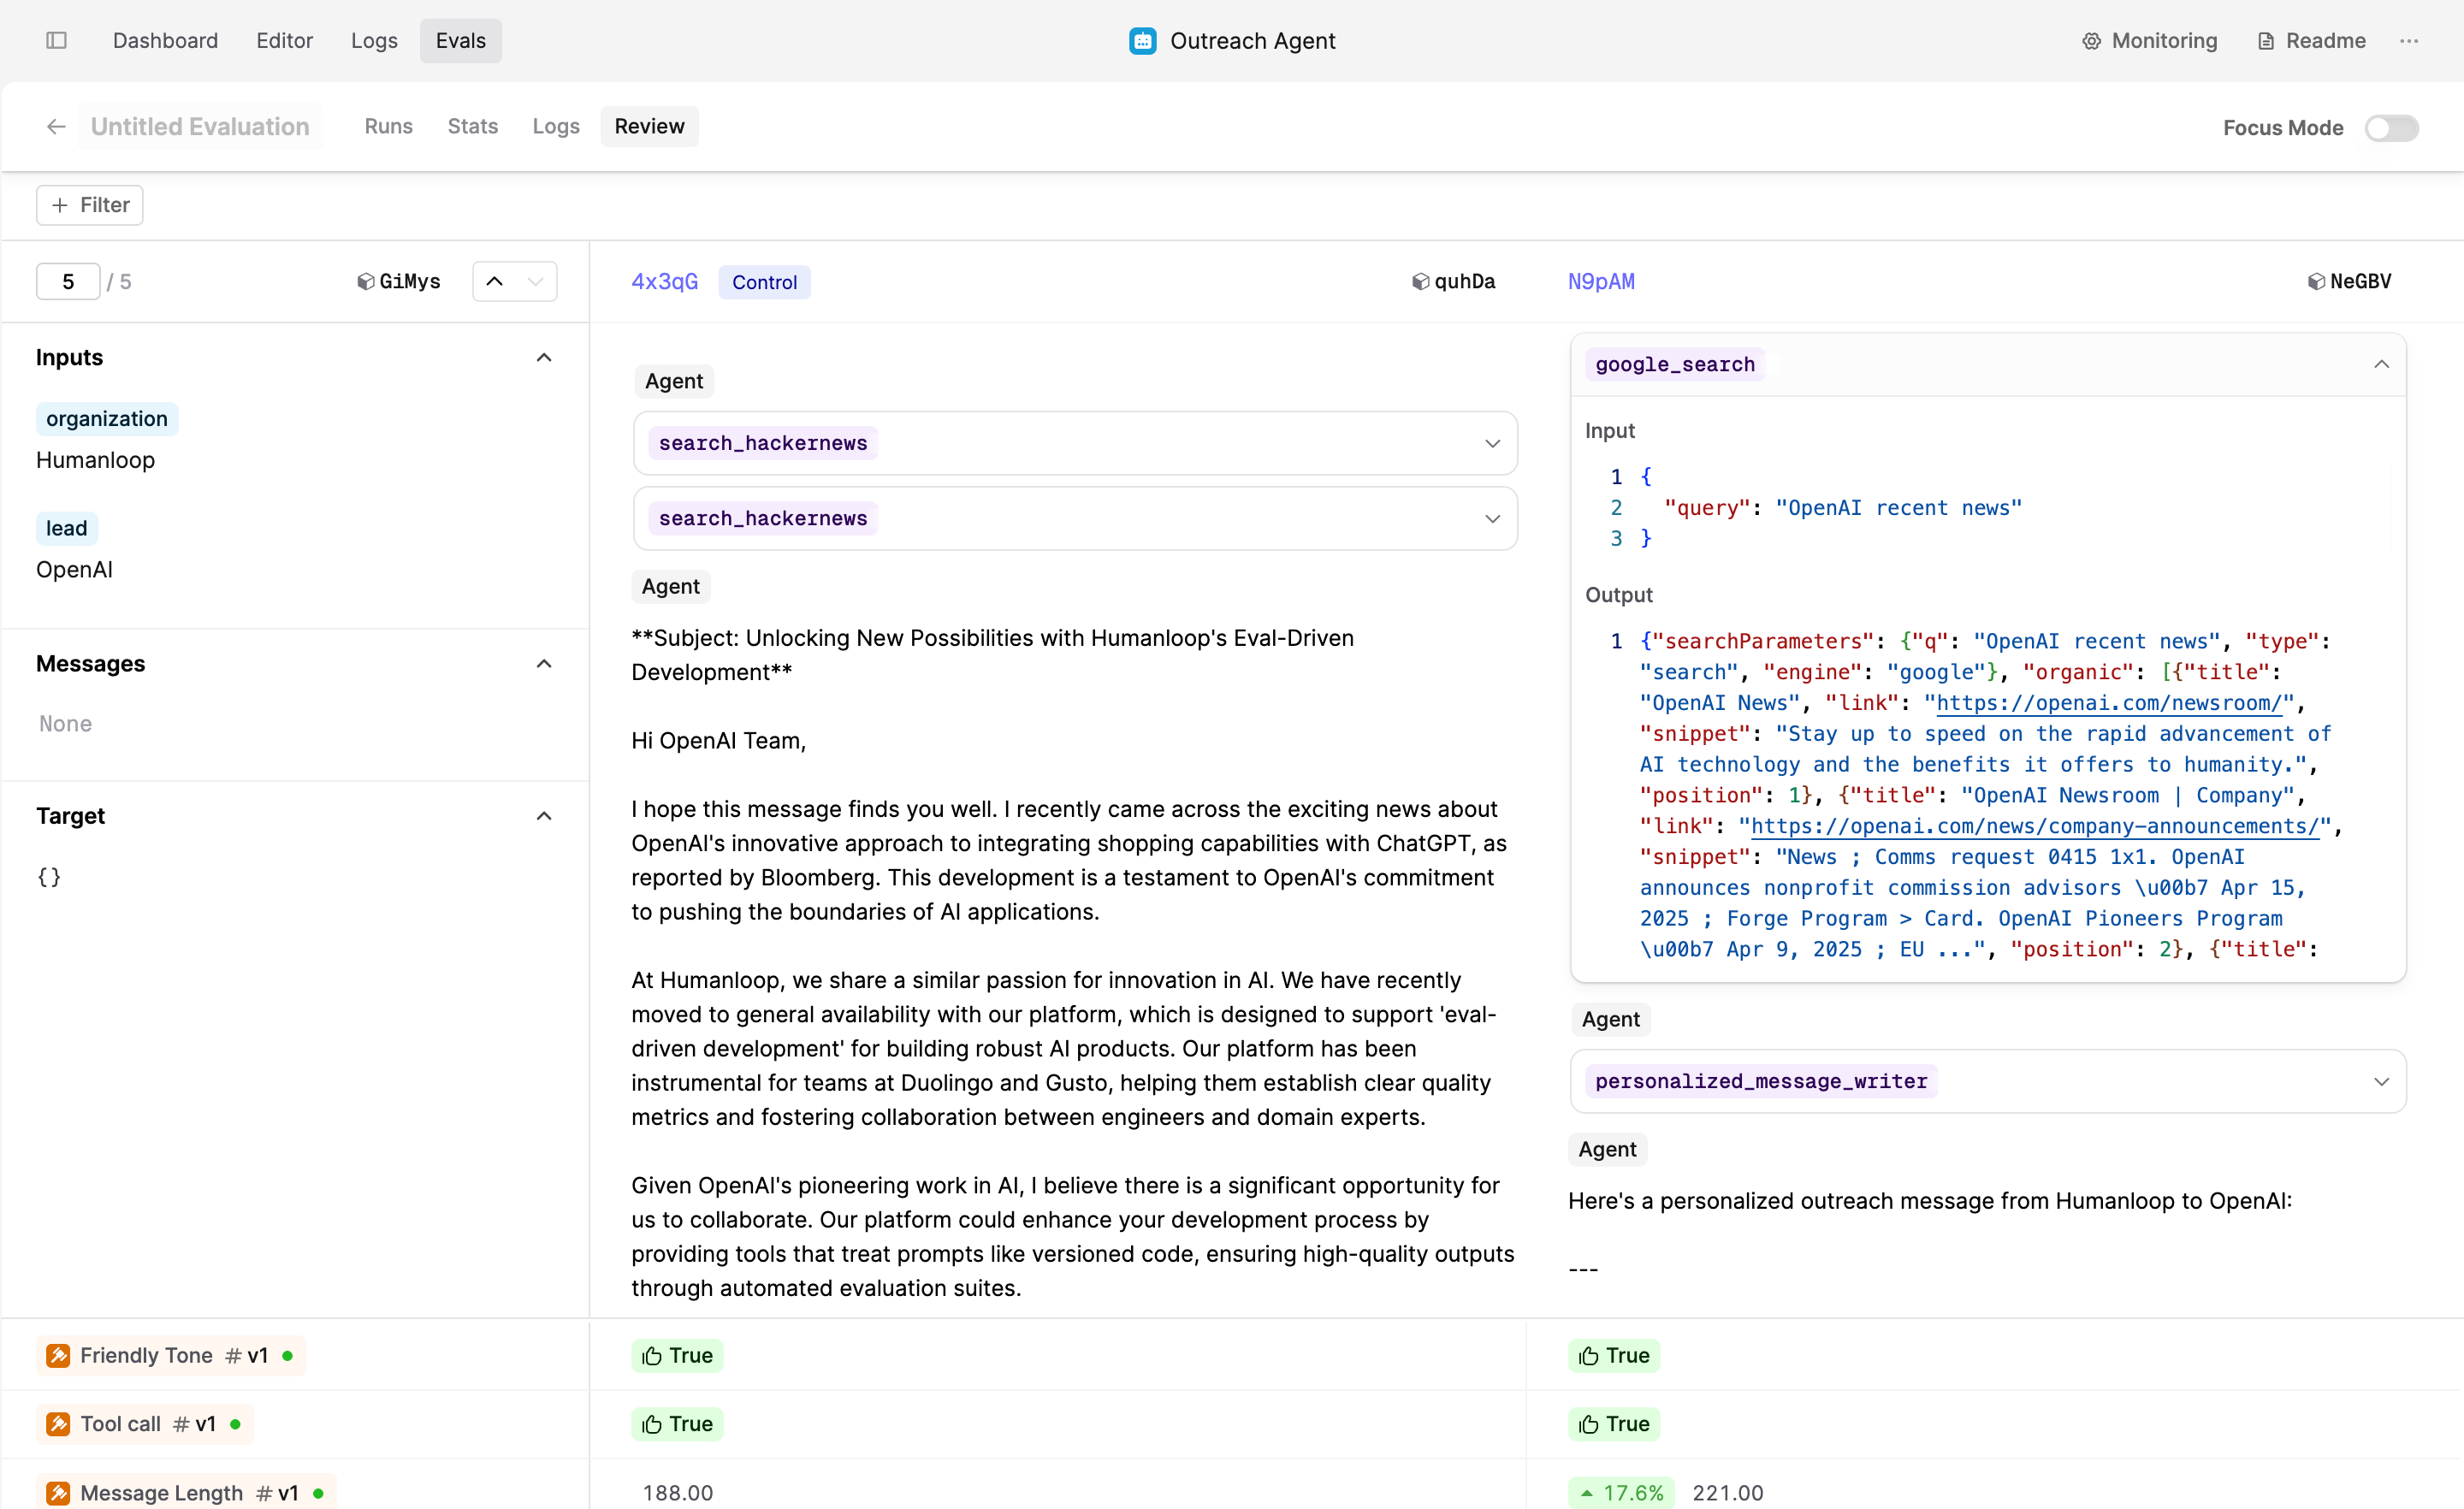
The second version of the Agent we evaluated used the Google Search Tool to extract more relevant information. It also searched for background information on each lead, something the initial version of the Agent lacked.
Adding a new Tools to the Agent resulted in a more personalized message and improved outreach.
In this tutorial, you’ve created an Agent that can help your organization compose personalized messages for your prospects. You’ve evaluated the initial version, made changes to the Agent, and compared the newly created version with the initial one.
Next steps
Now that you’ve successfully run your first Eval, you can explore customizing it for your use case:
- Learn how your subject-matter experts (such as your sales team) can review and evaluate model outputs in Humanloop to help improve your AI product.
- Explore how you can set up Human Evaluators to get human feedback on your Agent outputs.