Run an evaluation
Paid Feature
This feature is not available for the Free tier. Please contact us if you wish to learn more about our Enterprise plan
Create an offline evaluator
Prerequisites
- You need to have access to Evaluations
- You also need to have a Prompt – if not, please follow our Prompt creation guide.
- Finally, you need at least a few Logs in your prompt. Use the Editor to generate some logs if you have none.
You need logs for your project because we will use these as a source of test datapoints for the dataset we create. If you want to make arbitrary test datapoints from scratch, see our guide to doing this from the API. We will soon update the app to enable arbitrary test datapoint creation from your browser.
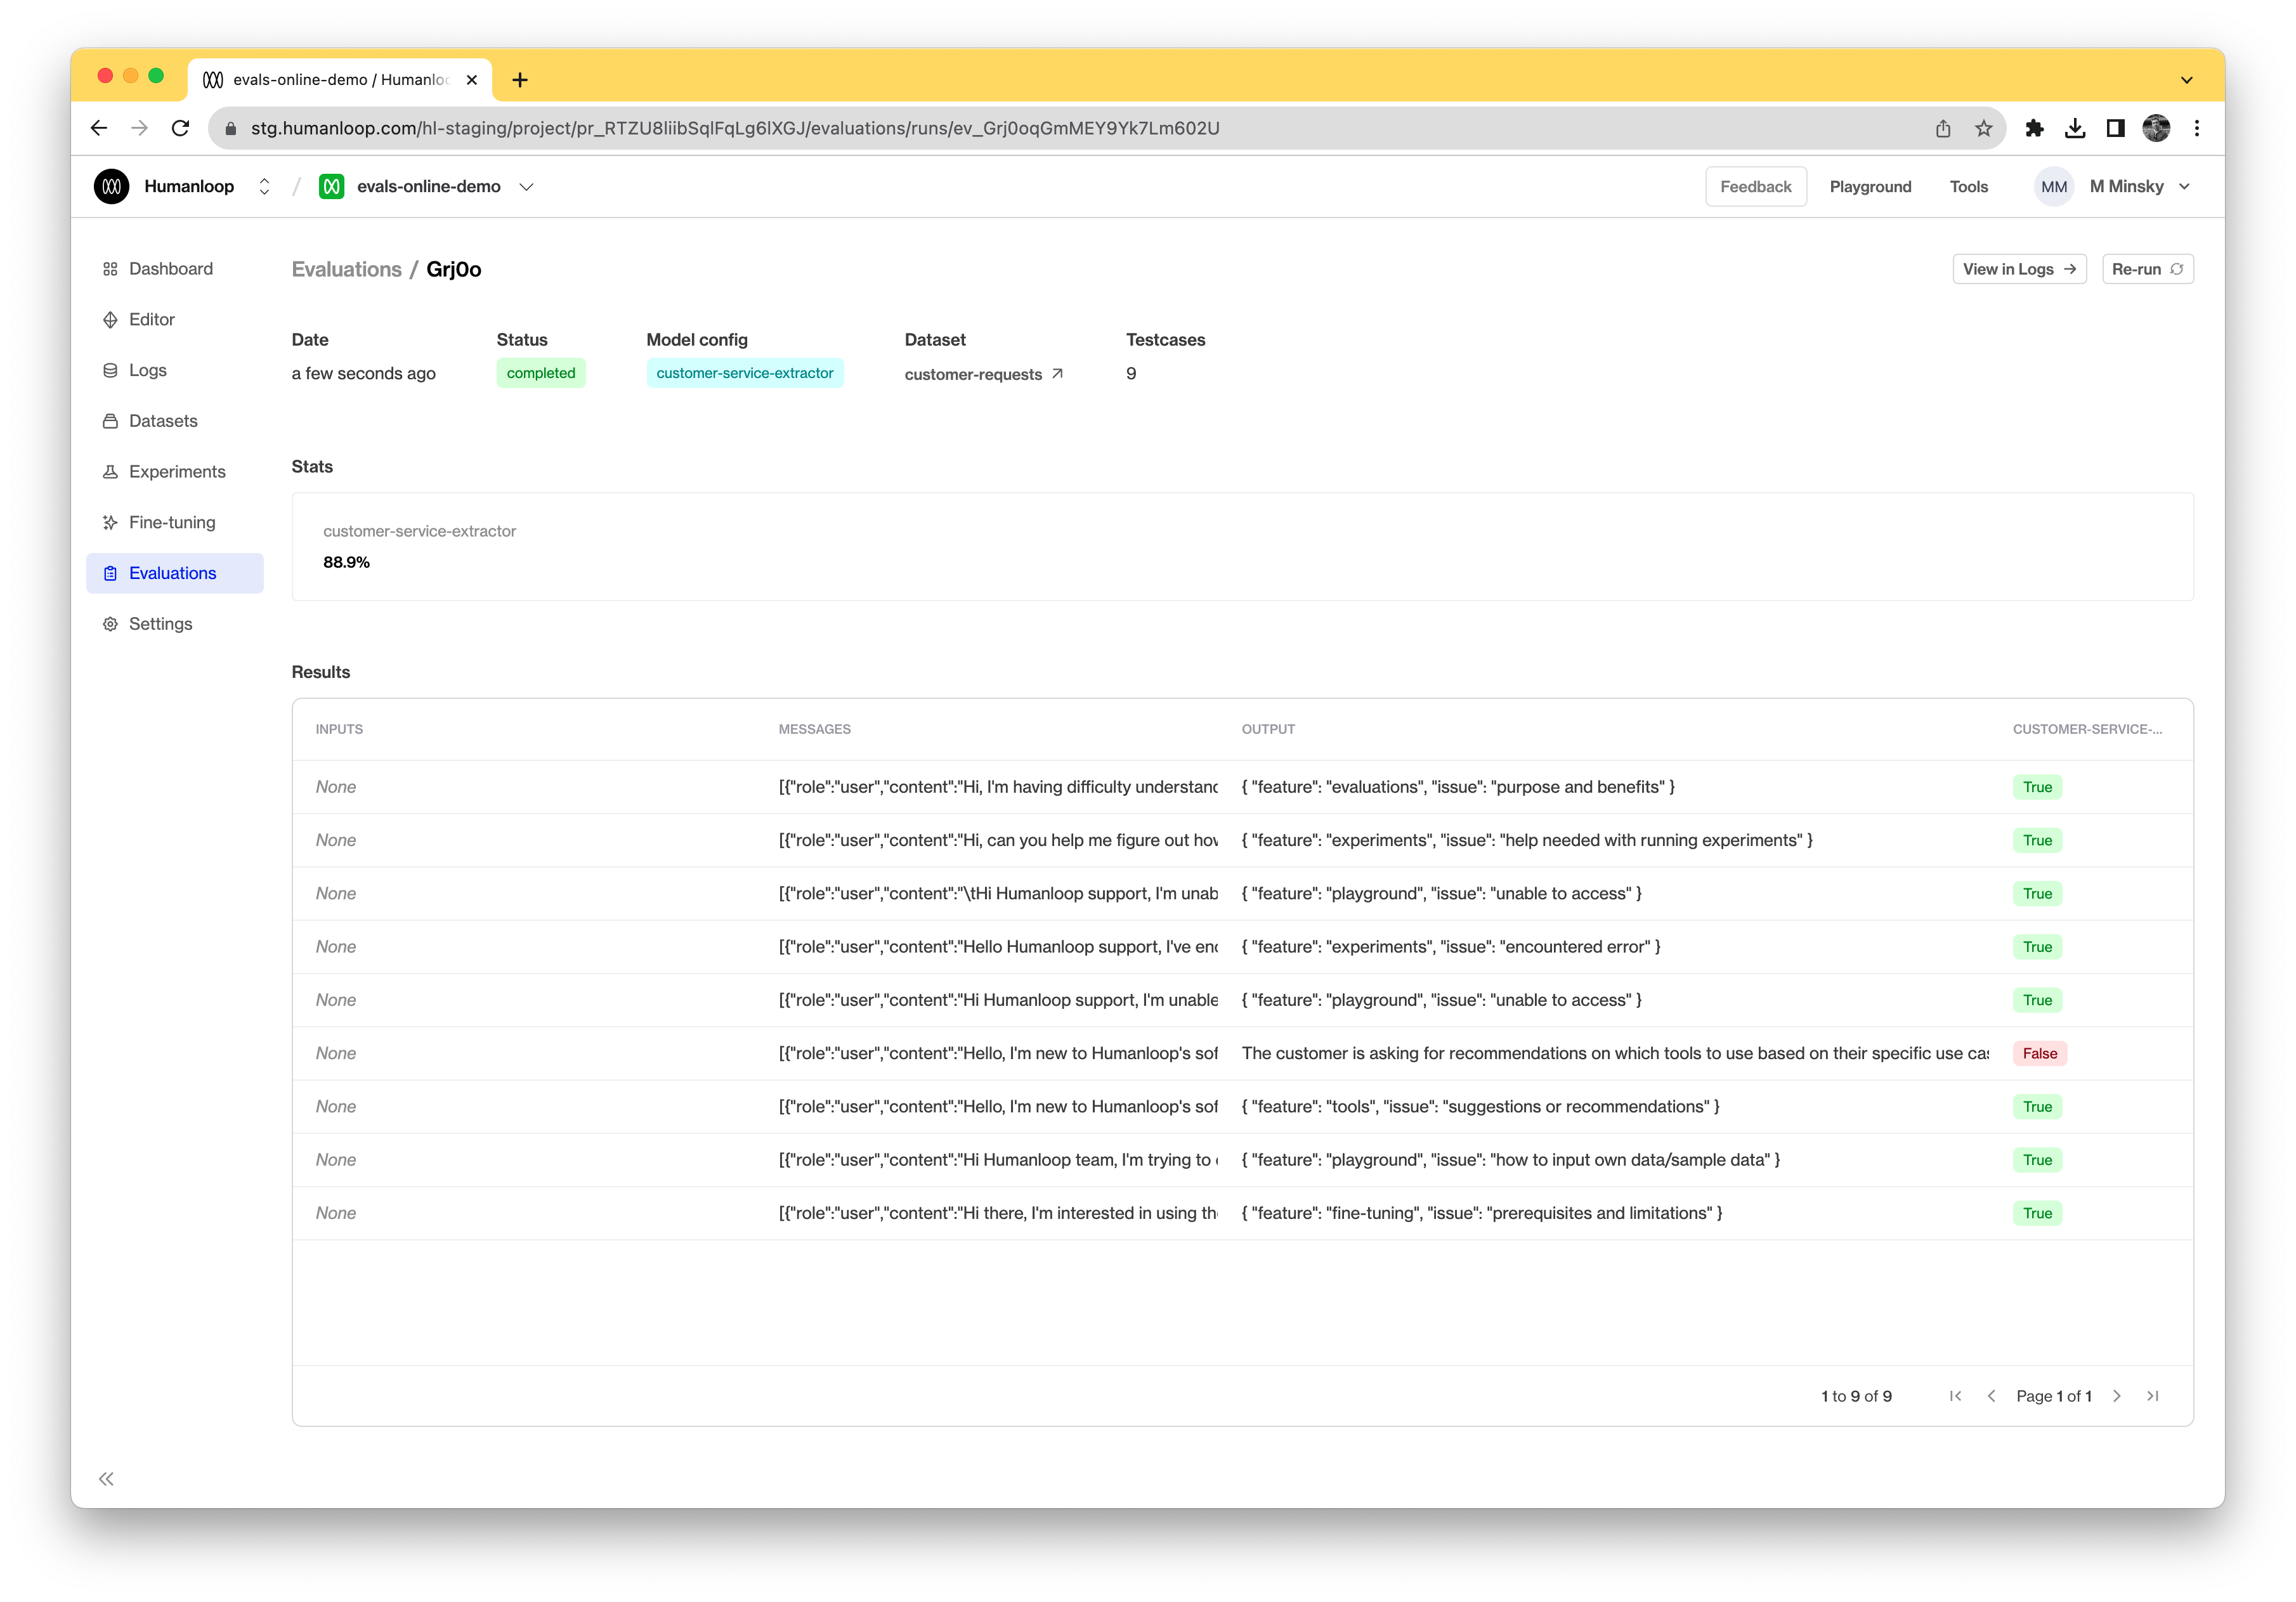
For this example, we will evaluate a model responsible for extracting critical information from a customer service request and returning this information in JSON. In the image below, you can see the model config we’ve drafted on the left and an example of it running against a customer query on the right.

Set up a dataset
We will create a dataset based on existing logs in the project.
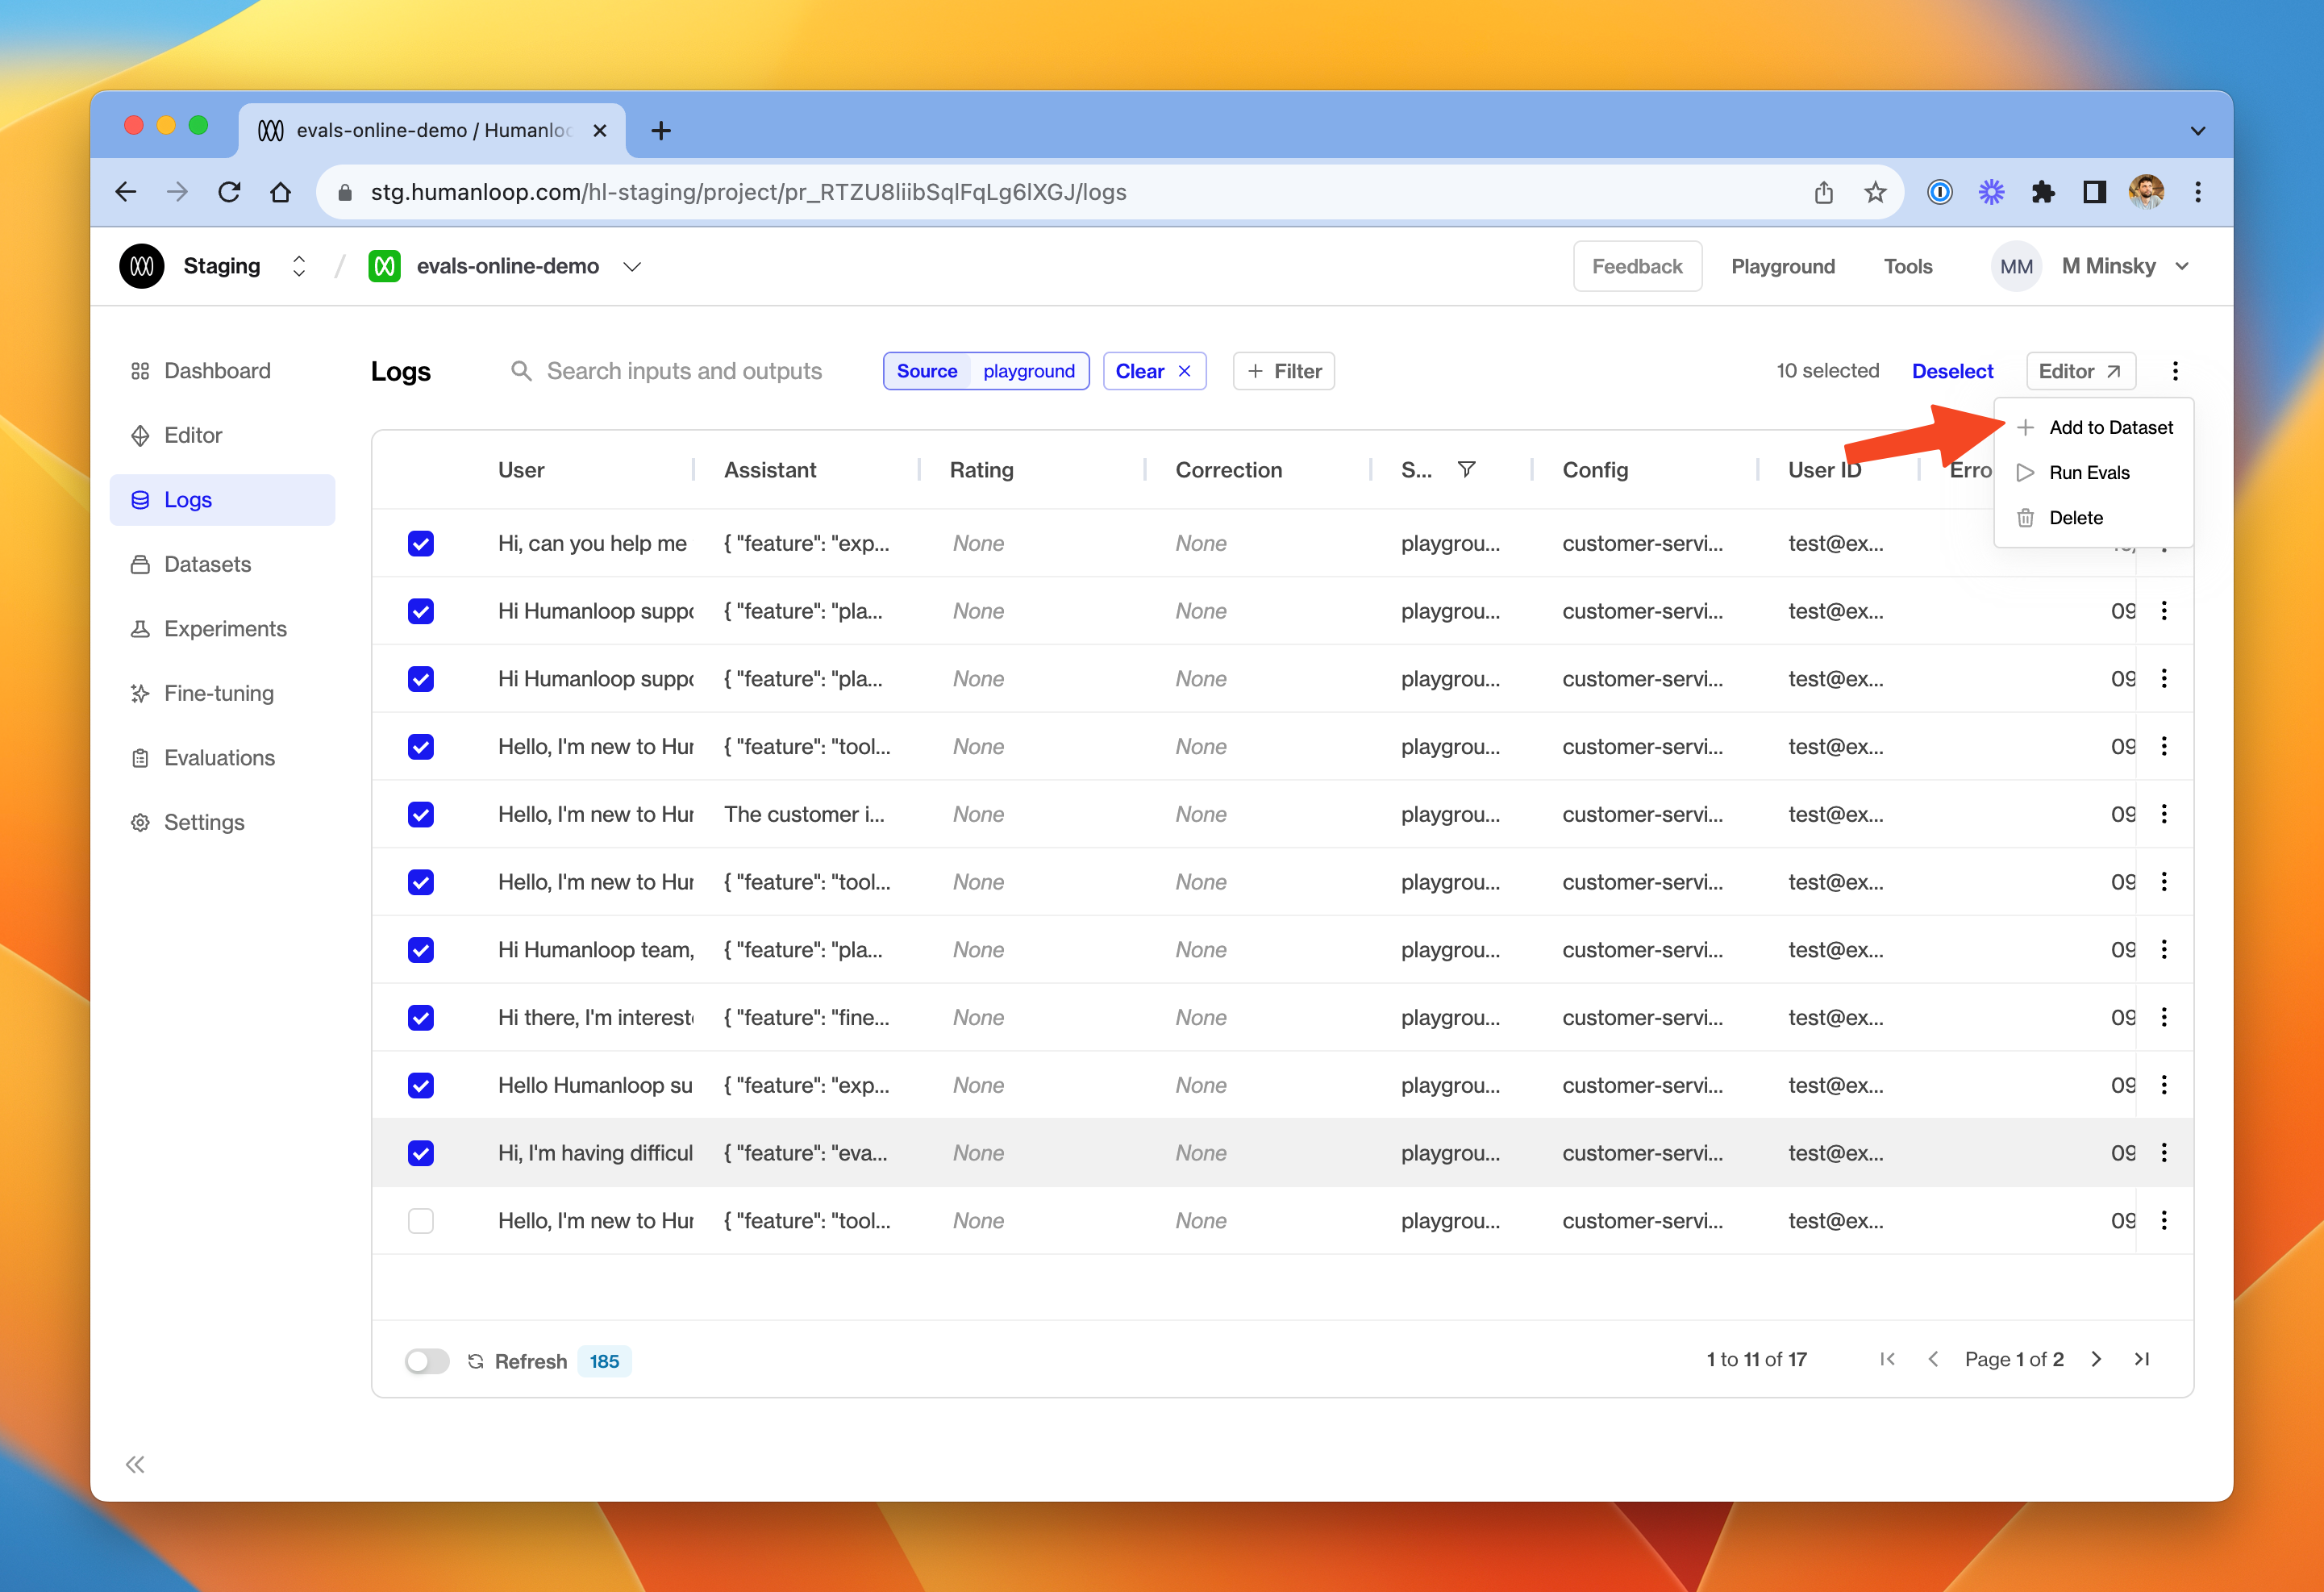
In the dialog box, give the new dataset a name and provide an optional description. Click Create dataset.
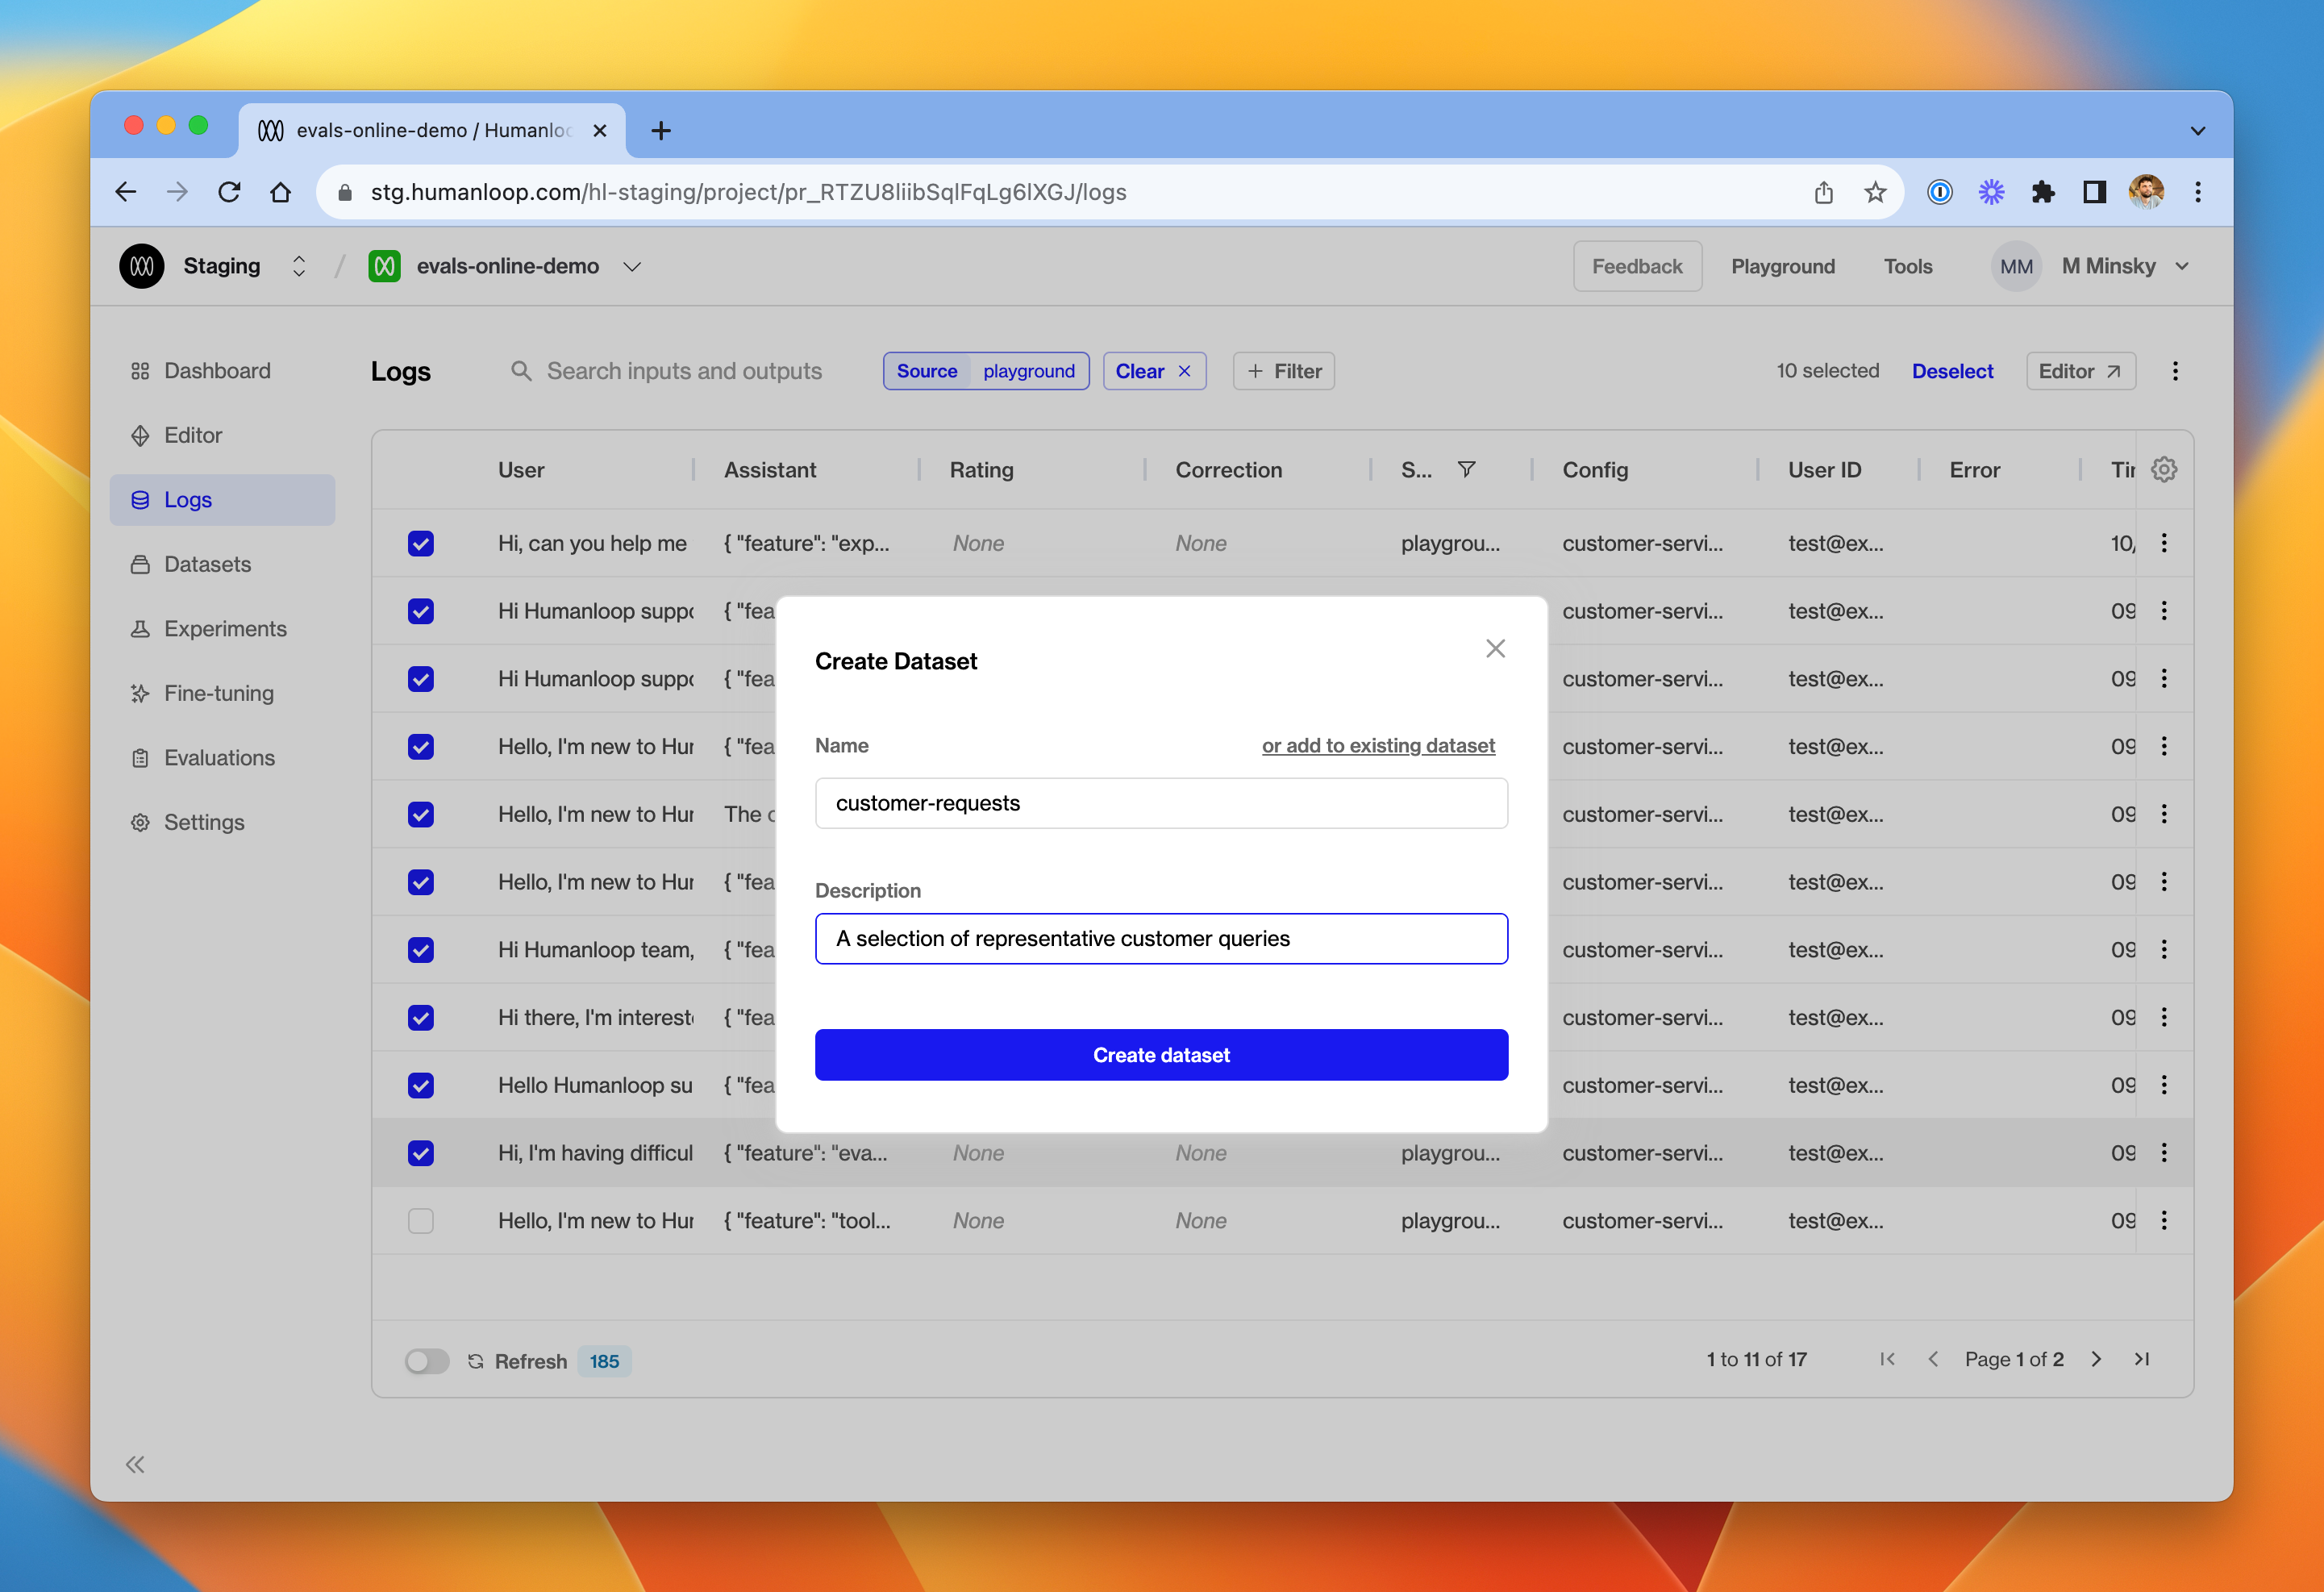
You can add more datapoints to the same dataset later by clicking the ‘add to existing dataset’ button at the top.
Click on the newly created dataset. One datapoint will be present for each log you selected in Step 3
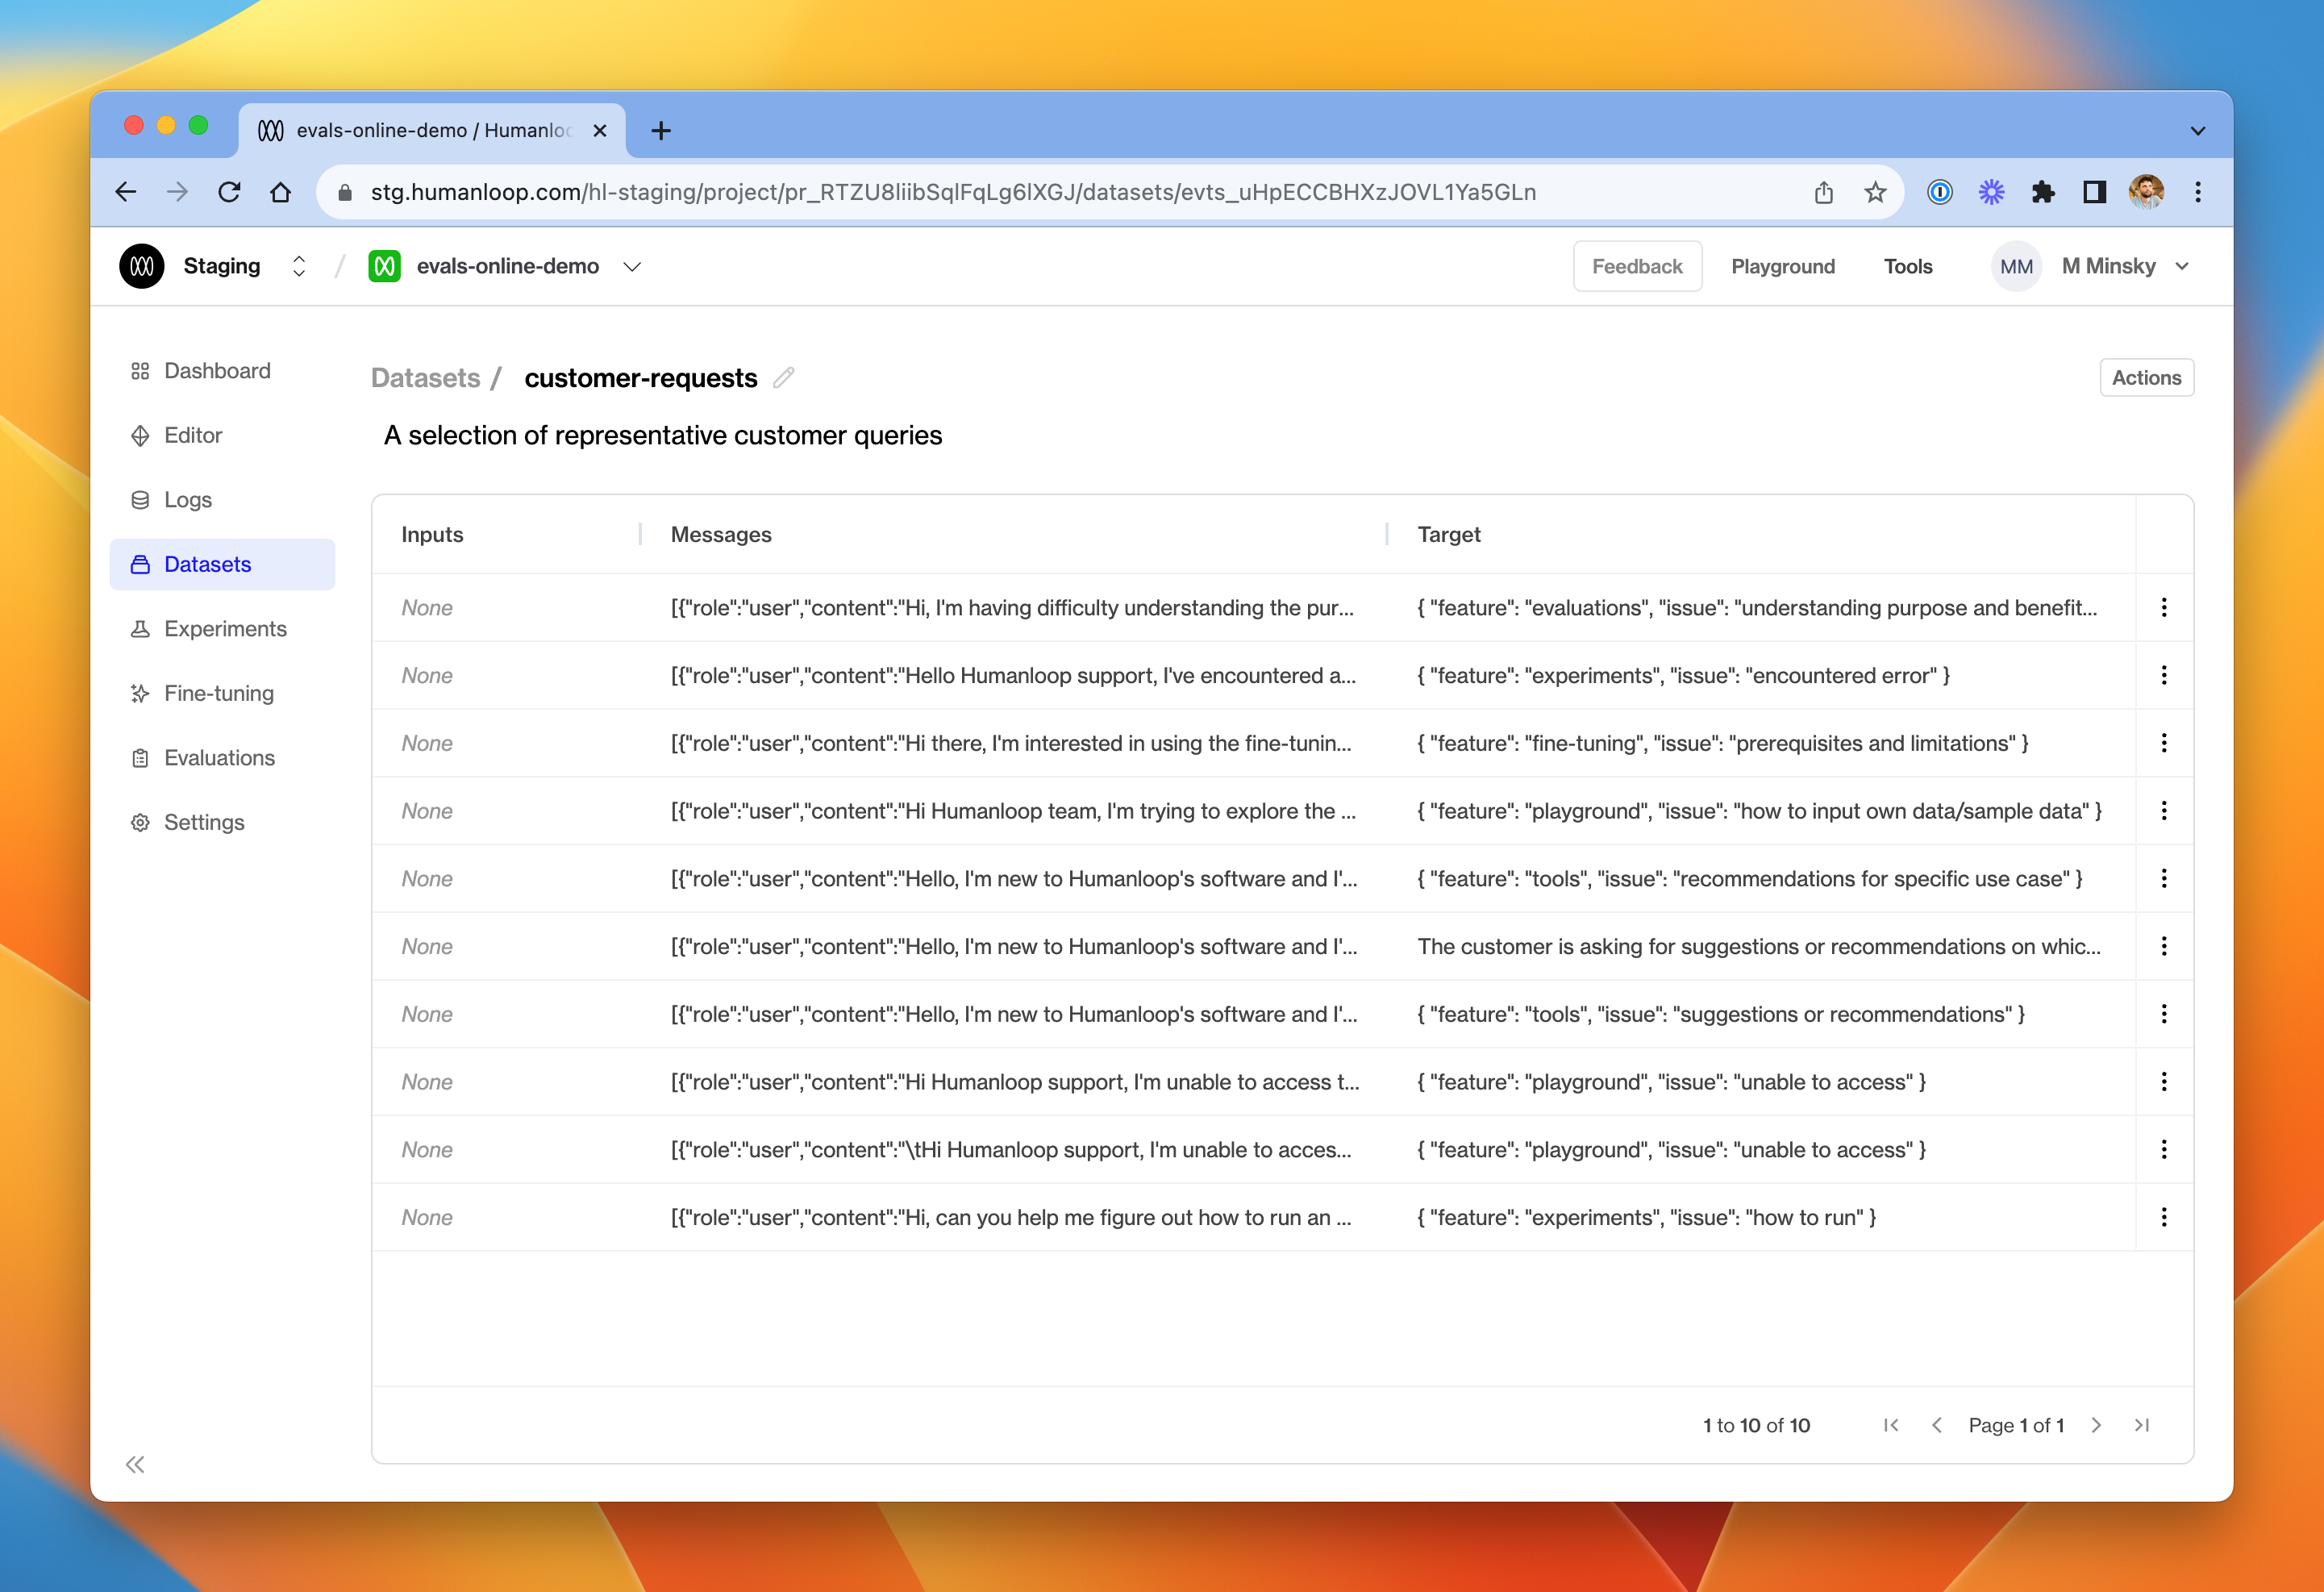
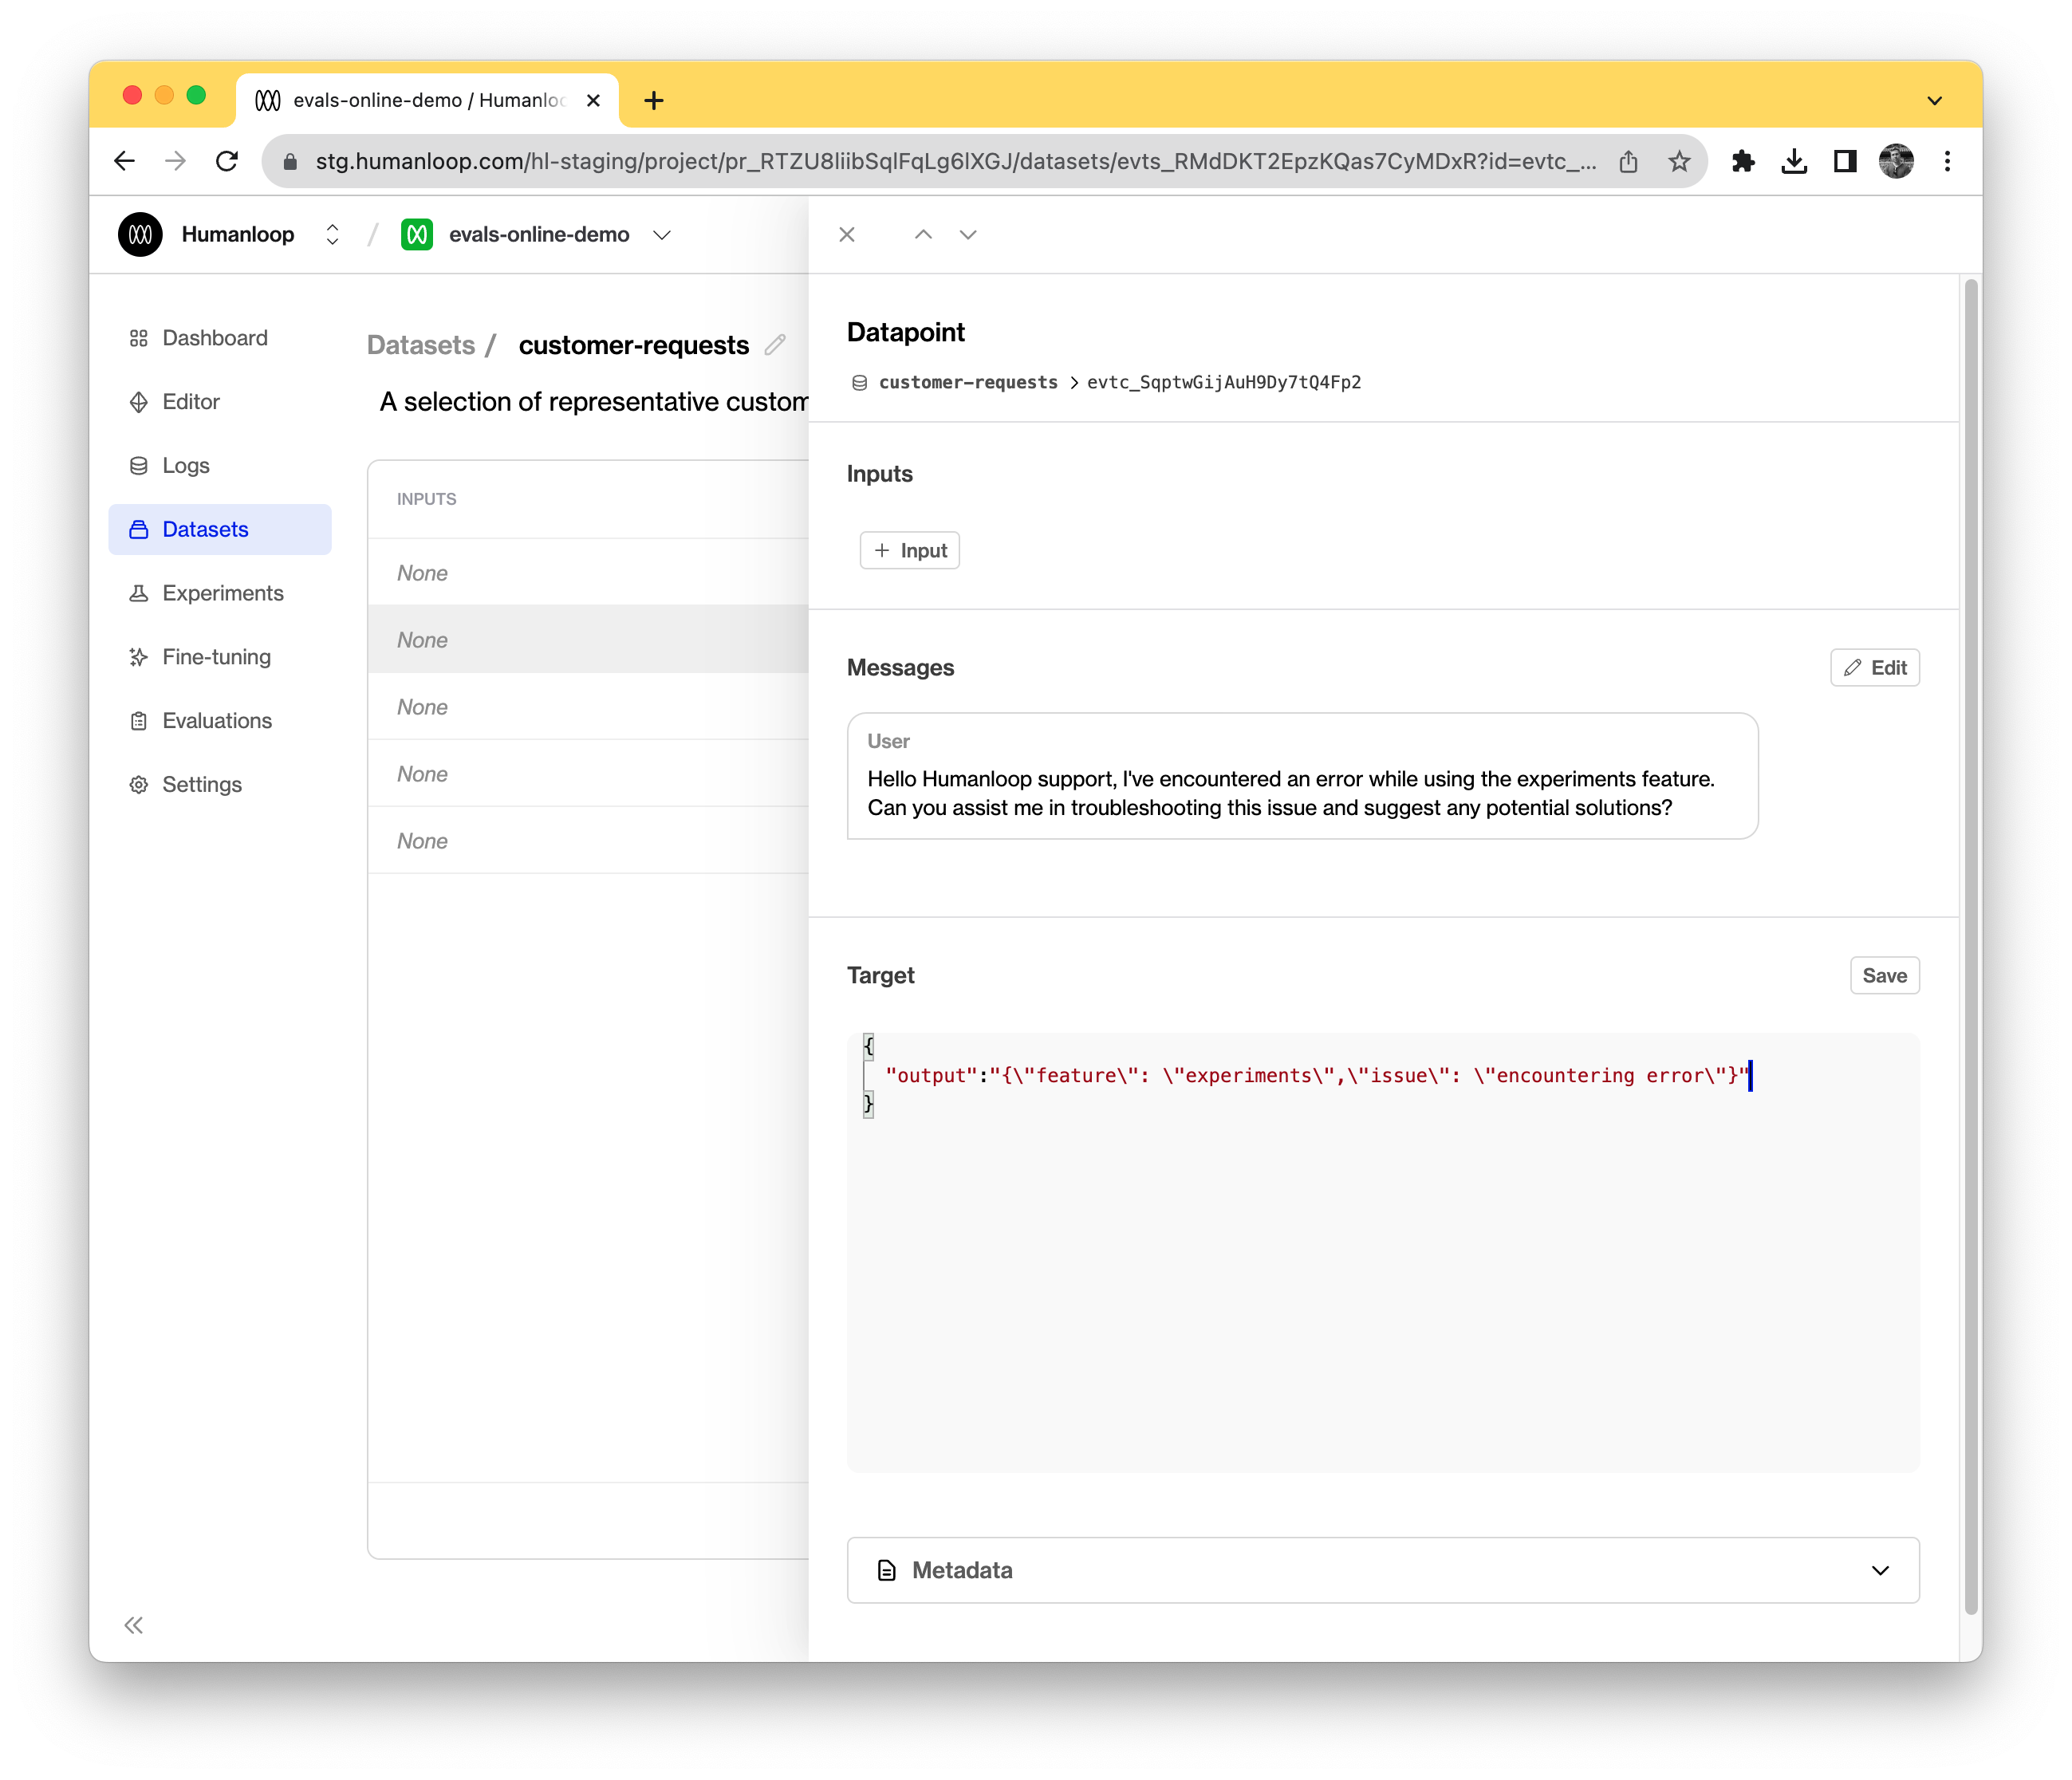
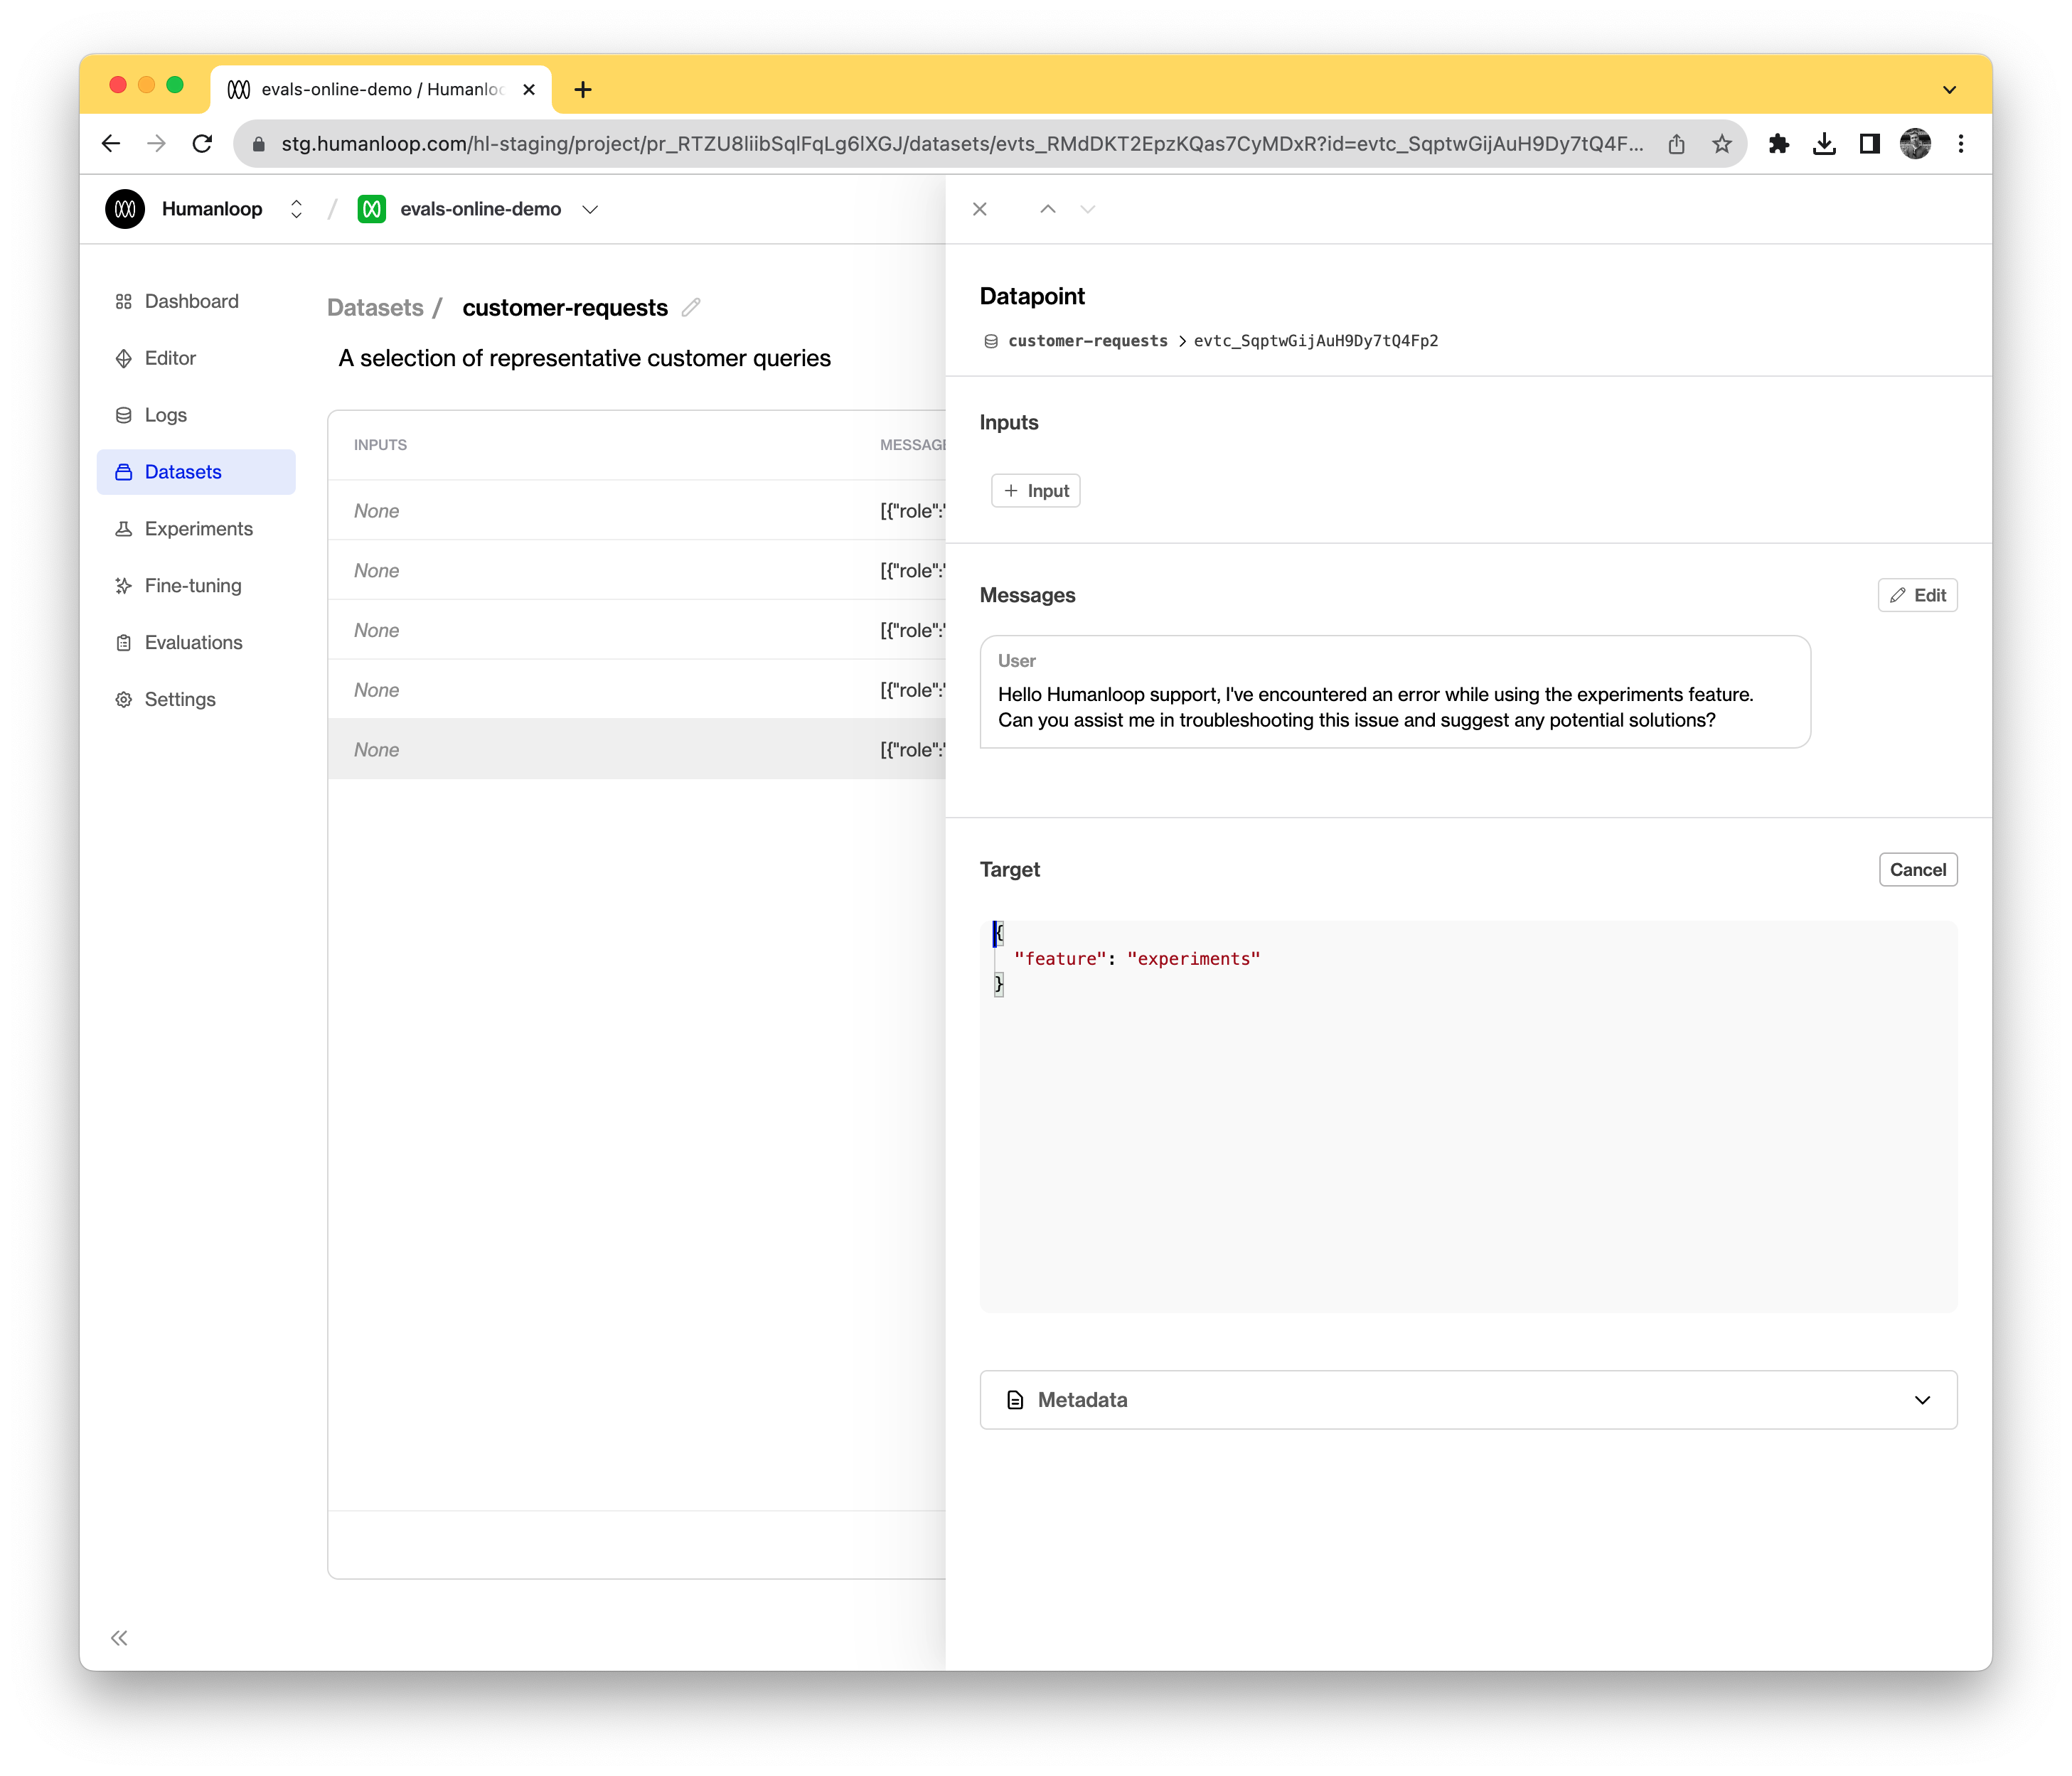
Click on a datapoint to inspect its parameters.
A test datapoint contains inputs (the variables passed into your model config template), an optional sequence of messages (if used for a chat model) and a target representing the desired output.
When existing logs are converted to datapoints, the datapoint target defaults to the output of the source Log.
In our example, we created datapoints from existing logs. The default behaviour is that the original log’s output becomes an output field in the target JSON.
To access the feature field more efficiently in our evaluator, we’ll modify the datapoint targets to be a raw JSON with a feature key.
Create an offline evaluator
Having set up a dataset, we’ll now create the evaluator. As with online evaluators, it’s a Python function but for offline mode, it also takes a testcase parameter alongside the generated log.
Choose Start from scratch
For this example, we’ll use the code below to compare the LLM generated output with what we expected for that testcase.
Use the Debug Console
In the debug console at the bottom of the dialog, click Load data and then Datapoints from dataset. Select the dataset you created in the previous section. The console will be populated with its datapoints.
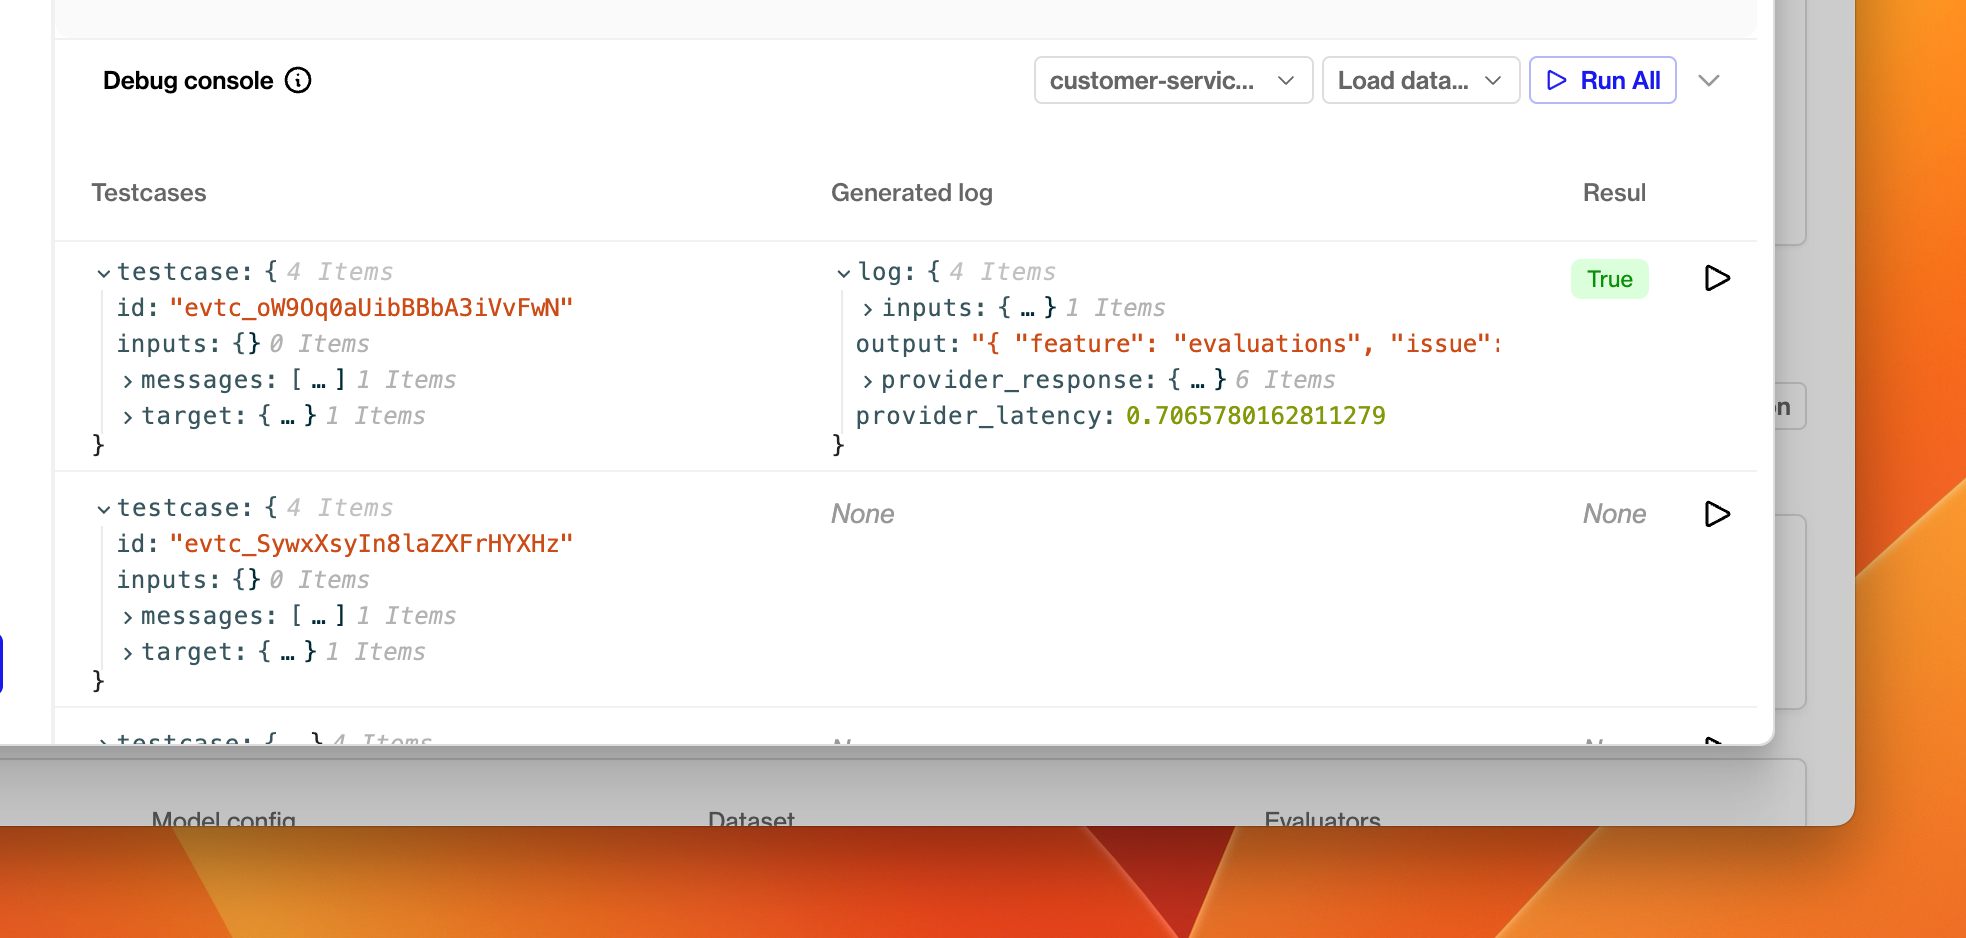
Choose a model config from the dropdown menu.
Click the run button at the far right of one of the test datapoints.
A new debug run will be triggered, which causes an LLM generation using that datapoint’s inputs and messages parameters. The generated log and the test datapoint will be passed to the evaluator, and the resulting evaluation will be displayed in the Result column.
Trigger an offline evaluation
Now that you have an offline evaluator and a dataset, you can use them to evaluate the performance of any model config in your project.
In the dialog box, choose a model config to evaluate and select your newly created dataset and evaluator.
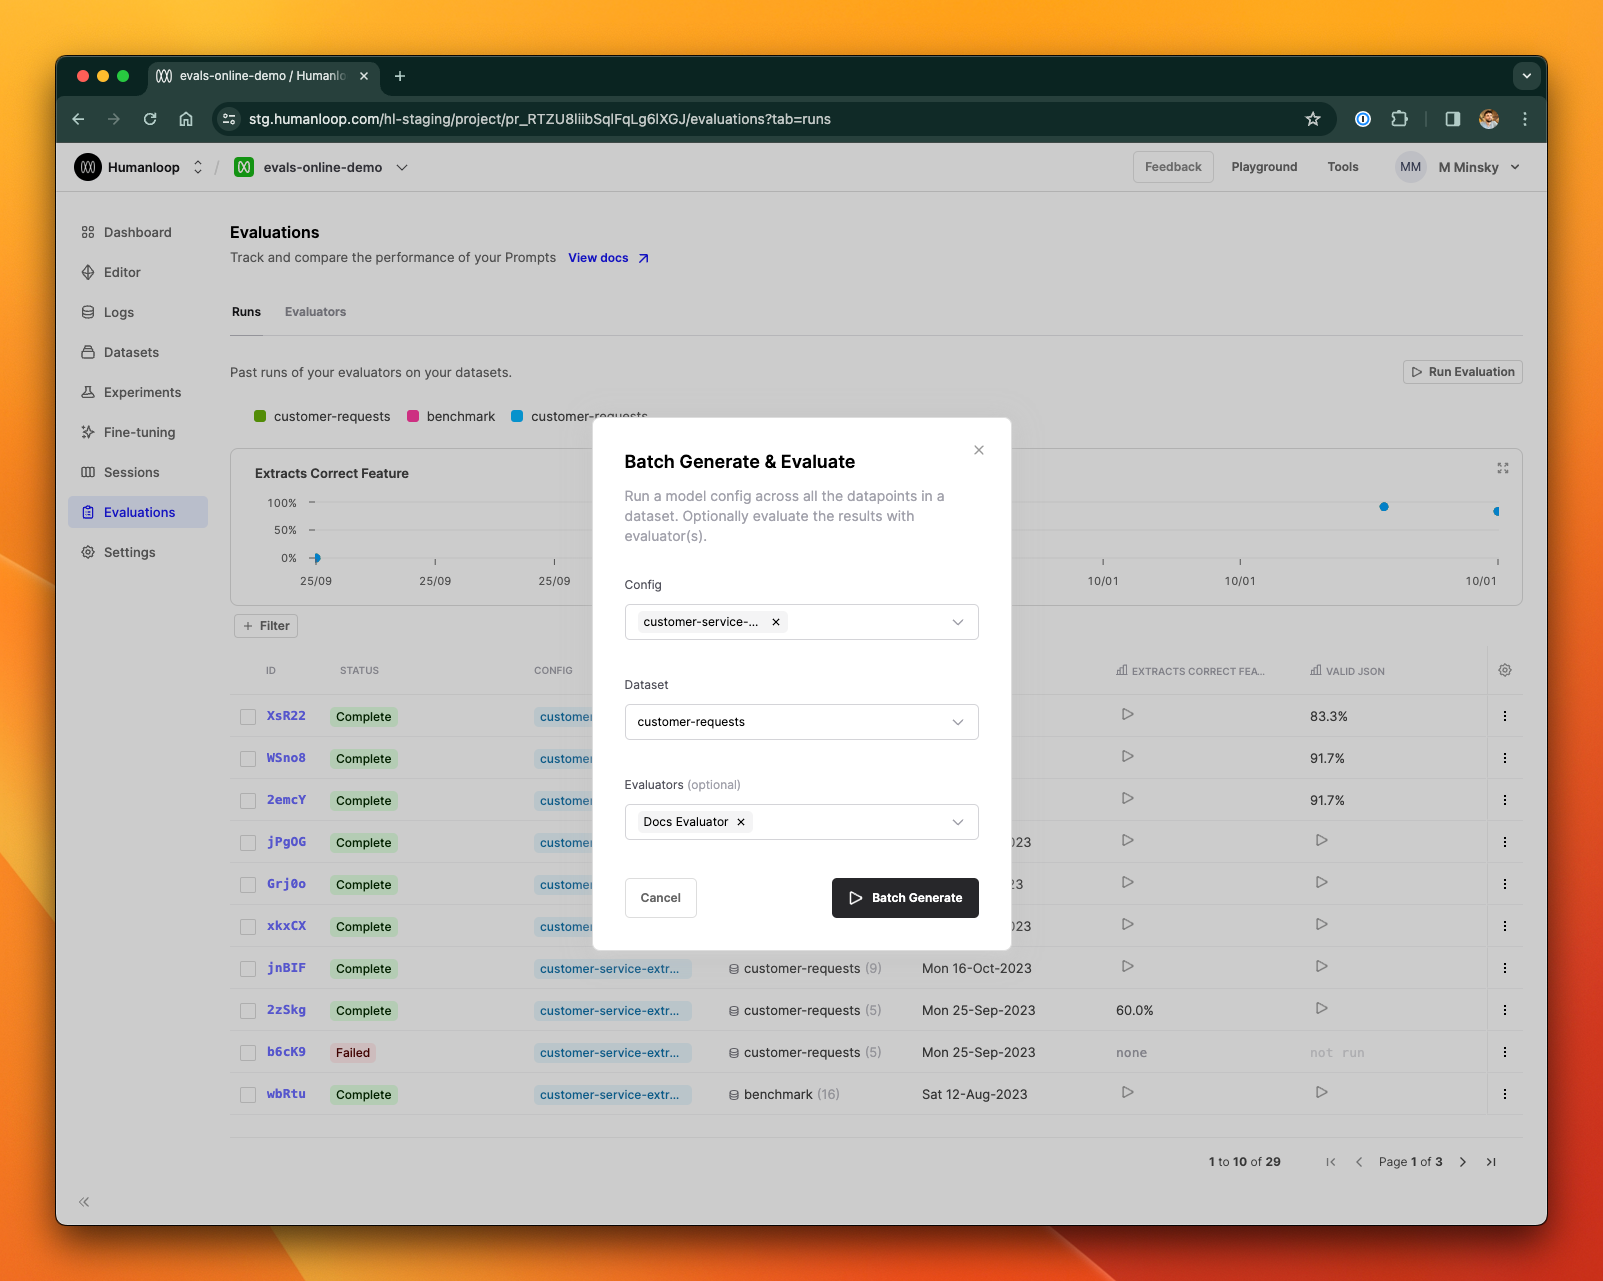
A new evaluation is launched. Click on the card to inspect the results.
A batch generation has now been triggered. This means that the model config you selected will be used to generate a log for each datapoint in the dataset. It may take some time for the evaluation to complete, depending on how many test datapoints are in your dataset and what model config you are using. Once all the logs have been generated, the evaluator will execute for each in turn.