

Run an experiment
This guide shows you how to experiment with Humanloop to systematically find the best-performing model configuration for your project based on your end-user’s feedback.
Experiments can be used to compare different prompt templates, parameter combinations (such as temperature and presence penalties), and even base models.
Prerequisites
- You already have a Prompt — if not, please follow our Prompt creation guide first.
- You have integrated
humanloop.complete_deployed()or thehumanloop.chat_deployed()endpoints, along with thehumanloop.feedback()with the API or Python SDK.
This guide assumes you’re using an OpenAI model. If you want to use other providers or your model, refer to the guide for running an experiment with your model provider.
Create an experiment
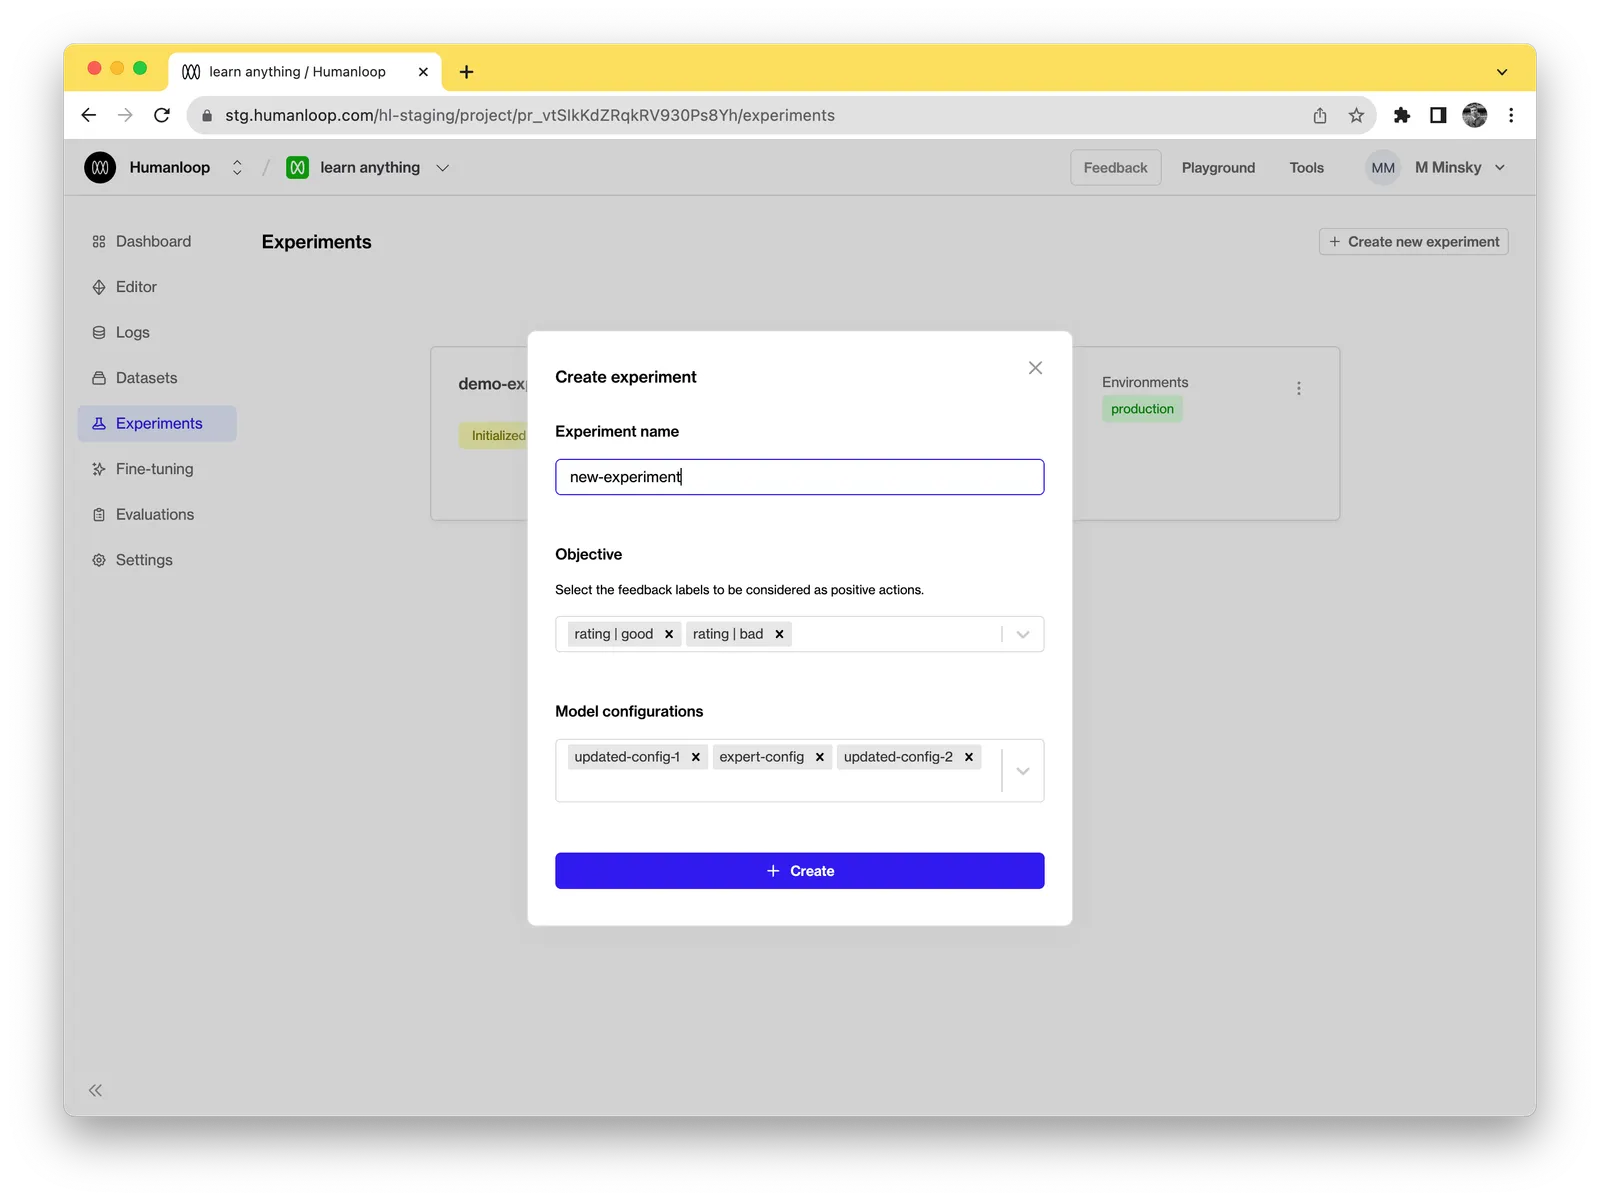
Click the Create new experiment button
- Give your experiment a descriptive name.
- Select a list of feedback labels to be considered as positive actions - this will be used to calculate the performance of each of your model configs during the experiment.
- Select which of your project’s model configs to compare.
- Then click the Create button.
Set the experiment live
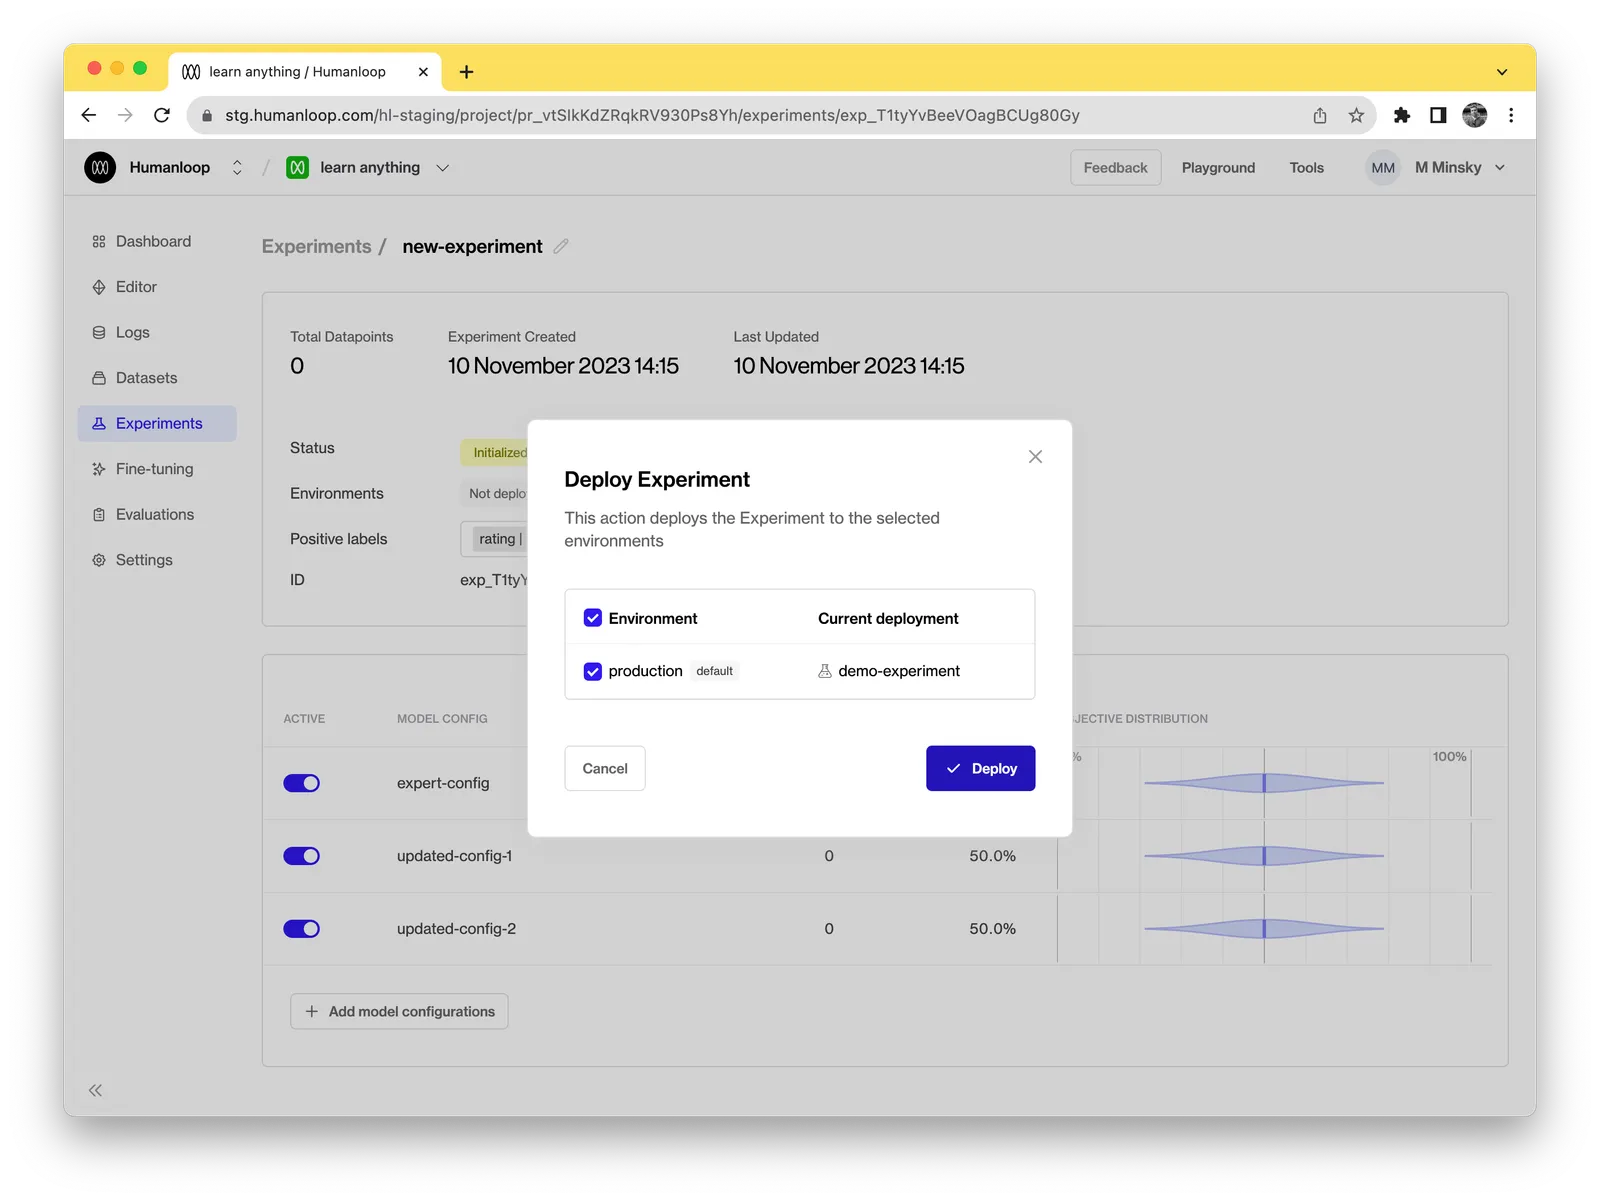
Now that you have an experiment, you need to set it as the project’s active experiment:
Now that your experiment is active, any SDK or API calls to generate will sample model configs from the list you provided when creating the experiment and any subsequent feedback captured using feedback will contribute to the experiment performance.
Monitor experiment progress
Now that an experiment is live, the data flowing through your generate and feedback calls will update the experiment progress in real-time:
Here you will see the performance of each model config with a measure of confidence based on how much feedback data has been collected so far:
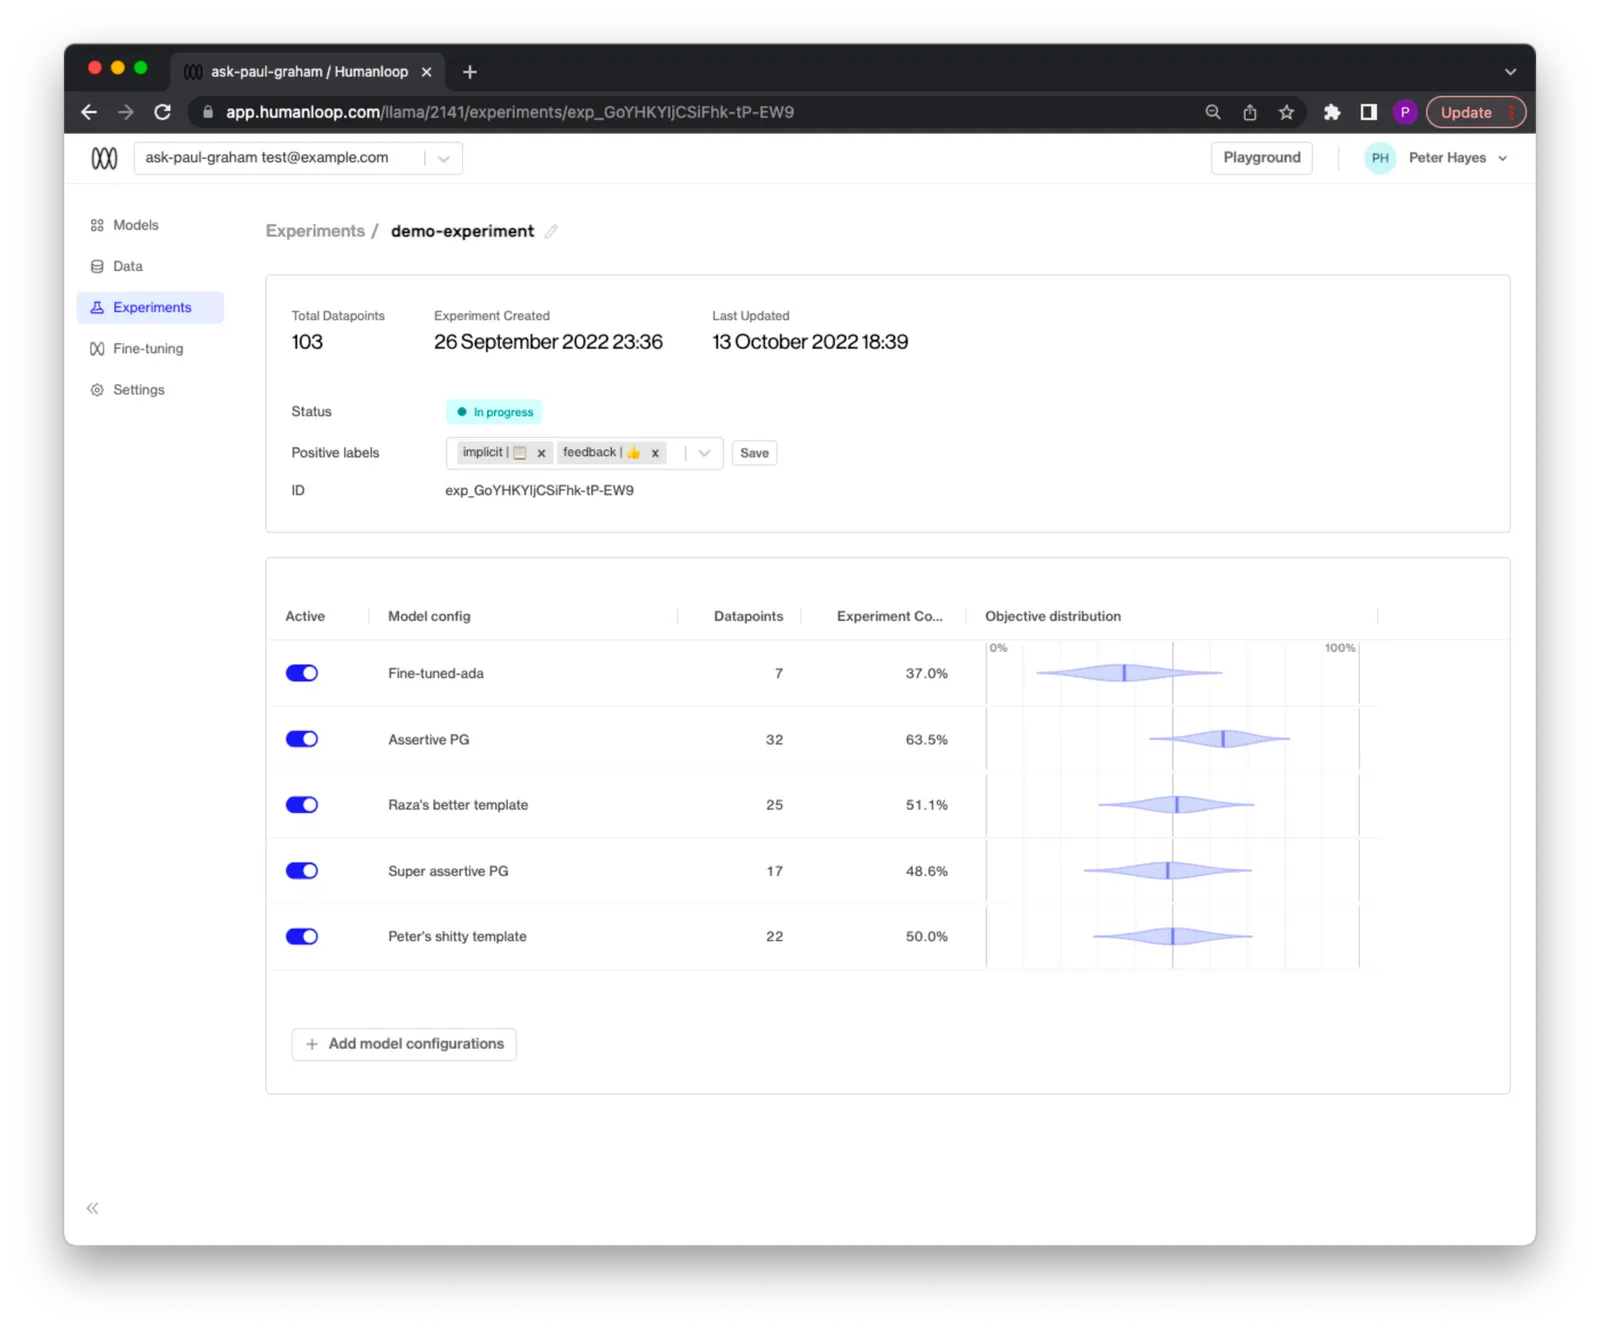
🎉 Your experiment can now give you insight into which of the model configs your users prefer.
How quickly you can draw conclusions depends on how much traffic you have flowing through your project.
Generally, you should be able to draw some initial conclusions after on the order of hundreds of examples.